Free Shipping Over $99* - 366 Day Returns - Dedicated Customer Support
- Call Us +1-503-285-5536
- Sign in & Register
- Recently Viewed
- West Coast Sailing Blog

LASER/ILCA TIPS: How to Repair the 'Hull to Deck Joint’ on a Laser / ILCA
Any crack or damage in the hull of your boat is something that should not be ignored. And while not all damage is equal, the ‘hull to deck joint’ is one that should be addressed. If you find yourself in this situation, hopefully these repair tips will help.
What is the ‘Hull to Deck Joint’?
Simply stated, the hull to deck joint is exactly what it sounds like - where the hull of the boat (the bottom) is joined together with the deck (the top). Fiberglass boats are constructed as separate pieces and then those components are combined to make your boat.
To inspect your hull to deck joint on your ILCA/Laser, flip the boat upside down. On the edge of the boat you will see what looks like an Oreo cookie (the joint will be darker on both sides sandwiched around a white or yellow filling). Starting in the early 2010’s, manufacturers started ‘painting’ over this joint with gelcoat, so you couldn’t see this layered joint, which was a purely aesthetic decision.

The Problem:
Over time (especially in older and heavily used boats), things such as hitting the dock, hitting other boats, freezing temperatures, etc. can lead to this joint failing. Evidence of this will be seen in the form of cracks or lines in the middle (filling) material.
The issue here isn’t so much a hull integrity problem as this joint is one of the strongest on the boat, but it is more so an entry point for water to seep in. Water in the hull is not good.
A super temporary repair (only if you notice this right before launching to sail): Throw some clear packing tape over the damaged area. Then follow these steps for a permanent and proper solution for this problem:
Steps for Prepping the Boat:
- Flip the boat upside down
- Dremel out the damaged area (of the ‘Oreo cookie’). Go a bit further than the crack itself, and wider too. Make sure to get it all out
- Clean it with acetone, vacuum, or air compressor, and let dry
Steps for R epairing the Hull to Deck Joint:
- Put on some latex/nitrile gloves. If you’re working in an enclosed space, it’s best to wear an organic respirator. The chemicals you’ll be working with are all ‘off the shelf’ items but it’s better to err on the side of safety here.
- Mix up some West Systems Epoxy in a small container. The ratios are dependent on temperature, so be sure to check the label. Aim for a maple syrup consistency.
- With a brush, or tongue depressor ‘wet out’ the damaged area. Think like you are trying to cover the crevices of a delicious waffle, using as little maple syrup as possible. You want to let the boat ‘soak up’ some of the liquid epoxy. We are NOT filling the hole here, but rather coating the repair area.
- Next, thicken your epoxy with silica filler. Aim for a consistency of thick peanut butter.
- Use your finger or tongue depressor to push the epoxy in and fill the void, using a more than you think. More is better than not enough here. Smooth it out as best you can.
- Let the epoxy cure overnight.
- Lightly sand with 120 grit then 320 grit sandpaper. The goal is to make sure it’s not sharp, and looks decent.
Congratulations! You’ve just fixed the hull to deck joint on your boat. Celebrate and go for a sail!
This is not a particularly difficult repair but it is an important one. If you’ve never worked with epoxy before, don’t be intimidated, just go for it.
Taking care of your Laser / ILCA sometimes means getting your hands dirty. But it also means your boat will take care of you over time. We hope you never have to do this type of repair - but if you do, do it with confidence and get back out on the water!
Recommended Products:

West System - Epoxy Repair Pack (Click Here)
Other Tools: Dremel, respirator (if working inside), latex gloves, brush or tongue depressor, 120 & 320 grit sandpaper & acetone.
Additional Resources:
Click here for our Laser/ILCA Rigging Guide
Click here for our Laser/ILCA Rigging Videos
Click here for our Laser/ILCA Reference Photos
This article was written by George Yioulos at West Coast Sailing.
All rights are reserved - if you want to make a link, great!
If you want to copy the content in any of our articles, please make a request to [email protected]
- ##laser #ilca #repair
Recent Posts

ILCA Charter Boat Blow Out Sale
All charter boats have sold out. Please contact our team at [email protected] for infor

2023 Year In Review
Another year has flown by, and we are beyond grateful to have the best customers in the world that m

Starting Line Sailing Supports the 2023 ICSA Singlehanded Nationals at Tulane University
November 13th, 2023Starting Line Sailing, through it's companies Zim Sailing, West Coast Sailing, an
- Read more articles
Subscribe To Our Newsletter
Sign up for our newsletter to receive exclusive discounts, new product announcements, and upcoming sales.
The Original MARINE FLOORING
Winner of the 2024 innovation award, for lighted seadek, our industries, outdoor & rv, pool & spa, top product categories, sheet material, rv step covers, fish rulers, get a quote, why seadek, premium material suppliers.
Our PE/EVA foam is developed in the same factories that supply the high end fashion industry brands (like Louis Vuitton & Birkenstock) with their premium materials.
In House Testing Like No Other
Every batch of foam that enters our facility is subject to extensive testing to ensure compliance with our quality standards.
Most Combined Experience
The SeaDek team has over 100 years of combined experience – the most in the industry.
Best Partners in the Industry
No other supplier is partnered with all major OEM boat buying groups.
Maximum Comfort
Designed to reduce fatigue, SeaDek's innovative PV/EVA foam flooring blend is supremely comfortable underfoot.
Superior Traction
Unlike slick traditional molded in non-skid textures, SeaDek reduces the risks of slips and falls, even when wet.
Aesthetically Pleasing
Whether it’s your boat, RV, or swim spa, SeaDek brings new life to any project.
Fully Customizable
With an array of colors, textures, and unique laser patterns, the possibilities are endless when it comes to customizing SeaDek.
OUR BRAND STORY
Behind every one of our retail products, our custom kits, and our industry-leading flooring material, is a team of individuals who are passionate about bringing you their best, every day. Our mission is to not only give you the best comfort, design, and innovation, but to give you the best experiences. Either on the water, or wherever your adventures take you, we’re with you every step of the way.
FAN FAVORITES
Dual density helm pad, 36-inch fish ruler, combo dash pocket, seadek – full sheet – wood grain, custom seadek options, textures & patterns.
Choose from two unique textures, Brushed & Embossed, alongside a number of unique routing designs, and laser patterns.
With a huge selection of shades to choose from, our color combinations are limitless. Not sure which might be right for you? Try a Sample Kit !
Personalize your custom kit with unique logos, laser art, or text.
CLICK HERE TO GET A QUOTE!
Permission to come aboard.
Copyright © 2013-present. SeaDek Marine Products. All rights reserved.
- AROUND THE SAILING WORLD
- BOAT OF THE YEAR
- Email Newsletters
- Best Marine Electronics & Technology
- America’s Cup
- St. Petersburg
- Caribbean Championship
- Boating Safety
Laser SB3: Review
- By Chuck Allen
- Updated: December 13, 2007
LaserSB3REview368
I’ve tested many sailboats while involved with Sailing World’s Boat of the Year program and one of the coolest I’ve ever encountered is the Laser SB3. The absolute simplicity of this boat is amazing. Upwind it locks into a groove, which in most boats you have to fight to maintain. Downwind is a dream; the SB3 is an incredibly stable platform with remarkable speed. Since its introduction in Europe in 2004, the SB3 has experienced tremendous growth, with more than 400 boats built. Two reasons for its popularity are that the boat has been designed to be sailed legs-in and all the controls are at the crew’s fingertips. Another key feature is that it can be rigged and launched in 45 minutes. The mast is light enough to make raising it a two-man job, allowing the third, and possibly fourth crewmember to rig the rest of the boat. The T-bulb keel, which is raised and lowered by an included, removable gantry, makes launching and hauling painless. As the boat only weighs 1,309 pounds, a mid-sized car can tow it. We sailed the SB3 twice, in 2 to 7 knots of breeze, and again in 25. Both times the SB3 found its groove easily and we found it nearly impossible to unintentionally slow down or fall off a plane. We tested moving our weight around, with the boat responding as expected. Light air and flat water required moving the crew forward and sitting close together, while in breeze and chop we moved aft. The boat sailed best in the light stuff with a lot of twist, and the long throw of the traveler made this easy; you can pull the car well to windward while easing the mainsheet for power. It was the exact opposite when the breeze was up; vang on, find the correct mainsheet tension and play the traveler up and down to control the angle of heel while maintaining good drive forward. All the controls are easily within reach and if someone needed to jump in to adjust a line, it wasn’t a big deal. You think the boat is going to tip over like a dinghy, but the high-aspect keel underneath keeps it on its feet. The boat has a great feeling upwind and because of the flared gunwales, is relatively dry.Downwind is an absolute blast; simply put, the SB3 rips! During our high-wind test we sailed consistently at around 15 to 18 knots of boatspeed. I would think when setting the 495-square foot kite at the offset in big fleets you would need to stay high, so easing the vang is a smart idea. When the kite reaches the sheave, it’s take-off time. Weight aft near the foot straps is the place to be. When driving in breeze, the helmsman is butted up against the backstay, the kite trimmer next forward (using the foot straps), and the bow person is the furthest forward, watching the vang while pumping the main. It’s quite obvious when a puff hits that you need to bear down a bit. Once you do so, the boatspeed jumps a couple of knots. A breeze spotter is the way to go, and can make a huge difference in one-design racing in a boat like this. Jibing is simple, especially with the long pole and high-clewed gennaker. I found the easiest way is to start the jibe slowly, wait until the clew got just past the centerline, and finish on the stronger side, coming out fully powered up. By starting slowly it also gives the crew some time to locate their position on the opposite side of the boat before take off. Sets and takedowns are very simple; there’s an enormous launching bag at the forward edge of the cockpit. Takedowns require a quick turn downwind to help the bow person get the kite in the boat completely. Overall, downwind sailing in the SB3 will be some of the best sailing you’ll ever do. The SB3 hull laminate is epoxy with a foam core, and there’s an internal frame and bulkheads providing strength and rigidity. The mast is an aluminum deck-stepped Proctor Selden rig with double spreaders. The boom, also by Proctor Selden, is aluminum as well, but the retractable pole is carbon fiber. The boat is mostly Harken equipped, with gear from the Carbo Block and Hexaratchet range. A Spinlock halyard cleating system offers easy lock and release even under load. The rudder is epoxy and core with carbon reinforcement, and the high-aspect ratio keel is based on a stainless steel main member with an epoxy, foam core, polyester skin, and a 770-pound lead bulb.The best thing the SB3 class has done is put a tight rein on its rules. The boats come complete from bow to stern and you cannot change anything. This ensures tight racing and keeps running costs down. One potential cost issue could be sail purchasing, which is unlimited [but sails are only available from Hyde Sails through Laser]. In Europe the top sailors are showing up with new sails for each big event. Otherwise, you are looking at a $39,000 program (includes sails, trailer, and a TackTick system), which seems high at first, but when you look at comparable boats and their costs, it’s right in line, if not better. The SB3 was clearly the best boat we sailed this year; if not the best boat we have sailed in all our BOTY years. With the buzz over the SB3 in Europe, it seems poised to take the U.S. market by storm. If you get the chance to take one for a sail, go for it; you’ll quickly see why we named the SB3 as our top choice.
For SW ‘s complete 2008 Boat of the Year coverage, click here
- More: Sailboats
- More Sailboats

Nautor Swan Has A New Pocket Rocket

Pogo Launches its Latest Coastal Rocket

A Deeper Dive Into the Storm 18

2024 Boat of the Year Best Recreational Racer: Z24

Jobson All-Star Juniors 2024: The Fast Generation

Wingfoiling Gear: A Beginner’s Guide

Caudrelier Wins Round-the-World Solo Sprint

A Tale of Two Macs
- Digital Edition
- Customer Service
- Privacy Policy
- Terms of Use
- Cruising World
- Florida Travel + Life
- Sailing World
- Salt Water Sportsman
- Sport Fishing
- Wakeboarding
Many products featured on this site were editorially chosen. Sailing World may receive financial compensation for products purchased through this site.
Copyright © 2024 Sailing World. A Bonnier LLC Company . All rights reserved. Reproduction in whole or in part without permission is prohibited.
FREE UK SHIPPING ON ORDERS OVER £55 WITH FAST DISPATCH

- Gelcoat Fillers
- Dry Lubricants
- Adhesive Glues
- Hooks & Clips
- Catamaran Launching Trollies
- Jockey Wheels
- Hitch Locks
- Lighting Board
- Breakaway Cables
- Clew Straps
- Upper Masts
- Lower Masts
- Rope Thimbles
- Wind Indicators & Burgees
- Parrel Beads
- Whipping Twine
- Sailmakers Palm
- Digital Compasses
- Laser Products
- Numbers & Letters
- Dinghy Covers
- Under Covers
- Catamaran Covers
- Single Handed
- Double Handed
- 18 Foot Skiff
- Exocet Moth
- Musto Skiff
- Dart 15/ Sprint 15
- Hurricane 5.9
- Laser Bahia
- Laser Cascais
- Laser Funboat
- Laser Stratos
Your Cart is Empty
- £0.00 Subtotal
Tax included and shipping calculated at checkout
Order before midday Monday to Friday and we will ship your order the same day.
- 01268 222912
- Accessories
- Sails & Covers
- Rope Lengths
- Parts By Boat
- Boat Care & Cleaning
- Splicing Tools
- Boat Covers
- Dinghy Rope Lengths
- Laser Rope Lengths
- RS Rope Lenghts
- Catamaran Rope Lengths
- Laser Performance
- Topper Sailboats
- Other Boats

- Mens Sailing Clothing
- Womens Sailing Clothing
- Repair Kits
- Skiff Suits
- Life Jackets
- Trapeze Harnesses
- Buoyancy Aids
- Hiking Pads & Pants
- Hiking / Toe Straps

Zhik Superwarm
- 100m Rope Reel
- Polyester Ropes
- Control Lines
- Double Braids
- Braid On Braid
- Anchor Lines & Ropes
- Spools & Reels
- Windsurfing

Mini Spools
- Single Block
- Double Block
- Triple Block
- Soft Attach
- Split Rings & Pins
- Inspection Hatches & Covers
- Bungs & Sockets
- Rudder & Tiller Parts
- Bushes & Fairleads
- Marine Screws
- Penny Washers
- VHF Aerials & Antennas
- Marine Tapes
- Traveller Systems And Parts
- Traveller Blocks
- Pico Hull & Deck Fittings
- Hull & Deck Fittings
- Laser Boats
- Laser Sails
- Laser Sail Packages
- Laser Spars
- Laser Rig Packages
- Laser Foils
- Laser Hull & Deck Fittings
- Laser Ropes
- Laser Dinghy Covers

Brand New Laser Boats
- Devoti ILCA Boats
- ILCA Sail Packages
- ILCA Rig Package
- Devoti KDK Boats

Part Exchange Your Boat
Search our chandlery
🚚 Fast Dispatch and a 5 Star Rated Service You Can Count On ✅
Laser Quality Spars for Sailing
Subcollections, laser models, rs sailboats models, part manufacturers, ocean play models, devoti models.
- Orange/Black
- White/Black
- Yellow/Black
Availability
- Out of stock

Let customers speak for us
This cover fits easily over the boat with masts and boom placed on a set of spar holders. There is a neat velco opening to bring out a bowline to secure to the trolley.
A new innovation surprise is having clips on both sides of the cover. You can unclip from whichever side you are on.
Sailing Chandlery have listened to feedback from a previous purchase of the older design. Remains to be seen how it weathers, how breathable and water-proof it all is, but looking v smart from new.
Probably the most comfortable visor I’ve worn. I put it to the test in Dubai last week, it never budged, and wasn’t too tight or hot. The little clip gives added reassurance that you won’t loose it. I’m very pleased with the purchase.
There’s a reason I keep on buying these. My last pair lasted 4 years of use, sailing almost every weekend. They last and when you consider the cost and use, it probably works out to be the equivalent of buying a really cheap pair once every 6-12 months. Why buy twice? Very comfortable and supportive.
What more can be said, easy to fit and do the job
Very happy with the Kingfisher braid on braid, very easy to splice.
Great top, fits perfectly. I’m purchased a size 10 and is true to size.
I am very happy with my products . The advice on the kicking strap replacement rope was very helpful. Love thee we colour and material of the Velcro strap. Thank you 🙏
Needed floating cleats to secure a freestanding mast middle of RIB. Ideal adjustable guy system created using these.
As expected at a good price with fast delivery
This is a top quality rope, a bit stiffer on hands than polyester braind on braid but much lighter for the same breaking load, I bought it for sheets on a light air sail. It is perfect for the job.
Massive thanks to Andrew and team. The boat was immaculate, stiff hull and package of new kit. Asked whether we could collect the boat between Christmas and New Year en-route to an event and the Sailing Chandlery team couldn’t have done more to help. Thank you.
Thanks they look great but I haven’t put them on yet!
Part delivered on time
We were delighted to receive 12 vouchers from Sailing Chandlery for their sponsorship of our Club Open events during 2024. The first of these prizes were awarded at our ITCA (Topper) open on 10th Feb, and our prize winners were very happy with the flexibility such prizes offer. The whole process from offer to delivery has been easy, and we are happy to promote Sailing Chandlery for the support they’ve given us. Allison Blakeway. Vice Commodore, Trimpley Sailing Club.
The right size and arrived very quickly. Great quality
Hints and Tips

Pre season Check List
January 12, 2024 3 min read

Where Should My ILCA Tell Tales Go
January 12, 2024 1 min read

What Are The Basic Tools Needed To Start Rope Splicing?
December 22, 2023 2 min read
SIGN UP TO OUR NEWSLETTER
Save up to 40% on your next order.

Step-by-Step Guide: Learn How to Rig a Laser Sailboat for Optimal Performance
Alex Morgan
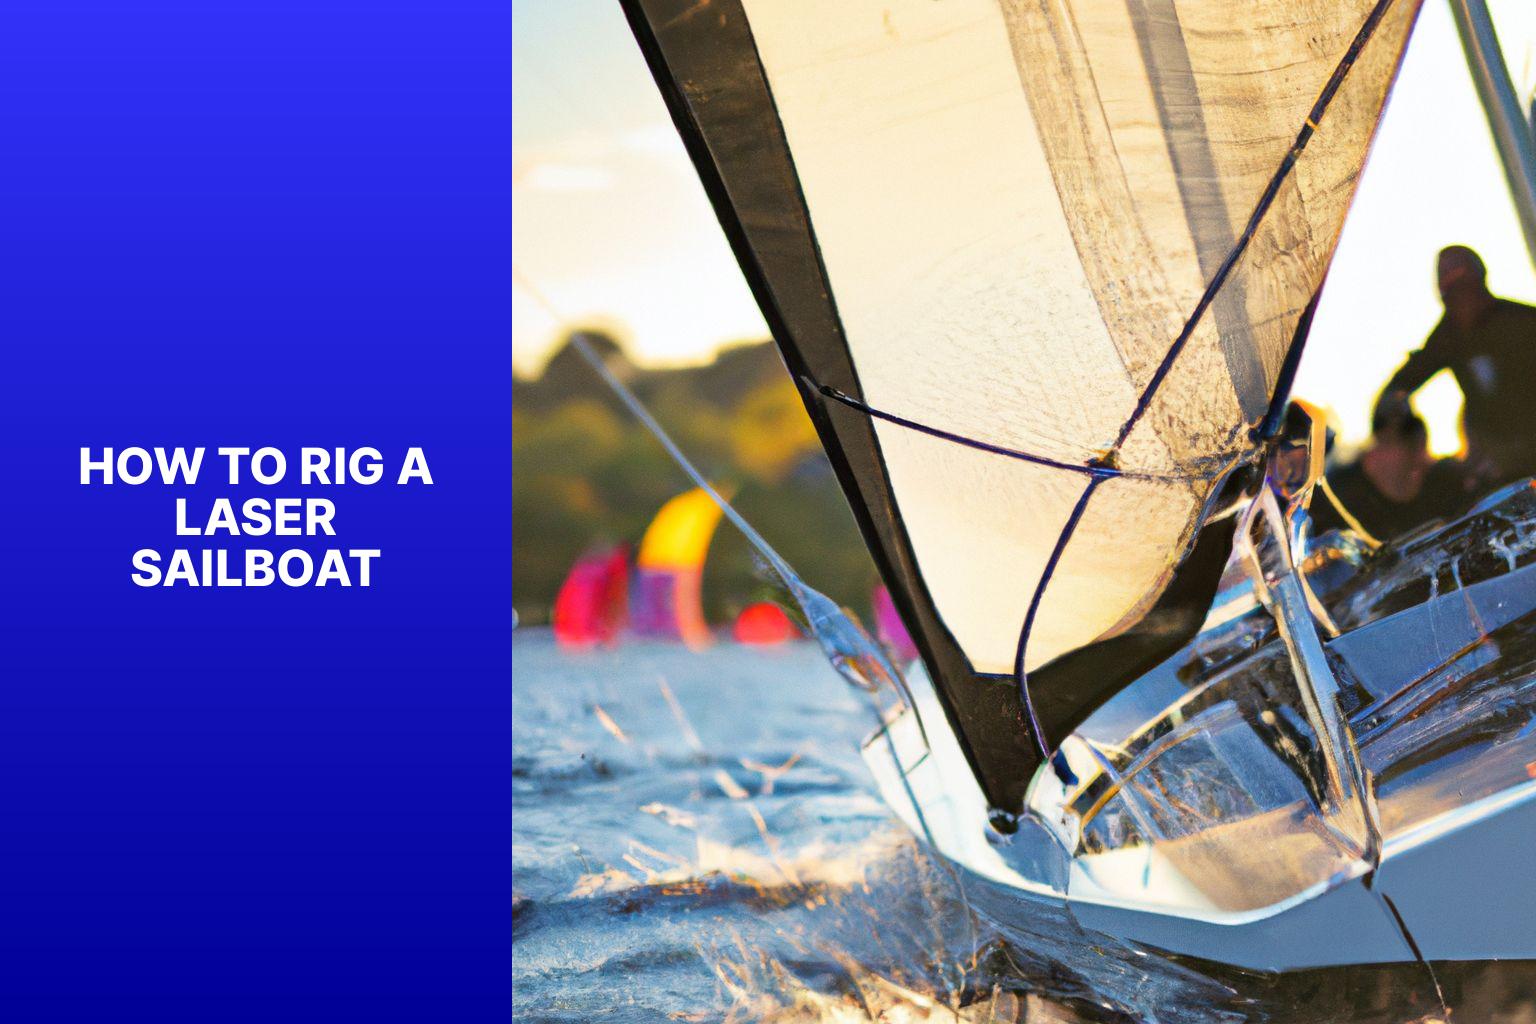
Rigging a Laser sailboat is an essential skill for anyone interested in sailing. Properly rigging a sailboat ensures that all components are securely in place, allowing for a safe and enjoyable sailing experience. This article will provide an introduction to rigging a Laser sailboat, explain the different components involved, and provide a step-by-step guide on how to rig the boat. It will offer tips and best practices to follow while rigging, as well as common mistakes to avoid. Whether you are a beginner or an experienced sailor, mastering the art of rigging a Laser sailboat is crucial for a successful outing on the water.
Key takeaway:
- Rigging a Laser sailboat requires understanding its components: The mast, boom, rigging lines, and sail are essential parts of a Laser sailboat rigging process.
- Following a step-by-step guide ensures proper rigging: Stepping the mast, attaching the boom, securing the rigging lines, and hoisting and adjusting the sail are necessary steps to rig a Laser sailboat correctly.
- Avoiding common mistakes and following best practices is crucial: To rig a Laser sailboat effectively, it is important to be aware of common mistakes and implement best practices for a successful rigging experience.
Understanding the Components of a Laser Sailboat
As we dive into the world of laser sailboats , it’s crucial to understand the nuts and bolts that make up these vessels. In this section, we’ll take a look at the key components that come together to form a laser sailboat . From the sturdy mast to the versatile boom , and the intricate rigging lines to the billowing sail , we’ll navigate through each element, unraveling their significance and how they contribute to a successful sailing experience. Get ready to explore the inner workings of laser sailboats and gain a deeper appreciation for their craftsmanship.
The mast is an essential component of a Laser sailboat as it provides vital support and stability to the sail. Constructed from either lightweight and strong carbon fiber or aluminum, the mast is designed to withstand the powerful forces of wind and water.
When rigging a Laser sailboat, the first crucial step is to carefully insert the mast into the mast step located at the base of the boat’s hull. Once inserted, it is important to raise the mast upright and secure it using a mast clamp or collar for stability.
The next important task is to attach the sail to the mast. This is achieved by raising the sail and securing it using halyards or sail ties. It is vital to properly tension the sail in order to optimize performance and maintain control while sailing.
Throughout the rigging process, it is imperative to regularly check the mast for any signs of damage or wear. It is essential to promptly address any cracks or weaknesses to ensure the safety of both the boat and the sailor while out on the water.
In order to prolong the longevity and enhance the performance of the mast, regular inspections, cleaning, and lubrication of the mast fittings are necessary. This will help prevent corrosion and ensure smooth operation during sailing sessions.
The boom is a necessary part of a Laser sailboat . It is a horizontal spar that extends from the mast. This sturdy pole controls the shape and position of the sail.
Attaching the boom is a crucial step in rigging a Laser sailboat . It involves sliding one end into a fitting on the mast called the gooseneck . The boom is secured with a boom vang , a line that runs from the mast to the boom . This vang controls the tension and angle of the boom , allowing sailors to adjust the sail’s shape and power.
Properly attaching and adjusting the boom is essential for efficient sailing. It allows the sailor to control the sail’s position and shape based on wind conditions. Adjusting the boom optimizes the sail’s power and performance, maximizing speed and maneuverability.
The use of booms in sailing has a long history. It originated from the use of horizontal spars to control the shape of sails on large sailing ships. Over time, booms have become an integral part of smaller sailboats, enhancing sailing performance and control. Nowadays, booms are used in various sailboat designs, including the Laser .
Rigging Lines
To properly rig a Laser sailboat, it is important to understand the components involved, including the rigging lines. Here are the steps to follow:
1. Begin by setting up the main halyard. Attach it to the head of the sail and run it through the top of the mast.
2. Next, secure the main sheet. Attach one end to the boom and run it through the blocks on the back of the boat.
3. Connect the cunningham line. Start by attaching one end to the cunningham eyelet on the front of the mast and run it through the block on the boom.
4. Establish the vang line. Attach one end to the vang fitting on the mast and run it through the block on the boom.
5. Attach the outhaul line. Connect one end to the outhaul fitting on the boom and run it through the outhaul block on the back of the boom.
6. Secure the traveler line. Attach one end to the traveler block and run it through the block on the back of the boat.
By following these steps, you can effectively rig the rigging lines on a Laser sailboat. It is important to check the lines for wear or damage before sailing to ensure a safe and enjoyable experience.
The sail is a crucial component of the Laser sailboat. It efficiently harnesses the power of the wind and propels the boat forward. The sail is carefully constructed using durable and lightweight materials, typically synthetic fibers like Dacron or Mylar .
The sail is securely attached to both the mast and the boom, forming a triangular shape that effectively captures the wind. The size of the sail plays a significant role in the boat’s overall performance. Sails of smaller sizes are ideal for lighter winds, whereas larger sails are more effective in stronger winds.
To properly rig the sail, it is important to securely attach the boom to the mast. Then, the sail should be hoisted up the mast, ensuring correct alignment and tension. The cunningham and outhaul lines can be adjusted to control the shape and tension of the sail.
Taking proper care and maintenance of the sail is crucial for its longevity and optimal performance. Prolonged exposure to direct sunlight should be avoided, as it can cause damage to the sail. Regular inspection for wear and tear is necessary, and any necessary repairs or replacements should be made promptly.
A well-rigged sail is essential for a successful sailing experience, allowing the boat to efficiently capture the power of the wind and maneuver through the water. By familiarizing yourself with the various components and following the correct rigging procedures, you can ensure that your Laser sailboat is ready for an exciting and rewarding adventure on the water.
Step-by-Step Guide on How to Rig a Laser Sailboat
Looking to hit the waves with your Laser Sailboat ? Mastering the rigging process is key to a successful sailing experience. In this step-by-step guide , we’ll walk you through the essentials of rigging a Laser Sailboat . From stepping the mast to hoisting and adjusting the sail, we’ve got you covered. Get ready to set sail with confidence and navigate the waters like a pro !
Stepping the Mast
To properly step the mast of a Laser sailboat, you should follow these steps:
- Position the sailboat upright on a flat surface, ensuring that the bow is facing into the wind.
- Securely insert the mast into the mast step.
- Lift the mast, bringing it into a vertical position.
- Make sure to fully insert the mast into the mast step, securing it firmly.
- Attach the mast base to the mast step by tightening the mast collar or locking mechanism.
- Ensure that the mast is straight and aligned with the centerline of the boat.
- If necessary, tighten any additional mast supports or stays to secure the mast further.
- Before moving forward with rigging the sailboat, double-check all connections to ensure they are secure and stable.
By following these steps, you can guarantee that the mast is properly stepped and securely fixed, providing a strong foundation for rigging the rest of the Laser sailboat.
Attaching the Boom
To attach the boom to a Laser sailboat , follow these steps:
1. Position the boom near the mast , aligning the gooseneck with the mast slot .
2. Slide the boom all the way through the mast slot .
3. Align the holes on the boom fitting with the holes on the mast fitting .
4. Insert the boom bolt through the holes and securely fasten it with a nut if needed.
5. Check that the boom is securely attached and moves smoothly along the mast .
True story: When rigging my Laser sailboat for the first time, I struggled to align the boom fitting with the mast fitting . After a few attempts, I realized I needed to adjust the boom’s position slightly for proper alignment. Once adjusted, the boom slid into place smoothly, and I secured it with the bolt . This experience taught me the importance of attention to detail when rigging a sailboat.
Securing the Rigging Lines
To secure the rigging lines on a laser sailboat, follow these steps:
- Attach the main halyard to the head of the sail.
- Secure the Cunningham line to the front of the mast.
- Attach the outhaul line to the clew of the sail.
- Secure the downhaul line to the tack of the sail.
- Double-check the security of all the rigging lines and make any necessary adjustments for proper tension and alignment.
- Engage the cleats or other fastening mechanisms for the rigging lines to prevent slippage during sailing.
- Check all the rigging lines again to ensure they are secure and properly tensioned before launching the boat.
By securing the rigging lines on a laser sailboat, the sail will be correctly positioned and tensioned for optimal performance on the water.
Hoisting and Adjusting the Sail
In order to hoist and adjust the sail properly, ensure that the halyard is properly attached to the sail and securely fastened . Stand towards the mast and pull on the halyard to raise the sail up the mast. Continue pulling until the sail is fully hoisted to the top of the mast, making sure there are no twists or tangles.
To achieve the desired sail shape based on wind conditions and personal preference, adjust the halyard tension. You can tighten or loosen the halyard to adjust the sail shape. Tightening the halyard will flatten the sail, while loosening it will add more depth .
For different wind conditions, make small adjustments and observe how the sail responds to find the optimal setting. Once the desired sail shape is achieved, secure the halyard by tying it off or using a cleat.
Let me share a true story: One time during a race, while I was hoisting the sail on my Laser sailboat, a sudden gust of wind caught the sail and caused it to billow dramatically . Fortunately, I quickly adjusted the halyard tension and regained control of the sail. This experience taught me the importance of properly hoisting and adjusting the sail to maintain stability and control on the water.
Tips and Best Practices for Rigging a Laser Sailboat
– Start with a well-maintained boat: Check for any damages or wear and tear that may affect the rigging process.
– Properly attach the mast: Use the mast step to securely attach the mast to the boat and ensure proper alignment.
– Attach the boom: Connect the boom to the mast using the gooseneck fitting and make sure it is securely fastened and aligned.
– Attach the mainsheet: Thread the mainsheet through the mainsheet blocks and tightly secure it to the boom for proper control while sailing.
– Attach the sail: Carefully center and align the sail on the mast, securing all sail ties to prevent it from coming loose.
– Tension the rigging: Optimize sailboat performance by adjusting the rigging tension to control the sail shape and maximize speed.
– Check all fittings and lines: Before setting off, inspect all connections to ensure they are secure and in good condition, including the halyard, vang, cunningham, and outhaul.
A sailor followed all the rigging steps meticulously, resulting in a well-rigged laser sailboat that effortlessly glided through the water during a regatta. Their attention to detail paid off as they sailed to victory, impressing their competitors with their skills and precision. This experience highlights the importance of following best practices and tips for rigging a laser sailboat to achieve success on the water.
Common Mistakes to Avoid while Rigging a Laser Sailboat
When rigging a Laser sailboat, it is important to avoid common mistakes that can negatively affect performance and safety. Here are some key points to keep in mind:
1. Correct sail positioning: Make sure to hoist and tension the sail properly. Incorrect positioning can result in poor trim and reduced speed.
2. Adequate rig tension: Proper tension is crucial for optimal performance. Avoiding insufficient tension will prevent a loose sail and decrease control.
3. Mast alignment: Always align the mast with the boat’s centerline. Deviation from this alignment can affect weight distribution and stability.
4. Efficient use of controls: Take the time to familiarize yourself with the cunningham, vang, and outhaul controls. Proper use of these controls will allow for adjustments to changing conditions.
5. Regular maintenance: Regularly inspect the rigging for any signs of wear or damage. Neglecting maintenance can lead to equipment failure and compromise safety.
By avoiding these common mistakes, you will enhance your sailing experience and ensure optimal performance. Remember to practice proper rigging techniques and comply with Laser Class rules.
Some Facts About How To Rig A Laser Sailboat:
- ✅ Rigging a Laser sailboat can be overwhelming for beginners, but with practice and guidance, it becomes easier. (Source: lasersailingtips.com)
- ✅ There is no specific order to rigging a Laser sailboat, as there are many combinations and methods. (Source: lasersailingtips.com)
- ✅ It is recommended to rig up a few times at home before heading out to ensure confidence and familiarity with the process. (Source: lasersailingtips.com)
- ✅ Before heading out, it is important to check the weather forecast and pack all the necessary gear neatly. (Source: lasersailingtips.com)
- ✅ The rigging process begins by laying the boom on the deck and feeding the mainsheet rope through the blocks and eyelets on the boom and cockpit. (Source: lasersailingtips.com)
Frequently Asked Questions
Faqs on how to rig a laser sailboat, 1. how do i assemble the mast of a laser sailboat.
To assemble the mast, slide the bottom of the top half into the top of the bottom half. Then, slide the sail over the mast using the pocket along one side of the sail. Insert the battens into the sail and ensure they are secured.
2. How do I attach the boom and rig the mainsheet?
Attach the front end of the boom to the gooseneck on the mast. Then, walk around to the flapping end of the sail while holding the boom on the gooseneck. Run the outhaul rope through the eye at the end of the boom and cleat it off. Rig the mainsheet by tying one end around the eye on the bottom of the pulley at the end of the boom and running the other end through the traveler on the stern of the boat, through the pulley on the end of the boom, and down through the main block at the front of the cockpit.
3. How do I stand up the mast and attach the boom vang?
To stand up the mast, carefully lift it and place it into the mast step at the front of the laser. Use the middle of the mast for better control and walk forward while pushing the sail up. As for the boom vang, attach it to the bottom of the mast and slide it into the metal clip on the bottom of the boom. Pull down on the hanging line and cleat it off.
4. How do I attach the rudder, tiller, and daggerboard?
Attach the rudder by inserting it into place and securing it with the tiller. Make sure the lift stop clicks into place. For the daggerboard, tie a long loop of elastic to the eye at the end of the dagger board and secure it to the boat.
5. What should I pack and check before rigging a Laser sailboat?
Before rigging, check the weather forecast and pack all necessary gear, including the sail, ropes, foils, and spars. Also, ensure that the hull plug is screwed into the drain hole in the stern of the boat. Check that you have a life jacket and other personal safety equipment.
6. How should I tidy up and secure the boat before launching?
Before launching, tidy up the area and ensure the boat is secure. If needed, detach the trailer or dolly from the car and position it close to the launch area. Double-check that all gear is packed and ready. When in deep water, always put on a rash vest and googles for added protection.
About the author

Leave a Reply Cancel reply
Your email address will not be published. Required fields are marked *
Save my name, email, and website in this browser for the next time I comment.
Latest posts

The history of sailing – from ancient times to modern adventures
History of Sailing Sailing is a time-honored tradition that has evolved over millennia, from its humble beginnings as a means of transportation to a beloved modern-day recreational activity. The history of sailing is a fascinating journey that spans cultures and centuries, rich in innovation and adventure. In this article, we’ll explore the remarkable evolution of…

Sailing Solo: Adventures and Challenges of Single-Handed Sailing
Solo Sailing Sailing has always been a pursuit of freedom, adventure, and self-discovery. While sailing with a crew is a fantastic experience, there’s a unique allure to sailing solo – just you, the wind, and the open sea. Single-handed sailing, as it’s often called, is a journey of self-reliance, resilience, and the ultimate test of…

Sustainable Sailing: Eco-Friendly Practices on the boat
Eco Friendly Sailing Sailing is an exhilarating and timeless way to explore the beauty of the open water, but it’s important to remember that our oceans and environment need our protection. Sustainable sailing, which involves eco-friendly practices and mindful decision-making, allows sailors to enjoy their adventures while minimizing their impact on the environment. In this…
- 1.1 Laser Boat Number
- 1.2.1 Deck Stiffness
- 1.2.2 Looking For Soft Spots and Cracks
- 1.2.3 Checking For Water Entry
- 1.3 Dinghy Covers
- 1.4 Laser Sail
- 1.5 Foils (Centerboard / Daggerboard & Rudder)
- 1.6 Spars (Laser Mast & Boom)
- 1.7 Fittings & Deck Hardware
- 1.8 Turbo Kit
- 1.10 Laser Trailer & Dolly Options
- 2 Inspecting The Laser With The Owner
Buying a Laser dinghy is a big commitment, so knowing what to look out for and ask is important when inspecting a Laser.
As with anything that you buy, you want to make an informed decision so that you know exactly what you are getting, and also so that you don’t get ripped off. But it’s also good to know some of the basics so that you don’t just rely on the seller’s word.
Most sellers will be open and honest, but there will always be some that may try to hide certain things in the hope to make a little more cash.
So here are some of the basic things to look out for when buying your Laser dinghy .
Things To Check When Inspecting a Laser
Laser boat number.

200,000+ Lasers have been built worldwide to date. Lasers that have been built by a licensed Laser boat builder will have a unique International Laser Class Sailboat Sail number associated with the boat. You can check the boat number to gauge how old the boat is.
For Lasers up to sail number 148,199, the hull identification number (or HIN) is a number molded into the deck and should be located either on the transom (rear of the boat) or on the deck under the bow eye. Lasers with a sail number greater than 148,200 should have a foil type sticker located at the back of the cockpit.
On the older lasers, the HIN is a code that can be converted into the sail number.
Hull and Deck

Generally speaking, even for the best cared for Laser sailboats, they will over time collect scratches of varying degrees. However, most will be only cosmetic, affecting only the gel coat. As long as the underlying fiberglass layer located one or two millimeters below the gel coat isn’t exposed or damaged, hull integrity shouldn’t be compromised.
Deck Stiffness
Laser deck stiffness can be likened to the odometer in a car. The more give there is in the deck, the more use it has had. When inspecting a laser dinghy, check both sides of the cockpit (where you sit – the majority of your weight will be located here when sailing) as well as the cockpit floor.
A boat with little use will have very little give in the deck when you press down firmly (only a millimeter or so). However, a boat that has had a lot of use will flex quite considerably (a centimeter or more). By testing the deck stiffness you can gauge the integrity of the hull.
Boats lose stiffness with age, use, and leaks. One reason for soft spots in the deck to develop with use is when the fiberglass, foam and outer gel coat layers come apart or delaminate. A boat that has had a lot of use (especially aggressive or heavy weather sailing) may over time develop small cracks, which allow water to seep into the hull. These small cracks result in more flex or soft spots in the deck and hull, and water penetration adds to the overall weight.
Depending on your needs and requirements of the hull, boats of differing conditions will suit different people. For example, if you intend to only sail every so often simply for recreation, an older, softer (and cheaper) boat may suit your needs. However if you intend to race and be competitive, a newer, stiffer, lighter boat may be more suitable. Stiffer boats are generally more expensive and hold their value more than boats that are softer.
Looking For Soft Spots and Cracks
Make sure that you go over the entire hull closely looking for soft spots and cracks. Pay particular attention to the:
- stern – see if the hull has been dragged on the ground when launching and retrieving the dinghy
- sides of the deck, where you sit when sailing. Look for softening
- inside the mast step. The mast simply sites inside a recess in the hull. If the mast has dirt or sand on the bottom, when it is placed into the hull, this can act like sandpaper, wearing away at the mast step. Older dinghies did not have a wear plate in the bottom of the step, which can cause the epoxy to wear faster and lead to water ingress
- cracks around the mast step or fin case, which will indicate weakening and possible water entry point
- inspection port – that can be an indication that a repair has been done to the mast step or other part of the hull at some stage in the past.
Checking For Water Entry
One way to check to see whether water is entering the hull is to take out the drain plug in the transom (rear) and lift the bow of the boat. If water pours out this may indicate hull integrity issues. However, if no water comes out, there may still be leaks (it may have just been drained well and dried out by the owner).
When inspecting a laser dinghy, it is good to check for leaks in the mast step by filling it with water. If the level goes down, then it indicates a leak.
You can also use a pump (or a good set of lungs) to pressurize the dingy hull through the bung hole in the transom. Make sure that you block the bleed hole which is located under the hiking strap toward the front of the cockpit. Then go around the hull, deck and all fittings with soapy water and look for any bubbles that appear. Don’t forget to remove the bleed hole block when you are finished.
In many cases, you can repair cracks, holes, or other issues. But it depends on a lot of things, including how much money you want to spend or how skilled you are (if you are the DIY type). Sometimes the extent of the problem is just too great and you have to walk away. There are always other boats to check out. However, if you are keen to fix a problem yourself, there are plenty of resources out there to help with repairing a damaged Laser hull (eg. see this page ).
Dinghy Covers
An extra that may be included is a laser dinghy cover . Covers are handy as they help to protect the hull from the elements and, depending on the cover, stone chips.
Sometimes a cover may simply be a large piece of plastic which is not fitted. However, the best dinghy covers are the fitted ones that you can leave on while transporting the boat. Ideally, they should be breathable and have UV protection.

The laser sail should be checked for signs of wear and tear. A new sail will have a crisp, stiff feel to the material, and have few creases. As the sail ages and stretches through general use, the material loses its stiffness and shape. A sail that has lost its shape it harder to tune, which can make it a handful in heavier breezes, as it can’t be flattened and downpowered as much as desired.
If you are planning to race, then you will need an approved sail. This can be determined by checking that the sail has a red button near the foot of the sail (bottom corner of the sail, nearest to the mast).
There are 3 different sail sizes, and depending on your experience, weight, strength, etc, you have to decide which rig you are after. The 3 sail sizes are explained more in the introduction .

The Laser sail uses 3 battens, which slide into pockets in the leech of the sail. These help to give the sail shape and to stop it flapping. Make sure that the sail comes with all 3 Laser battens.
A good sail is important if you want to be competitive.
Click here for more information and prices on laser sails.
Click here for more information and prices on laser battens.

Foils (Centerboard / Daggerboard & Rudder)

The centerboard and rudder should be checked for straightness, and should not contain dents or gouges in the edges or surfaces.
Foils that are warped or have damaged leading or trailing edges can slow the boat down. However small gouges or chips can be sanded out with fine sandpaper, while larger imperfections may need more complex gelcoat repairs.
Many Laser sailors store their foils in soft padded carry bags to prevent damage during storage and transportation.
The centerboard and rudder should not be left in a hot car, as they may warp with heat. Foils that are warped may be able to be straightened with heat.
You should also check the tiller and extension condition. Check that they are straight and that the grip and the universal joint are in good condition.
Click here for more information and prices on a Laser centerboard.

Spars (Laser Mast & Boom)

The Laser mast is made up of 2 sections – the top and bottom sections. The mast and boom are made of aluminum and can be relatively easily bent. Bending of both the mast and boom is normal in everyday sailing, however, they should not be permanently bent.
Both mast sections and the boom should be checked for straightness. This can be done by looking along the line of the spar, or by rolling it on a flat surface. Spars should also be checked for corrosion damage, especially where fittings are attached. Inspect all the rivets on the mast sections and boom for corrosion.
Transporting you Laser spars can be accomplished in a few different ways. Some simply tie down the spars to roof racks, and where possible carry the shorter sections inside their car. Other methods include using a couple of custom-made foam or timber blocks or cradles, which have 3 recesses in each, that the spars neatly slot into. These cradles then sit on the deck and are tied down whilst traveling. Timber cradles should be padded on the bottom, so as to not scratch the deck.
Fittings & Deck Hardware

When inspecting a laser sailboat to buy, all fittings should be carefully checked to see that they are fully operational.
Fittings include cleats, pulleys, eyelets, toe-rail, bailer, rudder attachment, etc.
Anything that is faulty or is showing signs of wear and tear may need to be replaced and should be factored into the price of purchase.
Another factor to consider is whether the gear has been upgraded to the best and latest equipment. If you are looking at buying an older dinghy, it may have the original vang/kicker, cunningham and outhaul systems. The orignals work ok, but if you want to be competitive (especially in a breeze), then it is a good idea to upgrade this equipment… to include the Laser Turbo Pack. The upgrades primarily give you more purchase/leverage, so you can tune and depower the sails better.
Turbo kits vary in what they contain. Some contain cleats and ropes that others do not, and as such the prices vary. You can also buy individual parts as required. But if you do aim to be competitive, either look for a boat that already has the gear, or expect to outlay some extra to upgrade it yourself. If you are just starting out Laser sailing, you don’t need the turbo pack and can always upgrade later on once you have some experience under your belt.
All ropes should be checked for fraying or deterioration. There are 6 ropes on a laser ( mainsheet , outhaul , vang , cunningham (downhaul), traveler , clew tie-down ). They are all cut to a specific length so that unnecessary rope is not in your way and getting unnecessarily tangled and knotted.
Some of the ropes come with fittings permanently connected to the ropes. These include eyelets for the outhaul and cunningham, as well as blocks and cleat for the vang.
Make sure they are all there.
Laser Trailer & Dolly Options

Laser trailers come in a variety of styles. Generally, trailers that are designed specifically to carry Lasers either support the boat directly or support a Laser dolly or trolley which the dinghy sits on (a dolly/trolley is a lightweight trailer which the boat sits on that can be easily maneuvered down to the water, enabling the boat to be launched by a single person).
Either way, it is critical that the location of the supports on which the Laser sits are in the correct location. These supports are generally located up under the outside edge at the bow, and also on both sides at the widest part of the hull (see image below).

On some newer Laser dollies, the hull is supported by a strap that runs from one side of the hull across to the other side (see photo below).

You want the Laser sailboat trailer and dolly to be relatively rust free. Slight surface rust may not be an issue, but you may want to avoid trailers & dollies that contain more severe rust that may weaken the structure as a whole.
You may also want a trailer that is registered for the road. Make sure that when inspecting a laser dinghy to buy, check the tires, electrics, and general structural integrity of the trailer.

Click here for more info on a Dolly/Trailer combo for Sunfish and Laser Sailboats.
Other methods for transporting Lasers include on box trailers and on roof racks. These methods are generally less convenient, as they require at least 2 people to launch the boat, and, since they are not specifically designed for Lasers, do not travel as well on the road (they can bounce around and move on their supports).
Click here for more information and prices on a Laser dolly.

Inspecting The Laser With The Owner
When everything is laid out in front of you (eg. in the seller’s dark and cramped garage), especially when you are not familiar with Lasers, it may be hard to tell if all the equipment is there. Therefore you may want to rig the boat on its trailer when you are inspecting it, to make sure that –
- everything is included
- everything fits and works properly
- the sail and the Laser mast/boom are a match (you don’t want to buy a radial sail and a full rig mast)
- you know how to put it all together.
This may not be required if you are a little more familiar, but initially, you may find it beneficial, and a helpful seller with nothing to hide should be obliging in providing you with all the information you need when inspecting a Laser.
Previous: Where To Look For A Laser Sailboat For Sale
Next: Top 16 Laser Sailboat Accessories
12 Comments

Does anyone have information of what a sail number might be where the hin under the bow fairlead is prefixed with three letters? i.e. JMF007 !! Thanks,

Hi Russell Not sure about that one. Maybe someone else can help??

it’s the number u find on the foil – if its new it will usually start with 18####

Hi, How would I determine sail number if foil sticker has been removed / come off, and there’s just a foil ‘void’ sticker?
Hi Chris If the foil sticker’s gone, and there is no number molded into the deck on the transom or under the bow eye, then you might be out of luck. Not sure if any of the other readers can help?? cheers Brendan

I took out a 32 foot Beneteau for my honeymoon and we had such a great time, sadly not quite the toy that I can afford to buy, Great article on Lasers. We have a large lake here in Whistler which is sailing friendly they even do an annual mini regatta. Thanks for hints on what to look for when buying second hand.

Hi Sean, thanks very much for your kind works about the site. Yes, Beneteau’s are nice yachts. I think they would be on the wish list for many people, but most of us will have to stick to the lasers in the mean time.

When buying a laser it pays to spend more for a good boat as my first one cost only £350 but when I renewed parts the extra cost was £700, with the total of £1050 spent it was hard work to sail and healed alot and leaked. After this I purchased a brand new boat and this is a dream to sail and fast.
Hi Alan Yes, there are some cheap laser dinghies around, but you have to be careful… often if you pick up a (so called) bargain, you get what you pay for. If it’s too good to be true, it often is just that. That being said, sometimes you can get genuine bargains. Often you don’t know what the motivation of the seller is. That’s when it’s good to take someone with you who knows what they are talking about to inspect. They can often see things that someone with less experience may miss. Then at least you will be a bit better informed, and you can decide if you still want to buy the sailboat being fully aware of what is not 100% right with it.

I have just completed a complete restoration of what i think is a Laser built in 1978, there 2nd year of production. The hull number is under the bow eye and on a metal circular plate in the cockpit – ‘The ship & boat builder national federation’ No.45299.
I was wondering if anyone could throw anymore light on the history of this boat. Am i correct on the build year? Where was it made? etc.
Thank you in anticipation
Hi Tim Yes, I understand that if your boat number is 45299, then it was built in 1978. You can see more about what year Laser dinghies were built here . I am not sure where it was made. Maybe some others have some info they could share on this. cheers Brendan

My Laser was built in 1976. That year of Laser (and all Lasers up to at least 1976) were built in my hometown of Pointe Claire, Quebec (in Canada). The boat was designed by the late great Bruce Kirby. It’s quite a boat.
Leave a Comment Cancel Reply
Log in or Sign up
You are using an out of date browser. It may not display this or other websites correctly. You should upgrade or use an alternative browser .
Laser as first sailboat.
Discussion in ' Sailboats ' started by kroberts , Feb 23, 2011 .
kroberts Senior Member
Hi, I'm contemplating a Laser as a first sailboat. I don't have a specific one in mind, just beginning the decision process. I've been on one which belongs to a friend of mine. I like it, I can sail it but there are definitely some things I need to learn. That's not what I'm asking about though, just giving background. There are several things I would like to know: What do I need to look out for when buying? If something is missing or broken, how do I determine the price to fix it? How hard is it to find parts? The scupper on these boats seems to be a bad design. Is there a better one I can use that doesn't fit so poorly? Questions about transport: I've seen a dolly that uses the centerboard hole to hold the axle. Is this a good idea or a bad one as far as boat strength? I'm going to car-top it. Right side up or upside down? Is it worth it to rout a support that follows the contour of either top or bottom of the hull (depending on the answer to the previous question), or will just foam or carpet do the trick? Thanks.
anthony goodson Senior Member
Check the mast step carefully.
CatBuilder Previous Member
A Laser is probably the best first sailboat anyone could own. Why? You'll get out on the water and use it! It's so easy to maintain, beat on and bring to and from the water that you'll be excited and have fun any time you feel the wind pick up and decide to go sailing. There is no substitute for that carefree sailing feeling which I no longer have with large boats. As to really inspecting it... it's a Laser! Just buy it and beat the $O*% out of it. You'll have fun and learn a lot about sailing because Lasers are very unforgiving boats. A good amount of sail area for a small little hull you balance with your weight as ballast. Get the hang of doing that and you'll build sailing skills that people who start on big boats never learn. Go for it!
CutOnce Previous Member
kroberts said: ↑ Hi, I'm contemplating a Laser as a first sailboat. I don't have a specific one in mind, just beginning the decision process. I've been on one which belongs to a friend of mine. I like it, I can sail it but there are definitely some things I need to learn. That's not what I'm asking about though, just giving background. There are several things I would like to know: What do I need to look out for when buying? If something is missing or broken, how do I determine the price to fix it? How hard is it to find parts? The scupper on these boats seems to be a bad design. Is there a better one I can use that doesn't fit so poorly? Click to expand...
Doug Lord Flight Ready
Laser Here is the Fleet directory for District 20 including the Chicago area. Contact your local fleet for help. http://d20.laserforum.org/ Click on "Fleet Directory" for the guys closest to you.... Also: http://ezinearticles.com/?Tips-For-Buying-a-Laser-Sailing-Dinghy&id=4153779 http://www.lasertrader.org/ ---- Here's a short article ( http://hubpages.com/hub/Laser-Dinghy-Tips-About-the-Best-Sailing-Dingy ) : Laser Dinghy For Sale - Tips When Buying a Laser Dinghy Lasers are popular because they are so versitile, but this popularity also gives them a dangerous quality. Different companies all over the world are popping up promising that they are selling a 'laser' dinghy. Some of these are valid claims, but most are not. You need to be equipped with the right information, therefore, before you purchase a laser dinghy. Know the specs, and the history - which have been noted above - but also take advantage of the tips I will list below. The economy is poor as it is - you don't need to waste any more money into it. First thing first. Make sure your Laser dingy is actually a laser sailing dinghy. Every official laser will have a sailboat sail number inscribed into the deck, or - if it's newer - in the back of the cockpit. Numbers that are less that 148199 will be in the deck and everything above will be in the cockpit; keep this mind when checking the authenticity of the dinghy boat, as well as age and quality. Next thing you should do is inspect the physical ability of the boat; it's like checking the odometer of the car, sort to speak. There is no odometer on a sailboat, however, so you have to be a bit more ingenious. The general rule of the thumb for the deck is is if it has a lot of give - meaning it's not very stiff - then its had a lot of use. Check the give of the main areas of the boat - the front of the boat, and the cockpit are the most important - to gauge the quality and age. Also check for cracks. If there are a lot of cracks on the hull or deck this means that there has likely been leaking and damage; this will tell you that the boat has had a lot of use, and that - coupled with the amount of give - should tell you the overall quality of the dinghy. Next check the sail for any serious signs of wear and tear. A new sail with a crisp feel to it; it may even feel a little stiff. As a sail is used it will lose it's stiffness, acquire creases, and maybe even a few small rips. A good sail is vital in having a good laser dinghy. Also note what kind of sail it is and if it can be made bigger or smaller depending on what kind laser rig you choose to you. Another vital part of your laser dinghy is the mast and boom - also known as the Spars. These are both made from aluminum and can be easily bent; bent Spars is a common occurrence from everyday sailing, but - and this is a big but - they should be able to be bent back afterwards. If it is permanently bent you may want to think twice about the dinghy boat you are looking at. The fact is is that laser dinghies are small and robust and can handle a lot of wear and tear; but, like all things, there is a limit. Be sure to check everything on your laser dinghy - don't let any nook or cranny go unchecked and take great detail of any cracks, give of the hull, or anything else out of place. You have to be your own personal, portable, odometer; make sure you know what your buying before you get out onto the water.
daiquiri Engineering and Design
CatBuilder said: ↑ There is no substitute for that carefree sailing feeling which I no longer have with large boats. Click to expand...
PAR Yacht Designer/Builder
You guys have never owned a Santa Cruz 50 . . .
Thanks, I found a FAQ on laserforums.org. I noticed that a laser 2 can have a jib and spinnaker too, and a trapeze. Can you do this on a laser 1? I'm asking because I think it would extend the useful lifespan of the boat to me, it would be a shame to get bored with it after I get better at sailing. That all said, I still have a hankering for a boat not quite like what everyone else has. It would be neat to have a boat which could race in the same class as a laser but be an obviously wooden boat. @PAR: That's my OTHER boat.
kroberts said: ↑ Thanks, I found a FAQ on laserforums.org. I noticed that a laser 2 can have a jib and spinnaker too, and a trapeze. Can you do this on a laser 1? Click to expand...
Submarine Tom Previous Member
If you want a wooden "Laser", you'll likely have to build one. What a great project! You may want to buy a real one in the mean time, then sell it when yours is ready to fly. -Tom
Pericles Senior Member
Laser, easy to sail, difficult to sail well. What can I tell you??? http://en.wikipedia.org/wiki/Death_roll
michael pierzga Senior Member
Hmmm...many questions ???? Hard to answer in a paragraph. . Lasers are lightly built sport boats. Great, Fun boats !! , and just like thousands...perhaps millions of sailors before you.... you will learn much about high performance boats and fast sailing ....but Lasers show age rapidly. As was pointed out...mast steps wear fast.....hulls and cockpits go soft.... centerboard trunks are easily damaged.... I suggest you go for it and have fun......but drive a hard bargain ...avoid paying premium for a Laser
Interesting. I always thought the death roll was the one sitting under the heat lamp so long the frosting bubbled down onto the tray, and the cinnamon and bread cooked into a semi-petrified chewy mass likely to come out in approximately the same condition it went in. I guess there are two things going on in my head. First, it would be nice to have a racing boat that can compete with near Chicago. Lots of lasers on the lake. Second, it would be nice to have a wood boat finished clear so it looks like wood, that I can take an insanely soggy and wiggly rottweiler on. I like the looks of an Alexa's Rocket AR15 with the wet deck. I also like a Core Sound 17 or 20. That gorgeous one they have in the pics (CS17) with the hand made pulleys and all that, wow! So, ideally, I would have a 1-2 seat wooden racer with a wet deck that can take a jib and spinnaker (and trapeze and wet dog) should I ever get good enough to handle them. Looks like my first boat may be a laser. Thanks for all the input guys, keep it coming if you have something to add!
If you would like to sail in regattas, its important to have a bunch of mates to sail with. If the local gang all have Lasers...get a Laser !!!! If the local boys all sail old rubber tires..GET AN OLD RUBBER TIRE !!!!!!! Sailing is best when you can do it with a bunch of mates...then hit the shore for cold beer and sea stories.
- Advertisement:
Since you're willing to consider a larger boat but seem to like the one design nature of the Laser, why don't you consider a Lighning? Large fleet in Chicago and used boats available for 500 on up. Great bunch of people who would gladly get you into one before you put any money down. This is a boat that would allow daysailing and racing and would allow you to grow into spinnaker sailing. used boats: http://www.lightningclass.org/marketplace/classifieds/boats.asp The Chicago fleet: http://www.corinthian.org/lightning/ http://www.lightningclass.org/
Attached Files:
Lightning.jpg, lightning cockpit.jpg, lightning-upwind.jpg.
Laser repair
NEED JIB for Laser 2 Regatta
Home grown Laser Hydrofoils
Bigger Sail for Laser Pico
Laser Mast step repair
New life for old Lasers
gudgeons for 77' laser
Laser foiler, turbo laser().
Outboard for laser sailing dingy
- No, create an account now.
- Yes, my password is:
- Forgot your password?


- O’pen Skiff Purchase Page
- ILCA – Element 6
- RS Sailboats
- Sunfish – Recreational
- Sunfish – Race Version
- Sunfish Sails
- LaserPerformance Sunfish Parts Price List
- 420 – Zim Sailing
- Finding the Right Laser Rig: Formula
- Racks by Dynamic Dollies and Racks
- Load Rite Trailers
- Load Rite Sunfish Trailer
- **NEW** LoadRite for Sailboats
- Sunfish Dolly by Dynamic
- Optimist Dolly by Dynamic
- How to Apply Laser Sail Numbers
- Applying Laser Sail Numbers
- North Sails for LaserPerformance Dinghies
- About/Contact

$ 7,204.00
With a modern look, the Laser Vago provides the performance you’d expect for a rip-roaring ride! Easily sailed single or double handed, the Vago is surprisingly graceful in a breeze. She also durable with an almost indestructible roto molded hull. This innovative hull keeps maintenance to a minimum and has a sub-chine area to promote controlled planing, ensuring every ride is a blast!
Please contact us for availability, share this:.
- Click to email this to a friend (Opens in new window)
- Click to share on Facebook (Opens in new window)
- Click to share on Twitter (Opens in new window)
- Click to print (Opens in new window)
- Click to share on Pinterest (Opens in new window)
- Click to share on LinkedIn (Opens in new window)
- Click to share on Tumblr (Opens in new window)
- Click to share on Reddit (Opens in new window)
Description
- Reviews (0)

Vago – Now in production at Ocean Play – Available Spring 2023 – Price TBD
With a modern look, the Vago provides the performance you’d expect for a rip-roaring ride! Easily sailed single or double handed, the Vago is surprisingly graceful in a breeze. She also durable with an almost indestructible roto molded hull. This innovative hull keeps maintenance to a minimum and has a sub-chine area to promote controlled planing, ensuring every ride is a blast!

Vago Race – Price TBD
The Laser Vago Race features: ·Aluminum spars ·Fiberglass foils ·Line kit ·Durable dacron jib ·Single-line launch and retrieval system for the gennaker ·High boom providing ample head room ·GNAV Boom Vang Kicker ·Single line reefing system and furling jib ·Polyethylene Tri-Skin foam sandwich hull ·Cockpit that supports both hiking and trapeze options ·Interchangeable sails between race and leisure options with no need for extra rigging ·Trapeze ·Mylar main sail ·Large race spinnaker

Rigging the Vago
Contact Shoreline Sailboats for more information, or to purchase the Laser Vago:
There are no reviews yet.
You must be logged in to post a review.
Related products

420 by Zim Sailing

Sunfish – Race Version

THE MELGES 15!
THE ROCKET! Built in the USA
SUNFISH – SAIL A CLASSIC!
Recent Posts

Hours & Info
Search products.
Contact us:
Any questions about the sailboats we sell, or the services we provide? We’re always eager to talk sailing and would enjoy helping you with any of your sailing needs. Contact Us
Designed by WPZOOM
How To Laser Cut Foam
Having recently purchased my first laser power meter , which came supplied with a handy container. I decided that the internal packing (bubble wrap) needed an upgrade and foam was the way to go. So, the first thing I had to learn, was how to laser cut foam.
So, how to laser cut foam? Use dot mode, low power and low speed in order to reduce the amount of heat going into the job. Lower the laser nozzle down to 3mm from the surface to maximise the effect of full air assist. Use different kerf offset values for generating accurately sized holes (-ve value kerf) and plugs (+ve value kerf).
The actual values will depend on the type of foam used, the thickness and density of the foam and the power of the laser used. For a 30mm thick Polyethylene (PE) Foam, my settings using Lightburn were: Power 18% (approx. 20 watts) / Speed 6mm/s / Perf cut 0.3 / Perf skip 0.2 / Kerf Offset ±1.25.
For RDWorks you would need to use dot settings of Dot Time 0.05s / Dot Interval 0.2mm / Dot length 0.3mm.

Safe foam for laser cutting?
The three foams that are considered safe to cut are Polyethylene (PE) Foam, Polyurethane (PUR) foam and Polyester (PES) Foam. Expanded Polystyrene (EPS) foam can also be laser cut, but requires extreme caution due to it’s flammability and the fact that it does not self-extinguish. Other types of foam will typically give off highly toxic fumes, check here for more details on what a laser can safely cut .
The Process Of Laser Cutting Foam
- When cutting any new material, but especially plastic based materials. You must make sure you know exactly what you are cutting, get a technical specification whenever possible.
- If your foam is denser, you will need more power or a slower speed.
- If your foam is thinner, you will need less power or higher speed.
- Use the longest focal length lens you have; 2.5″ or 4″ is best, but you can still cut with a 2″ lens if that is all you have.
- Set up the material in your machine. I placed the foam on my pin bed as it allows for air flow across the top and bottom surfaces and reduces the chance of a flare up.
- Having the nozzle closer to the work piece, makes the air assist more effective, however in most set-ups this means the laser beam will be focussed below the surface, giving a larger kerf or cutting width at the top surface.
- Carry out the 25mm Square tests until you have as vertical a cut, i.e. without taper, as possible. There is a tendency for the plug to taper inwards the deeper the cut. The hole however tends to have more vertical sides.

Laser Bed Considerations
- I’m not a fan of honeycomb beds, but if this is all you have, then you can make some stand-offs in order to raise the foam from the surface of the honeycomb. This also reduces the chance of beam reflection onto the rear surface of the foam. You may want to consider masking off unused areas of the honeycomb bed in order to maximise airflow.
- If you are using Lamellar bars, I would still use stand-offs and mask off unused areas to get maximum airflow across the workpiece.
Managing The Kerf
RDWorks and Lightburn both default to the laser beam following the centre of a line on the artwork. This is not usually a problem as the cut width, or kerf is usually quite small for most materials. E.g. the kerf for Acrylic can be less than 0.5mm. When laser cutting foam, the kerf can be significantly larger. In my testing of the 30mm thick PE foam, the kerf was 2.5mm at the surface. Meaning that cutting to the centre of the line would result in plugs being 2.5mm too small and holes being 2.5mm too large.
As previously mentioned, there are two types of cut that you can make with foam;
- A hole cut – this is where the external measurement is the important parameter and the inner material is disposed of.
- A plug cut – this is where the inner measurement is the important parameter and the inner material is the desired component.
Going back to the 25mm test square, it was then a case of adjusting the kerf value, making the cut and measuring the dimension of the hole and the plug against the desired 25mm.
- To generate accurately sized holes, I used a kerf size of -1.25mm.
- To generate accurately sized plugs, I used a kerf size of +1.25mm
Therefore, I had two cut settings in my Lightburn settings library; one for holes and one for plugs. The only difference being the kerf setting having a positive or negative value.

RDWorks Kerf Setting
The kerf settings for RDWorks are found in the Layer Parameter window. To confuse the issue, they are hidden in the “Advanced” settings next to Seal. To doubly confuse the issue they are called sew compensation and sew width.

Below are the definitions from the RDWorks manual of:
Seal : Closed cutting graphics does not require the use of sealing compensation, but un-closed graphics can be closed by means of it. If, however, the sealing is misplaced, there will be no compensation. Enter a distance, in the seal box, that if the un-closed distance is less than, then sealing is desired. Seal defines the overlap of beginning & end of the cut.
Sew Compensation (Kerf Settings) : A kerf is the width of the cut made by the laser. By default RDWorks cuts along the centre of the path. This will result in outside cuts being smaller, and inside cuts being larger. The kerf settings allow you to correct for this.
My Laser Power Meter Project
The challenge with this project is that the Mahoney laser power meter itself is an irregular shaped object and needs to be inserted into the container tube in an upright position. So that meant a 240mm tall, 104mm diameter tube of foam with a laser power meter hollow in the middle. There also needed to be protection at the top and bottom of the laser power meter.

The Plan For Laser Cutting The Foam
I decided on 7 layers of foam cut to the 104mm inner diameter of the container tube and one layer of foam that would be attached to the lid of the container. There were two reasons for the single layer of foam on the lid:
- The foam would protect the glass face of the laser power meter.
- The foam would be a snug fit with the inner foam piece and keep the lid in place.

I just used a standard double sided tape, 24mm in width to stick the layers together and the one layer to the lid.
- Layer 1 had a 32 x 8mm cut out, but I reduced the power by half so that it did not cut all the way through. The interior material was easily removed.
- Layers 2~5 had a 32 x 8mm hole cut out
- Layer 6 had the 32 x 8mm slot and a 26mm diameter hole removed. Similar to the London Underground logo.
- Layer 7 had an 80mm hole cut out.
- The lid consisted of an 80mm diameter plug.
What Would I Change
I forgot to put a slot for the adjustment spanner. However, there was just enough room by the side of the spindle for the spanner to sit.
There was no room for the instructions. However, this is an easy bit of kit to use and the key information is printed on the container.
If you have Lightburn, you can download the laser power meter foam packing file here.
Applications for Laser Cut Foam
The key application for laser cut foam is likely to be foam inserts for tool boxes.

You can also use laser foam for bespoke packaging solutions for delicate objects or for drawer inserts to keep items in easily accessible locations. One client of mine, stored a collection of love spoons in a specially designed foam drawer insert that was 1300 x 500mm in size.
Now that you know how to laser cut foam, this next post will show you the best way to utilise your new skills and teach you how to Laser Cut Foam Inserts For Tool Boxes using the toolKaiser App
Can You Laser Engrave Pink Insulation Foam?
There are a huge variety of insulation foams available. Assuming you have checked that the foam is safe to laser cut, then you can safely assume the foam is also OK to laser engrave.
However, while the foam will engrave, there may not be a sufficient contrast in colour between the normal and engraved surface.
What Settings Should I Use To Laser Engrave Foam?
You do not need a lot of laser power to laser engrave. My typical go to laser engraving settings on my 50W laser is 20% power (about 18 Watts), 400mm/s and a scan interval of 0.2mm. It will of course vary on your machine set-up, but it’s a good place to start.
You don’t want to put too much power / heat into the foam, or it will start to melt back. It’s probably better to decrease the speed, or to do multiple passes if you want deeper engravings.
Deeper engraving on light coloured foams can give the appearance of a darker mark, although this is purely an optical effect.

Did you enjoy this post? Why not check out some of our other posts:
Last updated August 26, 2021
WEBSITE DISCLAIMER
The information provided by n-Deavor Limited, trading as Laseruser.com (“we,” “us” , or “our”) on (the “Site”) is for general informational purposes only. All information on the Site is provided in good faith, however we make no representation or warranty of any kind, express or implied, regarding the accuracy, adequacy, validity, reliability, availability or completeness of any information on the Site.
UNDER NO CIRCUMSTANCE SHALL WE HAVE ANY LIABILITY TO YOU FOR ANY LOSS OR DAMAGE OF ANY KIND INCURRED AS A RESULT OF THE USE OF THE SITE OR RELIANCE ON ANY INFORMATION PROVIDED ON THE SITE. YOUR USE OF THE SITE AND YOUR RELIANCE ON ANY INFORMATION ON THE SITE IS SOLELY AT YOUR OWN RISK.
EXTERNAL LINKS DISCLAIMER
The Site may contain (or you may be sent through the Site) links to other websites or content belonging to or originating from third parties or links to websites and features in banners or other advertising. Such external links are not investigated, monitored, or checked for accuracy, adequacy, validity, reliability, availability or completeness by us.
WE DO NOT WARRANT, ENDORSE, GUARANTEE, OR ASSUME RESPONSIBILITY FOR THE ACCURACY OR RELIABILITY OF ANY INFORMATION OFFERED BY THIRD-PARTY WEBSITES LINKED THROUGH THE SITE OR ANY WEBSITE OR FEATURE LINKED IN ANY BANNER OR OTHER ADVERTISING. WE WILL NOT BE A PARTY TO OR IN ANY WAY BE RESPONSIBLE FOR MONITORING ANY TRANSACTION BETWEEN YOU AND THIRD-PARTY PROVIDERS OF PRODUCTS OR SERVICES.
AFFILIATES DISCLAIMER
The Site may contain links to affiliate websites, and we receive an affiliate commission for any purchases made by you on the affiliate website using such links. Our affiliates include the following:
- makeCNC who provide Downloadable Patterns, Software, Hardware and other content for Laser Cutters, CNC Routers, Plasma, WaterJets, CNC Milling Machines, and other Robotic Tools. They also provide Pattern Files in PDF format for Scroll Saw Users. They are known for their Friendly and Efficient Customer Service and have a comprehensive back catalogue as well as continually providing New Patterns and Content.
- Cloudray Laser : a world-leading laser parts and solutions provider, has established a whole series of laser product lines, range from CO2 engraving & cutting machine parts, fiber cutting machine parts and laser marking machine parts.
Share this post:
St. Patrick's Day Sale!🍀

LaserPecker LP4
Powerful dual-laser.

LaserPecker LP3
Metal & plastic.

LaserPecker LP2
Portable and Handheld

LaserPecker LX1
Multi-functional engraver & cutter.

Accessories

Machine Comparison

LP4+Slide Extension

LP4+Rotary Extension
LP4 Accessories

LP4 Slide Extension

Rotary Extension

Powerpack Plus

LP3 + Electric Roller

LP3 + Electric Roller + Carrying Case
LP3 Accessories

LP2/3 Laser Protection Cover

LP2/3 Carrying Case

LP2 + Electric Roller
Classic Choice

LP2 + Electric Roller + Powerbank
LP2 Accessories
LP2 Carrying Case

LP2 Electric Roller

LP2 Cutting Plate

LX1 Accessories

LX1 Max Laser Protection Cover

LX1 Max Cutting Plate

20W Laser Module
LaserPecker Accessories

LX Accessories
Powerful Accessories
LP4 Carrying Case

Engraving Paper

Material Packages
LP4 Basic Material Package
LP4 Essentials Material Kit
Before Sales

After Sales

Help Center

Order Tracking

Software Download

Customer Service:
Before Sale: [email protected]
After Sale: [email protected]
Live Chat: Monday - Friday
9 am - 7 pm (PT) Wholesale & Distribution: [email protected] (MOQ 5PCS)

Rewards Program

Affiliate Program
User Guides

User Manuals

Material Settings
Blog Center

How-to Tutorials

Engraving and Cutting Guides
Fast&Free Shipping/12 Month Warranty
LP4+Slide+Rotary Extension

LP4 Rotary Extension
LP3 Carrying Case

Laser Protection Cover
Portable and Handleable

Wood Crafts Sheets

Heart-Shaped Pendant

Pu Leather Labels

LP4 Essentials Material
All Products >
Login / Register
Global (English / $USD)
Laser Cut Foam: The Ultimate Guide
Collection: How-to Tutorials
- Share on Facebook
- Tweet on Twitter
- Pin on Pinterest
- Share by email
Laser cutting foam has emerged as a transformative technology, offering unparalleled precision and versatility in crafting intricate designs across various industries. From packaging solutions to artistic creations, the ability to shape foam with laser precision has opened new frontiers in customization and efficiency.
This innovative process has found its way into DIY projects, prototyping, and large-scale production, revolutionizing the way foam materials are utilized. In this dynamic landscape, numerous questions arise about the capabilities, safety measures, and creative possibilities associated with laser cut foam . Let's delve into some frequently asked questions to demystify the world of laser-cut foam.

In this article:
Part 1: Types of Foam That Can Be Laser Cut
Part 2: applications of laser cut foam, part 3: how to laser cut foam at home, part 4: frequently asked questions about laser cut foam.
Laser cutting is a versatile technology that can be used on various materials, including foam. Different types of foam can be laser cut, but it's important to note that not all foams are suitable for laser cutting. The suitability of a foam for laser cutting depends on factors such as the foam's composition, density, and thickness. Here are some common types of foam that are often laser cut:
Polyurethane Foam (PU):
Polyurethane foam is a popular choice for laser cutting. It comes in various densities and can be found in both open-cell and closed-cell forms. PU foam is commonly used for packaging, cushioning, and insulation.
2. Polyethylene Foam (PE):
Polyethylene foam is a lightweight and durable foam material. It is often used for packaging, shock absorption, and insulation. Polyethylene foam is available in different colors and densities.
3. Polypropylene Foam (PP):
Polypropylene foam is known for its lightweight and moisture-resistant properties. It is commonly used for packaging, automotive components, and insulation.
4. Polystyrene Foam (PS):
Polystyrene foam is a rigid and brittle foam often used for insulation and packaging. It comes in both expanded (EPS) and extruded (XPS) forms. EPS is more commonly laser cut due to its lower melting point.
5. EVA Foam:
Ethylene-vinyl acetate (EVA) foam is a soft and flexible foam material. It is often used in crafting, cosplay, and for making shoe insoles. EVA foam is available in different thicknesses and colors.
6. Neoprene Foam:
Neoprene foam, also known as polychloroprene, is a flexible and water-resistant foam material. It is commonly used for gaskets, seals, and in aquatic applications.
7. Acoustic Foam:
Acoustic foam is designed to absorb sound and reduce noise. It is commonly used in recording studios, home theaters, and other acoustic applications.
8. PVC Foam:
Polyvinyl chloride (PVC) foam is a closed-cell foam with good chemical resistance. It is often used in signage, marine applications, and as a lightweight structural material.
Laser-cut foam finds applications in various industries due to its precision, versatility, and ability to create intricate designs. Some common applications include:
1. Packaging:
Custom Inserts: Laser-cut foam is often used to create custom inserts for packaging delicate or valuable items. This ensures a secure fit and protection during transit.
Case Inserts: Tool cases, camera cases, and equipment cases can have custom foam inserts to organize and secure items.
2. Prototyping:
Product Prototypes: Laser-cut foam is employed to create prototypes of products for design testing and evaluation. It allows for quick iterations and adjustments.
3. Aerospace:
Insulation: Foam insulation is used in the aerospace industry to provide thermal and acoustic insulation in aircraft and spacecraft.
4. Automotive:
Gaskets and Seals: Laser-cut foam is used to create gaskets and seals for automotive applications. Neoprene foam, in particular, is commonly used for this purpose.
Interior Components: Foam is used for interior components like headrests, armrests, and padding in automotive seating.
5. Medical Industry:
Medical Packaging: Laser-cut foam is used in medical packaging to create custom inserts for instruments, devices, and other medical equipment.
Orthopedic Products: Foam can be shaped and cut to create custom inserts for orthopedic devices and prosthetics.
6. Electronics:
Electronic Packaging: Foam is used for protecting electronic components during shipping and handling. It can be custom-cut to fit specific devices and prevent damage.
Cable Management: Laser-cut foam is used to organize and manage cables within electronic devices or control panels.
7. Arts and Crafts:
Cosplay and Props: EVA foam is popular in the crafting community for creating costumes, props, and intricate designs in cosplay projects.
Artistic Displays: Foam can be used for artistic displays, sculptures, and installations due to its versatility and ease of customization.
8. Education:
Educational Models: Laser-cut foam is used to create educational models and prototypes for various subjects, providing a hands-on learning experience.
9. Signage:
3D Lettering: Foam can be laser-cut to create 3D lettering and logos for signage and displays.
10. Architectural Models:
Scale Models: Architects and designers use laser-cut foam to create detailed scale models of buildings and landscapes.
11. Acoustic Treatment:
Acoustic Panels: Laser-cut foam is used to create acoustic panels for soundproofing and improving sound quality in spaces like recording studios, home theaters, and offices.
Laser cutting foam at home can be a creative and rewarding DIY project. Here's a general guide on how to laser cut foam at home:
Materials Needed:
- Foam Sheet: Choose the type of foam suitable for laser cutting, such as polyurethane foam, polyethylene foam, or EVA foam.
- Laser Cutter : If you don't have a laser cutter, you may consider using a laser engraver with cutting capabilities.
- Vector Design Software : Create or obtain a vector design of the shapes you want to cut. Software like Adobe Illustrator, CorelDRAW, or free alternatives like Inkscape can be used.
Step 1 - Prepare the Design:
Use vector design software to create or import the design you want to cut. Ensure that the lines are set to the appropriate cutting settings.
Step 2 - Choose Laser Cutter Settings:
Consult the specifications of your laser cutter and the recommended settings for the type and thickness of foam you are using.
Common settings include laser power, speed, and focal length. These settings may vary depending on the specific laser cutter and foam material.
Step 3 - Secure the Foam:
Place the foam sheet on the bed of the laser cutter. Ensure it is flat and securely positioned to prevent movement during cutting. You may use masking tape or other methods to secure the foam.
Step 4 - Calibrate the Laser Cutter:
Before cutting your actual design, perform a test cut on a small piece of foam to ensure the laser cutter is properly calibrated. Adjust settings as needed.
Step 5 - Load the Design into the Laser Cutter:
Load your design file into the laser cutter's software. Arrange multiple copies of your design if needed.
Step 6 - Run a Test Cut:
Before cutting the full design, run a test cut to confirm that the settings are appropriate. Check the depth and cleanliness of the cut.
Step 7 - Start the Cutting Process:
Once satisfied with the test cut, initiate the cutting process for your full design. Monitor the laser cutter during the process to ensure everything is going smoothly.
Step 8 - Post-Processing:
After the laser cutting is complete, carefully remove the cut foam pieces from the laser cutter bed. Be cautious as the foam may be hot.
Remove any residue or debris from the cut edges.
Step 9 - Clean and Maintain the Laser Cutter:
Clean the laser cutter's lens and bed regularly to maintain optimal performance.
Follow the manufacturer's guidelines for maintenance and safety procedures.
Important Tips:
- Ventilation: Ensure proper ventilation, especially when cutting foam, as it may produce fumes.
- Safety Gear: Wear appropriate safety gear, including safety glasses, when operating the laser cutter.
- Experiment and Adjust: It may take some experimentation to find the optimal settings for your specific foam and laser cutter.
1. Can any type of foam be laser cut?
While many types of foam can be laser cut, not all foams are suitable. Common types include polyurethane foam, polyethylene foam, EVA foam, and others. The suitability depends on the foam's composition and density.
2. What thickness of foam can be laser cut?
Laser cutters can handle a range of foam thicknesses, but the specific capabilities depend on the power of the laser cutter. Generally, foam up to several inches thick can be laser cut.
3. Are there safety concerns when laser cutting foam?
Yes, safety is crucial when laser cutting foam. The process may produce fumes, so proper ventilation is essential. Additionally, operators should wear appropriate safety gear, including safety glasses, to protect against laser exposure.
4. Can intricate designs be laser cut on foam?
Yes, laser cutting is ideal for intricate and detailed designs. The precision of the laser allows for the creation of complex shapes, fine details, and intricate patterns on foam surfaces.
5. What file formats are compatible with laser cutting software?
Laser cutting software typically accepts vector file formats such as SVG, DXF, or AI. These formats allow the laser cutter to follow precise paths defined in the design.
6. Can foam with adhesive backing be laser cut?
While it's possible to laser cut foam with adhesive backing, it's essential to consider the adhesive's composition. Some adhesives may release harmful fumes when exposed to the laser, so it's important to choose a foam product compatible with laser cutting.
7. Are there limitations on the size of foam that can be laser cut?
The size of foam that can be laser cut depends on the size of the laser cutter's bed. Larger laser cutters can accommodate bigger foam sheets, but the specific limitations vary between machines.
8. What settings should be used for laser cutting foam?
Laser cutting settings depend on the type and thickness of the foam as well as the specific laser cutter. Common settings include laser power, cutting speed, and focal length. Consult the laser cutter's manual and conduct test cuts to determine the optimal settings.
9. Can laser-cut foam be used for outdoor applications?
The suitability of laser-cut foam for outdoor applications depends on the type of foam used. Some foams may be more resistant to environmental factors, such as moisture and UV exposure, than others.
10. Is laser-cut foam suitable for creating prototypes?
Yes, laser-cut foam is commonly used for creating prototypes in various industries. Its precision and ability to quickly iterate designs make it a valuable tool for prototyping.
11. Can laser-cut foam be painted or coated?
Yes, laser-cut foam can be painted or coated with various finishes. However, it's important to choose paints or coatings suitable for the specific foam material and intended application.
Final Thoughts
As we navigate the frequently asked questions surrounding laser-cut foam, it becomes evident that this technology holds a multitude of advantages, from delivering precise cuts and intricate designs to offering customization and consistency. The safety considerations underscore the importance of responsible operation, ensuring that the benefits of laser-cut foam are enjoyed without compromising the well-being of individuals or the quality of the end product.
As technology continues to evolve, the applications and creative potential of laser-cut foam are likely to expand further, inspiring new innovations and pushing the boundaries of what is achievable in the world of foam fabrication. Whether it's for packaging solutions, artistic endeavors, or functional prototypes, laser-cut foam stands as a testament to the synergy between technology and creativity, offering a pathway to precision in an ever-expanding array of applications.
Leave a comment
Please note, comments need to be approved before they are published.
Live Chat: Mon-Fri 9am - 7pm (PT)
Before-sales: [email protected]
After-sales: [email protected]
Shipping Policy
Warranty Policy
Return & Refund Policy
Privacy Policy
Terms and Conditions
Cookie Policy
Payment Methods
Track My Order
Find My Order
© 2024 laserpecker.net.

- Choosing a selection results in a full page refresh.
Your cart is empty
Have an account?
Log in to check out faster.
Recommendations
There are no products in comparison list.
Please select at least 2 products to compare.
Please SAVE to make app work
Things to Do in Elektrostal, Russia - Elektrostal Attractions
Things to do in elektrostal.
- 5.0 of 5 bubbles
- 4.0 of 5 bubbles & up
- Good for a Rainy Day
- Good for Kids
- Good for Big Groups
- Adventurous
- Budget-friendly
- Hidden Gems
- Good for Couples
- Honeymoon spot
- Good for Adrenaline Seekers
- Things to do ranked using Tripadvisor data including reviews, ratings, photos, and popularity.

1. Electrostal History and Art Museum

2. Statue of Lenin

3. Park of Culture and Leisure
4. museum and exhibition center.

5. Museum of Labor Glory

7. Galereya Kino
8. viki cinema, 9. smokygrove.
10. Gandikap
11. papa lounge bar, 12. karaoke bar.
- Statue of Lenin
- Electrostal History and Art Museum
- Park of Culture and Leisure
- Museum and Exhibition Center
- Museum of Labor Glory

First refuelling for Russia’s Akademik Lomonosov floating NPP
!{Model.Description}
The FNPP includes two KLT-40S reactor units. In such reactors, nuclear fuel is not replaced in the same way as in standard NPPs – partial replacement of fuel once every 12-18 months. Instead, once every few years the entire reactor core is replaced with and a full load of fresh fuel.
The KLT-40S reactor cores have a number of advantages compared with standard NPPs. For the first time, a cassette core was used, which made it possible to increase the fuel cycle to 3-3.5 years before refuelling, and also reduce by one and a half times the fuel component in the cost of the electricity produced. The operating experience of the FNPP provided the basis for the design of the new series of nuclear icebreaker reactors (series 22220). Currently, three such icebreakers have been launched.
The Akademik Lomonosov was connected to the power grid in December 2019, and put into commercial operation in May 2020.
Electricity generation from the FNPP at the end of 2023 amounted to 194 GWh. The population of Pevek is just over 4,000 people. However, the plant can potentially provide electricity to a city with a population of up to 100,000. The FNPP solved two problems. Firstly, it replaced the retiring capacities of the Bilibino Nuclear Power Plant, which has been operating since 1974, as well as the Chaunskaya Thermal Power Plant, which is more than 70 years old. It also supplies power to the main mining enterprises located in western Chukotka. In September, a 490 km 110 kilovolt power transmission line was put into operation connecting Pevek and Bilibino.
Image courtesy of TVEL
- Terms and conditions
- Privacy Policy
- Newsletter sign up
- Digital Edition
- Editorial Standards

VIDEO
COMMENTS
The Laser sailboat has had a number of different rig sizes, with the intention of making the boat sailable by a wide range of sailors (and different sailor weights) by simply swapping out the lower mast section and sail while keeping all other components the same.
Pair of 4Spar Supports for the Laser® We always wondered why no one made a spar support to hold 4 spars. Go ahead and bring an extra upper or boom to that regatta. Made of foam, these mast holders are spar and deck friendly.
#1 K KBiedermann New Member I recently bought a 1976 Laser that needed a bit of work to be race ready. However, when I was flipping the boat, I noticed something sliding around inside. It sounds like something fairly large but does not bang around when moved. The boat never had any inspection ports installed so I have no idea what it could be.
Shop all ILCA / Laser sailboat parts, racing sails, hardware, and accessories at West Coast Sailing. Free Shipping Over $99* - 366 Day Returns - Dedicated Customer Support. Menu. Search. Close Search. Call Us +1-503-285-5536; Sign in & Register Compare ; Recently Viewed. Cart. More Back Apparel. Life Jackets ...
Flip the boat upside down. Dremel out the damaged area (of the 'Oreo cookie'). Go a bit further than the crack itself, and wider too. Make sure to get it all out. Clean it with acetone, vacuum, or air compressor, and let dry. Steps for R epairing the Hull to Deck Joint: Put on some latex/nitrile gloves.
SeaDek's PV/EVA foam boat flooring blend is designed to be comfortable. Our products offer safe, non-slip alternatives to other marine traction products. ... With an array of colors, textures, and unique laser patterns, the possibilities are endless when it comes to customizing SeaDek.
The Laser is a class of single-handed, one-design sailing dinghies using a common hull design with three interchangeable rigs of different sail areas, appropriate to a given combination of wind strength and crew weight. Ian Bruce and Bruce Kirby designed the Laser in 1970 with an emphasis on simplicity and performance.
Click Here Discover how to start the sport of Laser sailing with our step-by-step guide that quickly gets you onto the water. Even with NO experience at all, we simplify the process to help you learn the basics of sailing, along with tips and techniques used by expert sailors. This means you can get the most out of your Laser Sailing Dinghy faster!
Walter Cooper I've tested many sailboats while involved with Sailing World's Boat of the Year program and one of the coolest I've ever encountered is the Laser SB3. The absolute simplicity of...
Push Button Quick Release Pin for Laser Harken Vang/Kicker. £22.50 £24.99. Sold out. Laser Clew Strap - 91078. £13.50. PROtect Self Adhesive Chafe Tape Per Metre - 500 Micron 51mm £12.44 ... Laser 1 Boat Cover - PVC - Blue. 02/13/2024. Pleased with purchase. Very pleased with the boots. Good quality and fit. Julie. 2023 Gill Aquatech ...
Practice Sail for Laser Radial Sailboats (ILCA 6) Price: $175.00 Sale price: $139.99: Practice Sail for Laser Sailboats 4.7 (ILCA 4) Price: $165.00 Sale price: $129.99: Intensity Batten Set for ILCA/Laser Sails Fits ILCA7 Mk1 ILCA6 & ILCA4 Price: $14.99 Sale price: $10.99: Tapered Batten Set for Mk2 Laser Sail Price: $19.99 Sale price: $14.99 ...
When rigging a Laser sailboat, the first crucial step is to carefully insert the mast into the mast step located at the base of the boat's hull. Once inserted, it is important to raise the mast upright and secure it using a mast clamp or collar for stability. The next important task is to attach the sail to the mast.
Here's a checklist of 10 things to check when inspecting a Laser boat. Buying a laser dinghy can be a large commitment, so knowing what to look for is crucial. Here's a checklist of 10 things to check when inspecting a Laser boat ... Other methods include using a couple of custom-made foam or timber blocks or cradles, which have 3 recesses in ...
Flat side down is easier on the important side of the boat. High density foam at all contact points works fine. Don't rachet down tie straps to the point where you get deformation of the hull. ... Every official laser will have a sailboat sail number inscribed into the deck, or - if it's newer - in the back of the cockpit. Numbers that are less ...
$ 7,204.00 With a modern look, the Laser Vago provides the performance you'd expect for a rip-roaring ride! Easily sailed single or double handed, the Vago is surprisingly graceful in a breeze. She also durable with an almost indestructible roto molded hull.
For a 30mm thick Polyethylene (PE) Foam, my settings using Lightburn were: Power 18% (approx. 20 watts) / Speed 6mm/s / Perf cut 0.3 / Perf skip 0.2 / Kerf Offset ±1.25. For RDWorks you would need to use dot settings of Dot Time 0.05s / Dot Interval 0.2mm / Dot length 0.3mm. Laser Cut 30mm Thick PE Foam ...
Part 2: Applications of Laser Cut Foam. Laser-cut foam finds applications in various industries due to its precision, versatility, and ability to create intricate designs. Some common applications include: 1. Packaging: Custom Inserts: Laser-cut foam is often used to create custom inserts for packaging delicate or valuable items.
1. Electrostal History and Art Museum. 2. Statue of Lenin. 3. Park of Culture and Leisure. 4. Museum and Exhibition Center. 5.
Find company research, competitor information, contact details & financial data for BETA GIDA, OOO of Elektrostal, Moscow region. Get the latest business insights from Dun & Bradstreet.
Laser Retro Reflector with hands at the base of the panel housing to which the Laser Reflector assemblies are attached. 3.4. STORING REQUIREMENTS 3.4.1. Store this CryoSat-LRR-01 Laser Retro Reflector at storage facilities in Manufacturer-supplied Stowing Container at +5oC through +35oC, 80 percent relative humidity. No vapour of acids,
Rosatom's fuel company TVEL has supplied nuclear fuel for reactor 1 of the world's only floating NPP (FNPP), the Akademik Lomonosov, moored at the city of Pevek, in Russia's Chukotka Autonomous Okrug. The supply of fuel was transported along the Northern Sea Route. The first ever refuelling of the FNPP is planned to begin before the end of ...