
Affordable Sailboats You Can Build at Home

Last Updated by
Daniel Wade
September 13, 2023
Key Takeaways
- There are many sailboats that anyone can build from home depending on tastes
- Budget will be the biggest deciding factor on a majority of the process
- Consider kits that come with most of what you need or choose ones that are all-inclusive
- Design complexities and new materials may make the building time process longer
- Plan the best you can ahead of time to save money and your working hours
Buying a sailboat can be expensive, but building your own can save you money. So what are sailboats you can build from home?
Sailboats that you can build from home will likely be a small boat under 20 feet. These could be from many different boat suppliers such as B&B Yachts, Brooks Boat Designs, and Chase Small Craft. Boat plans will vary based on your budget and how much time you have on your hands.
Based on my previous experience, building your own boat will take much longer than if a professional were to do it. You also have to be able to study plans, consider various sailboat designs, and have tons of supplies such as fiberglass tape or fiberglass cloth. On top of that, you will also have to be good with your hands.
Table of contents

Top 10 Affordable Sailboats Anyone Can Build at Home
Building your own pocket cruiser or other styles from boat plans is an impressive feat, as this will need dedicated time and money to assure your boat sails safely. Boat building takes a lot of patience as well, especially since this will not be completed in a fast manner.
Finding boat plans and materials that fit your budget will be key to being able to complete the project. The time it takes to complete these projects will vary on your overall experience and needs. Below are 10 of the most affordable sailboats that you can build in the comfort of your home.
B&B Yachts

B&B Yachts have 14 different boat plans you can choose from to find the boat of your desires. Their shop is located along the Bay River in North Carolina where they construct all of the kits and have a 100 foot dock to show off your project once you complete it.
One popular model to check out is their Core Sound 15, as it is the perfect size for those wanting to build a modest size boat for a handful of people on board. Their website features some videos of completed projects and the plans or kits for purchase.
- 14 different models to choose from plus some dinghies
- Various monohull and multihull options
- Friendly customer service with attractive prices
- Might be too many options for some that are indecisive
- Not ideal for those wanting to have a motor sailer
Brooks Boat Designs

Brooks Boat Designs has a handful of options to consider for your next sailboat building project. They are located in Brookline, Maine and give the option to buy the kits or have them build one from scratch for you. They have plenty of knowledge, so do not be shy to ask about modifications or custom features you are looking for.
Depending on your specifics, they can attempt to accommodate some of their plans to help fit your desired outcome. By checking out their site, you can see many examples of their construction in progress and what the boats will look like when completed.
- Offers a variety of kits
- Plans vary around $50 and up, while materials will obviously add more costs
- Some plans can be rowing boats that can convert to sailboats
- Might take a while to hear back from them, as their contact section is a little outdated
- Their plans may not accommodate a ton of extras for your taste
Chase Small Craft

Chase Small Craft offers a simple process for building boats. Their kits are equipped with everything you need and will help save you time than just buying the materials outright and other parts you could need. This is arguably one of the best bang for buck instances if you want to save time and money searching for pieces to your boat.
They are located in Saco, Maine and will ship everything to your home from there. All the necessary materials are included and all you need are the proper tools and working space.
- All-inclusive kits with what you need
- Tons of knowledge on their site for boat building
- Easy process to order and customize
- Complete kits can range over $20,000 for larger boats
- Kits may take up to eight weeks to ship out
Chesapeake Light Craft

You can expect high-quality boat kits from Chesapeake Light Craft . They feature 18 different sailboat kits that vary from eight to 20 feet in length. This should be more than enough to find one for you if you are newer to boat building.
They also have a wide variety of other kits in addition to the sailboat, in the event that you wanted to order a small kayak or paddleboard in addition to your sailboat. The prices vary considerably when considering a small or larger boat, so check the complete list of options to in order to potentially fit your needs.
- Plenty of sailboat offerings to choose from
- Different beautiful hull form options to consider
- Easy to build and perfect for sailing
- Only has basic materials needed for kit, so you may need to purchase other items
- Has epoxy shipping fee no matter if you pick up item
Dudley Dix Yacht Design
Dudley Dix Yacht Design has an extensive list of plywood and single skin sailing boat options. They have plenty of sail plans and kits to consider depending on your goals. These follow a classic look for sailboats, which are aesthetically pleasing.
If you are wanting one to accommodate a small family, they have more than plenty to look through. The cost is not as bad compared to others, but keep in mind that you may need to throw in your own supplies or specific tools to get the job done.
- Plans start at $30 and range up to $7,500 or more for kits
- More than enough of options to consider
- Affordable variety of sailboat offerings
- Might be too many options for those new to sailing
- Most are wood without the use of aluminum or steel
Farrier Marine

If you are in search of a multihull to build, then Farrier Marine is what you need. They offer a unique folding catamaran that is trailerable and give you the option to build it yourself. This not only makes it an appealing option, but anyone can take this multihull boat wherever they want with ease.
It features a thorough construction guide once you receive all of the materials. These also come with stainless steel fasteners and an aluminum mast for high-quality materials. Pricing will vary since you must request which model type you are considering.
- Ability to build a unique catamaran
- In-depth construction guide to help
- Easily handled and trailerable
- Price may be too high
- Limited offerings since only a few multihull options
Glen-L Marine Designs

Building a boat from Glen-L Marine Designs can save you time and money. They feature an easy system to order and receive the kits, as well as an in-depth guide to building them. This is an appealing option compared to most boat kit sellers.
The beauty about Glen-L is that anyone can build these from scratch, so you do not have to be the best boat builder in the world to get it done. They offer guides and helpful insights from their team to point you in the right direction. Plans vary around $15, while kits can range well over $1,000 depending on boat size.
- Nearly 50 designs to choose from
- Complete guide to help anyone build it
- Plenty of price points depending on size
- Might be overwhelming with the amount of options
- Could take a while to get parts since they are popular
John Welsford Boat Designs

John Welsford Boat Designs invites new and veteran boat builders that want a taste of quality small wooden boats. The boat plans are designed to meet your specifications and are catered to your desires.
There are seven sailboat designs to choose from so you do not feel overwhelmed in the process. However, they do not sell kits all the time, so you would need to have the materials or be on the lookout for the best prices when they are available.
- Seven sailboat plans with different sizes
- Quality boat builder and supporting community
- In-depth knowledge provided to you when you order
- Might be too small of boat size
- Kits are not always available
Iain Oughtred
There are plenty of options on the wooden boat store, but you should narrow down your search for Iain Oughtred’s line of sailboat kits and plans. There are 25 different plans to choose from, which should accommodate most everyone looking to build their own boat.
While they do offer some kits, they do not routinely offer sailboat kits. You would need to purchase all of the materials if you are considering one of their sail plans. Keep this in mind if you are considering, as you would need to hunt down the parts yourself.
- 25 different sailboat plans to look through
- Various sizes to contemplate for you sailing needs
- Prices will vary but are not bad compared to market
- No sailboat kits, only plans
- Newer boat builders might find too many options unappealing
Paul Gartside Boat Builder and Designer
Gartside Boats is a boat builder company based in Long Island, New York that showcases a variety of boats from traditional and newer methods of boat building. Within that variety, they have boat plans meant for six to 50 feet in length.
With an abundance of options, you will need to contact them regarding prices and any customizable options. Kits may vary as well, as they typically design in-house and build for you.
- Experienced boat designer that can accommodate with custom plans
- Many options are trailerable
- Can have plans for up to a 50 foot boat
- You will need to contact them for prices
- Customized options may make process more complicated for new boat builders
How Much Does it Cost to Build a Sailboat at Home?
As you have likely already done so, the math between building your own boat and buying one may be a huge difference. Likewise, you may even enjoy the challenge of taking an older boat that is gutted and restoring with parts from a kit to build one new again.
But how much does it cost exactly to build a boat from the comfort of your own garage or workshop? The prices are going to vary dramatically depending on your situation and material needed to get the job done. In addition, the time that it takes to complete this will also vary.
Sail plans are rather inexpensive if you are aiming to build a small boat. These plans allow you to see the workings of the boat design and what you need to build the boat.
Without these plans, you will not know the exact details of the design and it can cause major issues with the boat’s hull or other areas of the boat. Think of these as the backbone or instructions of the boat’s infancy before being built.
Price Per Square Foot
You should assume to pay anywhere between $300 to $600 per square foot if you are interested in building a boat. Buying a kit outright can be a good way to save time, but oftentimes these do not come with everything you need.
Instead, you should try to source as much of the materials at the best price as possible. Thinking ahead is part of the process and you might be able to score a deal at a lumber yard or hardware store for parts.
Boat Designs Matter
The design of the boat will be much different from one boat to the next, regardless if they are the same size in length. If you are pondering boats that range anywhere between 16 and 20 feet, you should factor in the shape of the hull, any rigging, and various appendages.
Prices tend to increase when there are more complexities within the designs. If you are considering a kit with more details than others, you will also have to pay more for the designs on that as well.
Kits Can Differ
It is important to understand that all kits are not going to be the same. As you gander at sailboat kits online to stitch together, you need to thoroughly look over to see if you have everything you need before buying.
It would also be at your advantage to ask the seller if any additional parts or supplies are needed. This may change your dynamic on the kit buying process and you may pass up one for another if it has everything you need. An all-inclusive kit may cost several hundred, if not thousands, of dollars more to have the convenience of everything in the bundle.
Construction Approaches
Some boat plans may require you to have certain tools to get the job done. This means special saws or planers, which the average person simply does not have.
Purchasing specialty tools might be expensive upfront and hard to find depending on what it is. Your best bet would be to check locally for others trying to sell their tools or consider a boat plan that does not require extensive tools to finish the job.
How Long Does it Take to Build a Sailboat?
An easy to build sailboat could take a while to build from scratch. Many different variances come into play that are difficult to pinpoint for everyone. But how long is that exactly and how will your experience play into this?
A fun project to sail in the wind could take you several months to well over a year depending on the boat plan and how big your boat is going to be. In addition, the materials all need to be accounted for prior to starting in the event a hardware store does not have them in stock.
Time Varies
The time that passes for simple boat designs on small sailing vessels can be done in a few weeks. This is assuming you have everything you need and work non-stop around the clock.
Certain complex situations may make the process long, such as the difficulty of working with some materials. If you are a skilled laborer, it may take you half the time compared to a novice. The amount of time it can take will vary on your availability and skill level.
Planning ahead will undoubtedly offer the most time-saving features. It also helps if you can tackle parts of the project at your own pace.
Complexity of Design
The design of the boat may make the construction process longer. For example, it may take you longer to build a catamaran compared to a similar lengthed monohull.
More complex designs might require more materials, therefore making the process a bit longer to complete. Furthermore, you will also need more experience working with difficult designs and that will affect you more as a newbie.
Be sure to manage your expectations well and do not allow yourself to become too stressed over this fun project. If you can, seek expert boat building advice from a local builder or the company you purchased sail plans through.
Quality Materials
The quality of the materials will matter significantly when building a boat and will greatly affect the time it takes to construct it. Handling fiberglass or carbon fiber might require specialty tools, while wood also demands a certain level of craftsmanship.
If you are not skilled at working with the material at hand, it might affect the quality of the build and you may have to go back to fix mistakes. This will definitely add more time to your project, because mistakes are bound to happen with your first project.
To save time, consider adding the tools and materials throughout the year or as often as your budget allows. You may want to try testing your skills on fiberglass or other materials to get a feel for how to work with it.
Related Articles
I've personally had thousands of questions about sailing and sailboats over the years. As I learn and experience sailing, and the community, I share the answers that work and make sense to me, here on Life of Sailing.
by this author
Best Sailboats
Learn About Sailboats
Most Recent

Best Small Sailboat Ornaments
September 12, 2023

Best Small Sailboats With Standing Headroom
December 28, 2023
Important Legal Info
Lifeofsailing.com is a participant in the Amazon Services LLC Associates Program, an affiliate advertising program designed to provide a means for sites to earn advertising fees by advertising and linking to Amazon. This site also participates in other affiliate programs and is compensated for referring traffic and business to these companies.
Similar Posts

Discover the Magic of Hydrofoil Sailboats
December 11, 2023

Best Bluewater Sailboats Under $50K

Hunter Sailboats: Are They Built for Bluewater Cruising?
August 29, 2023
Popular Posts

Best Liveaboard Catamaran Sailboats

Can a Novice Sail Around the World?
Elizabeth O'Malley
June 15, 2022

4 Best Electric Outboard Motors

How Long Did It Take The Vikings To Sail To England?

10 Best Sailboat Brands (And Why)
December 20, 2023

7 Best Places To Liveaboard A Sailboat
Get the best sailing content.
Top Rated Posts
Lifeofsailing.com is a participant in the Amazon Services LLC Associates Program, an affiliate advertising program designed to provide a means for sites to earn advertising fees by advertising and linking to Amazon. This site also participates in other affiliate programs and is compensated for referring traffic and business to these companies. (866) 342-SAIL
© 2024 Life of Sailing Email: [email protected] Address: 11816 Inwood Rd #3024 Dallas, TX 75244 Disclaimer Privacy Policy
How to Build a Wood Sailboat

Introduction: How to Build a Wood Sailboat

I've been wanting to combine my two favorite hobbies - woodworking and sailing for a long time, so I thought I'd build a boat. It's got classic lines and looks so dazzling in the sunshine that people constantly stop me at the boat ramp to ask me about it. There's something unbelievably rewarding about building something like this from scratch. This is definitely a boat that is much better built than bought . Here's how I did it.
The boat takes about 100 hours to build. I did it over 3 months, working a little bit just about every day and full days when my schedule permitted.
It will take about $1,000 in total to build if you buy everything at full retail cost (not including tools you might need to buy), but you can spread that across the length of the project. For example, you only need to buy one $30 sheet of plywood at a time, take it home, draw out the parts (loft) that fit on just that sheet and cut them out. That will take a couple of hours right there. Some boating supply stores (chandleries) might let you setup an account which might give you a discount if you tell them you're building a boat.
All of the skills needed to build a sailboat can be learned slowly, one step at a time. For example, if you've never fiber-glassed plywood before, just practice on a small piece first to get your confidence up. This was my first boat build, so I did a lot of learn as you go . Not only am I going to show you the right way to successfully build your own sailboat, but I'm going to share with you the mistakes I made along the way to hopefully save you from repeating them.
The end result will be a very attractive little 8 foot long pram, that is easily made out of 4x8 sheets of plywood that is light enough to put in the back of a small pickup truck or roll down to the local lake on the optional dolly. Anything longer would require you to either make a scarf joint (which is a bit tricky) or buy longer sheets of plywood (which is considerably more expensive).
What you will need:
Boat building plans
8 panels of 1/4" oak plywood 4'x8'
Pencil, Sharpie, ruler, tape measure, yard stick, etc.
Long flexible straight edge
Box of 1" brad nails
2 gallons of epoxy resin
1 gallon of epoxy hardener - SLOW
1 quart silica thickener
5 quarts wood flour thickener
1" masking tape
Japanese pull-saw
Table saw (helps, but optional)
Round-over router bit
Flush trim router bit
Palm/random orbital sander
220 sanding discs
Combination square
Drill bit set
Drill bit extension
Basic hand tools
Small diameter wire or zip ties
Wire cutter
12 C-clamps - 3"
Mixing cups, mixing sticks, rubber/nitrile gloves
16' x 60" of 6oz fiberglass cloth
2" plastic spreader
Gallon of waterproof glue
Glue roller
Silicone bronze screws
Stainless steel fasteners
Small blocks
Gudgeon & pintle - dinghy size
Patience - large
Elbow grease - large
For more detailed explanations on each step and more specific info/reviews on the materials and parts used, check out my boat build blog: www.Midnight-Maker.com
Step 1: Cutting Out the Parts...
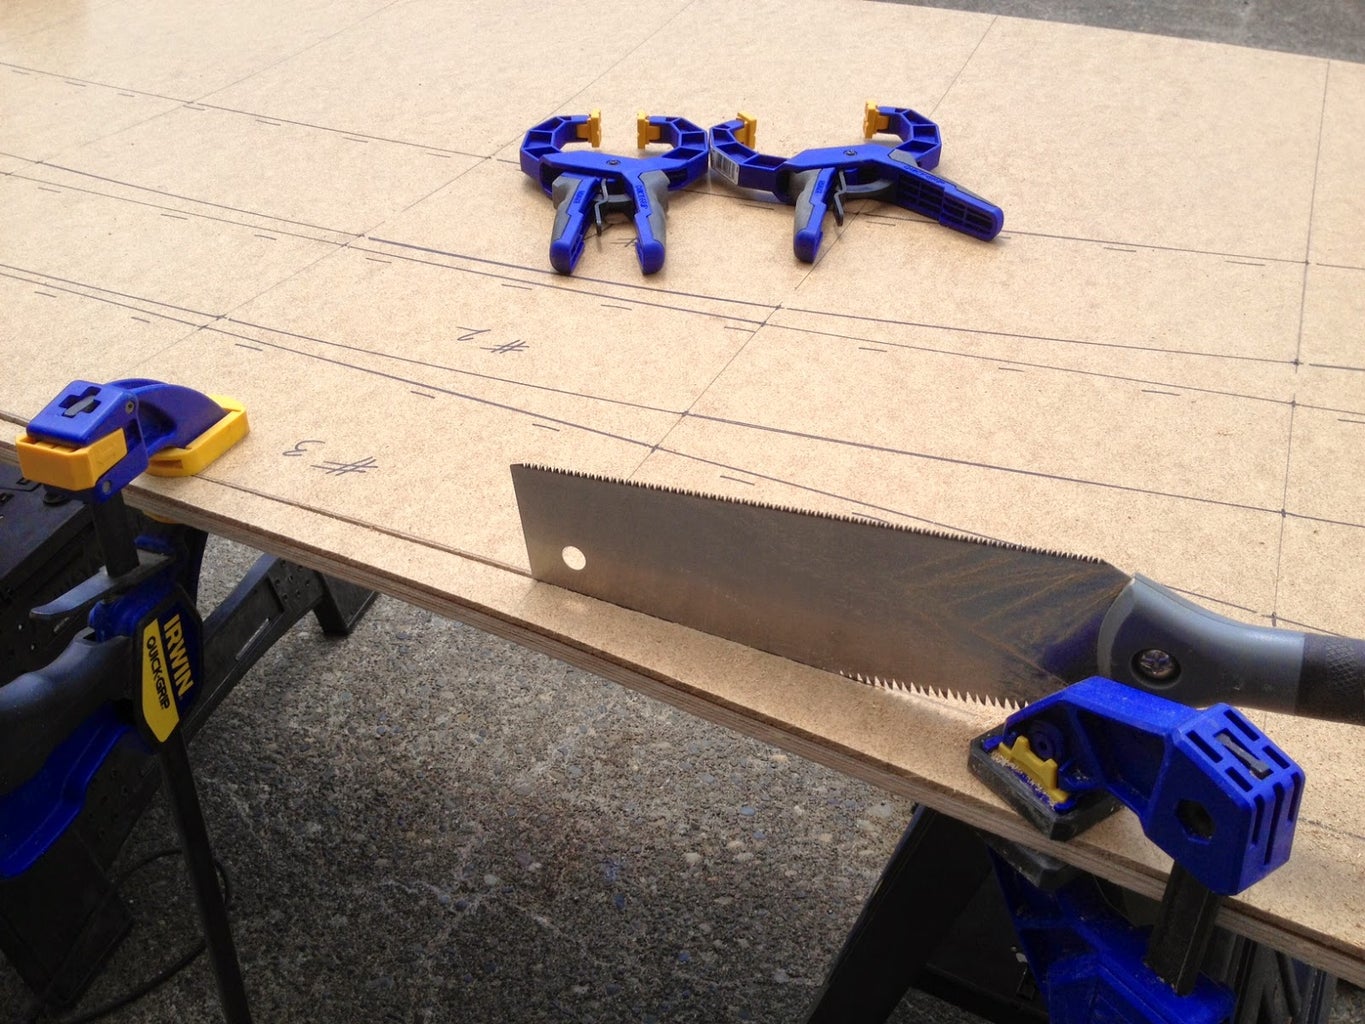
First, you'll need boat building plans. I purchased some very nice ones from a popular boat building website because I had a specific style in mind to build, a "pram". It's a Norwegian design with lots of buoyancy in the bow and building a pointy boat is a little more difficult. There are a bunch of free boat building plans (search "dinghy") online. Also, I wanted my boat parts to fit in a standard (read cheap) 4'x8' sheet of plywood. It also had to be light enough for me to load/unload/move myself. This boat weighs in at about 70 pounds. When on the custom dolly I built, it's very easy to move from the parking lot to the lake.
Next, you'll need to draw out the parts of the boat full-sized onto the plywood (lofting). I actually did this step on hardboard/masonite because I wanted to make templates of all the parts in case I ever wanted to build another one.
This step requires you to be very meticulous. Carefully transfer the measurements (offsets). They may or may not look correct because it's very non-intuitive to look at curved boat parts that are laying flat. Some parts actually bend the opposite way you think they should. To make the curves, I nailed a bunch of 1" brads into the panel and used a long, flexible straight edge (yard stick, etc.) bent to follow the curve, then I traced the curve with pencil/Sharpie. Once I removed the brads, I had perfectly smooth curves. Keep in mind that with the side panels that are symmetrical to both sides of the boat, only draw out one version and cut two stacked sheets at a time. This ensures the boat will not be lop-sided. Make sure to immobilize the two sheets together with screws outside of the boat parts or use double-sided tape/clamps, etc. to keep the parts registered properly.
Using a Japanese pull-saw allows you to control the cuts very carefully and it can follow the graceful curves. They cut on the pull stroke which means they're very easy to control. Make sure you leave a bit of your cut line, meaning cut just outside the line. This allows you a bit of a safety margin and you can always sand to the line to sweeten it up. This is where the elbow grease really kicks in. It takes hours to cut out the hull panels by hand, but it's worth it. I tried cutting the first part out with the jigsaw and it wandered all over the place and quickly cut inside the line before I knew it. Also, a jig saw blade can lean to one side which could mean two panels might not be the exact same shape. Using hand tools is a classic way to do woodworking and is a very gratifying process. With hand tools, things happen slow enough for you to be in total control, whereas power tools can quickly do unexpected damage. With the understanding that you're building a classic boat, using hand tools wherever possible is part of the philosophy.
The plans I bought were in metric and called for 6mm (1/4") and 9mm (3/8") plywood, but I wanted to make everything out of 1/4" plywood so the thicker parts in the plans were glued together with two layers of 1/4" (so at 1/2" they were a bit thicker than designed). I actually liked this because it made the boat feel sturdier and of course it was cheaper that way. The trade-off was that the boat would be a bit heavier.
For any of the parts that need to be doubled-up/laminated (e.g. the transoms), now is a good time to do that. Make sure you use "waterproof" glue instead of "weatherproof" glue like I did...
Spread a thin layer of glue over one of the "bad" sides (plywood usually has a good side and a bad side, glue bad sides together so good sides show on both outside faces), making sure it's completely covered (I used a special glue roller), then carefully place the other half on top. Align all of the edges together, then clamp them in place. Now put heavy things carefully on top to press the parts together. The glue should be dry in about 6 hours.
NOTE: It's considerably easier and safer to do any woodworking processes to the parts before you assemble the boat. This way, you can safely clamp pieces to the work bench and cut out handle holes, etc. Since my boat is a "lapstrake" design, I had to route a rabbet (groove located on the edge) carefully on the bottom edge of each side panel. This creates a shoulder for the parts to sit on, positively locating them while you're stitching the panels together. Likewise, the grab handles in the transoms are much easier to cut out before putting the boat together.
Also keep in mind that any mistake will be considerably more painful the further you are along in the build. For example, if I biff cutting out the grab handle holes while they're just loose pieces rather than when they're a permanent part of the boat, it's much easier to recover - just make another transom. If you had to patch a hole in the boat, it would be difficult and possibly never look perfect. No pressure...
Step 2: Assembling the Hull...
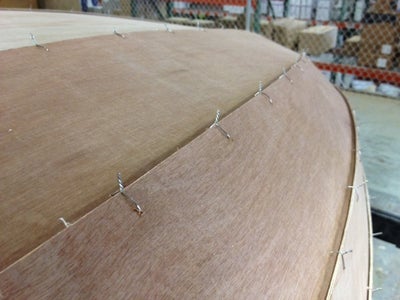
Once you have the bottom and sides cut out, you can start to "stitch and glue" the hull together. This is a technique used usually for smaller boats to be able to pull the hull form together without the need to build a frame or mold (which can take almost as long and as much wood as the boat itself).
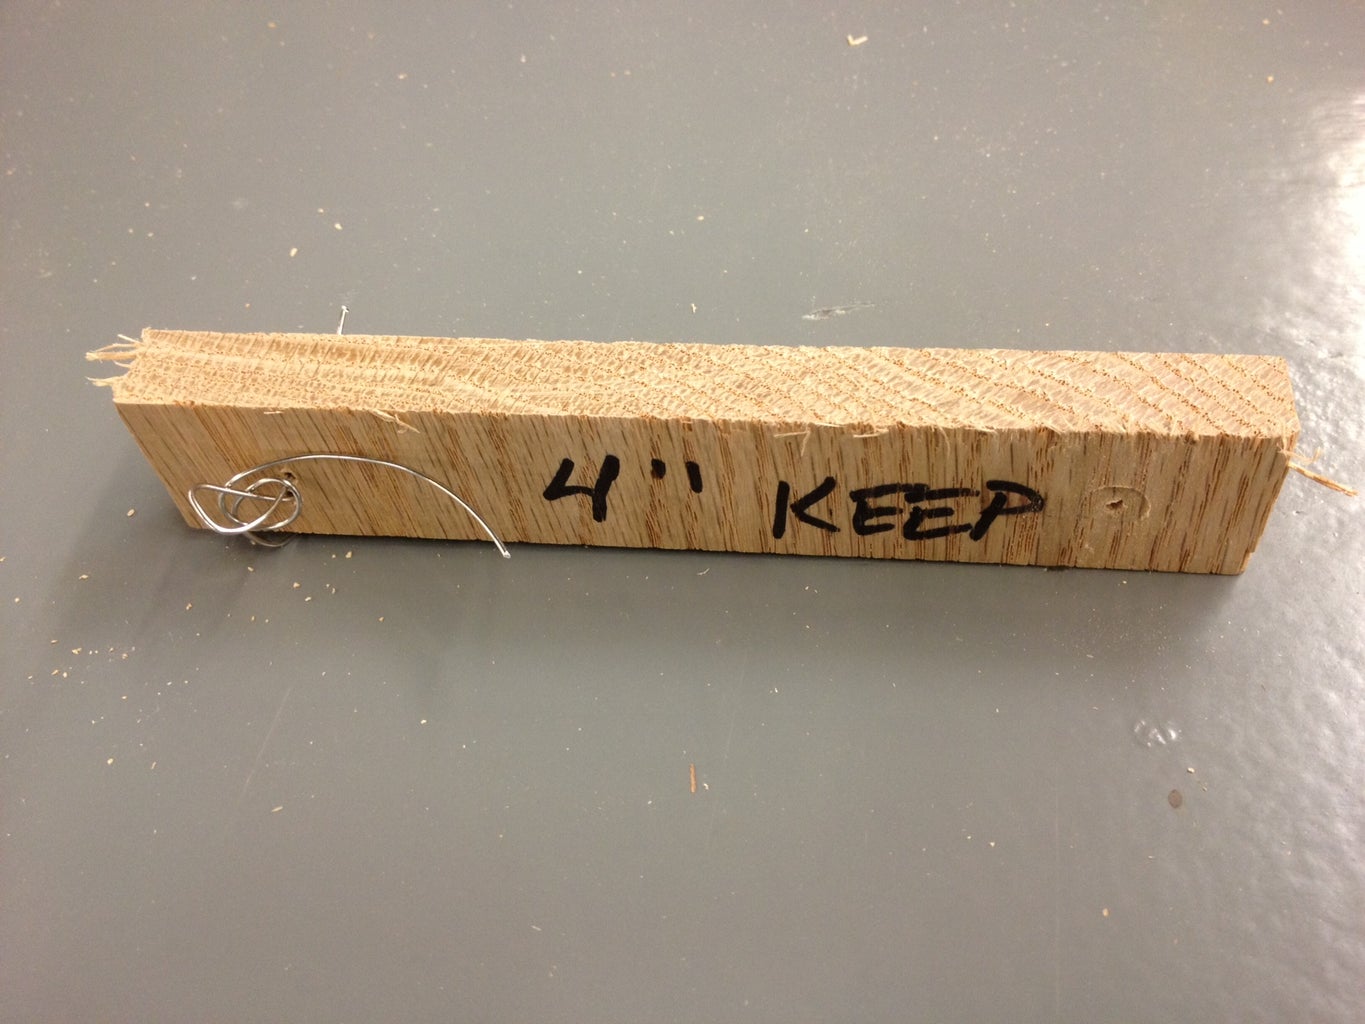
I built a gauge stick to make sure my holes were perfectly spaced at 4" at 1/2" in from the plywood edge. It was 1" wide so either edge was the required 1/2" from the centerline. I worked my way down one side of each of each mated seam and drilled all those holes at once while the panels could lay flat on the bench. Make sure to use a backer block to prevent tear out on the back side, even with such a small drill bit.
With one mating panel drilled with a 1/16" drill bit, hold the mating panel in it's relative position. I used some spare twine to wrangle my panels into the proper orientation as I was marking them. Make a pencil mark where the mating hole should be, remove the pre-drilled panel and drill the second set of holes 1/2" in from the edge. This makes sure there's enough strength to hold the boat together.
The first pass on the stitches is just to get the hull together structurally. You can always go back and make the stitches fancier/tighter and tweak the position of the panels.
The stitches go from the inside out. Cut 6" lengths of wire and bend them into long, narrow U's that are the width of the distance between the holes. Stick the ends through the holes and carefully twist the tails together on the outside of the hull, making sure not to damage the plywood. If you're using zip ties, then the holes you drill will need to be bigger and you'll have to start on the outside, go in, turn around, then back out, then "zip".
Make sure your panels' rabbet shoulders are resting securely on the mating panel and carefully tighten all the stitches. For my boat, once I had two panels stitched to the bottom panel on each side, it was time to attach the transoms (ends). Once all of the exterior parts are stitched together, you should have something that looks like a boat. It will be a little rickety at this stage, but that's okay.
NOTE: In the photos I took of my build, you'll notice that the transom doublers (reinforcers) aren't in place. That was because I was following the instruction manual, but I think that was a mistake, so I highly recommend laminating (gluing) the doublers to the transoms before you stitch the boat together.
Step 3: Reinforcing the Hull Joints...
Now that the hull is stitched together, flip it over upside down. You'll be surprised at how stiff it is, considering how difficult it was to wrangle all those panels into position. Be careful, there's lots of poky wire ends sticking out all over the place.
I used a technique called "tabbing", meaning I made small, structural tabs from thickened epoxy that fit between the stitches, then I removed the stitches and made one long, larger fillet to connect the hull panels together.
Make sure your panels are perfectly aligned and tightened. I used a nipper to lop off most of the tails so they wouldn't get in the way, but that left very sharp spikes.
Make sure your boat is square. Take diagonal measurements from corner to corner, make sure the boat parts are parallel to each other, etc. because if there's a twist in your boat, the next step will make it permanent, which will affect the boat's performance.
Now mix up a batch of epoxy and silica thickener according to the manufacturer's directions (meaning each type of epoxy has a different resin to hardener ratio) until it's between the consistency of thick ketchup, but runnier than peanut butter (make sure to mix the 2 parts of epoxy together first very well before adding a thickener). Too thick and it won't fill the void, too thin and it'll run down inside the boat. Both are bad. I used a small syringe to inject the mix into the V intersection between the panels and checked underneath/inside to see if there were any runs.
Once the epoxy has partially set, use a glove wet with denatured alcohol to smooth out the "tabs" so they fit inside the V groove and don't extend above the intersection between the panels. This will give you good practice for the seams that will show on the finished boat. Be careful of the wire spikes.
Repeat this process for every seam on the hull. Let it cure overnight.
Once the tabs have cured, carefully remove the stitches. If the wire seems to be epoxied permanently to the hull, heat the wire with a lighter. That will soften the epoxy enough to pull the wire out. Be careful not to scorch the boat (you don't want a Viking funeral). Now repeat the thickened epoxy process for each overlap, except this time each seam will need to be one long, smooth joint. Let it cure overnight. This goes a long way in making the boat hull structural.
Step 4: Fiberglassing the Hull...
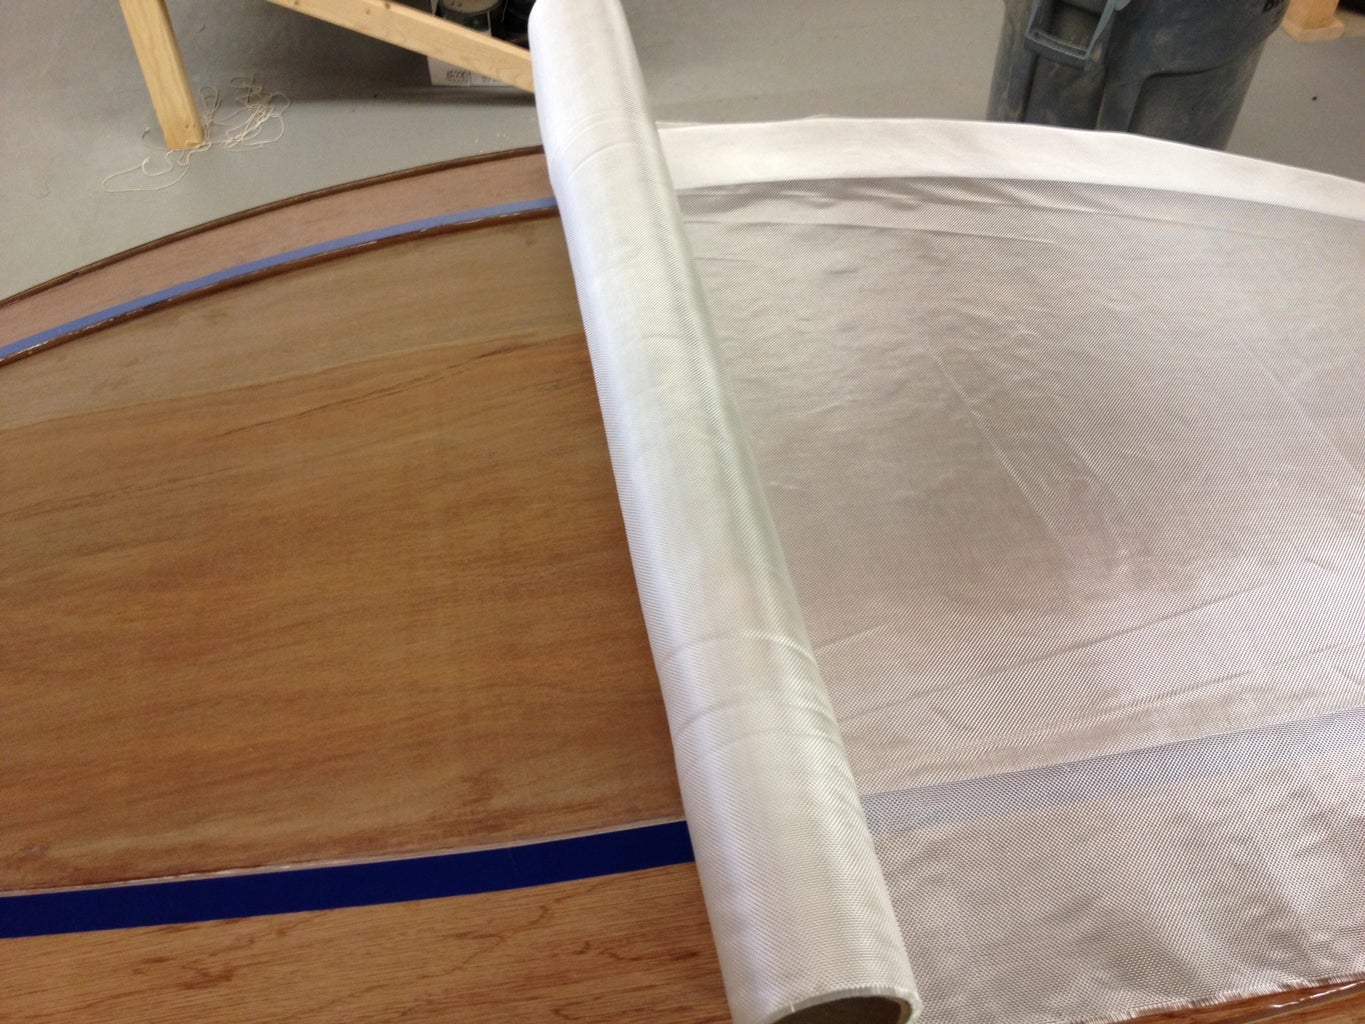
Now that you've got a permanent hull shape, it's time to make it waterproof and rugged. Fiberglass and resin over plywood is a tried and true Do It Yourself boat building technique which makes it strong and light.
Mask off the bottom panel and roll out your fiberglass cloth. Smooth the cloth out very carefully so as not to snag or tweak the fibers' orientation. Mix up an unthickened batch of epoxy (it will be the consistency of syrup). Starting at the stern, pour a small puddle of epoxy and spread it out nice and thin. You should be able to squeeze most of the epoxy out of the cloth, leaving only saturated cloth with no dry spots (which will appear white) but the weave should still be showing (meaning no extra epoxy is pooling). You should easily be able to see the wood grain through the cloth now.
Let the epoxy partially cure and using a razor, slice the dry fiberglass cloth away on the taped seam. Then remove the masking tape. Let the epoxy cure overnight.
Flip the hull over and mix up a batch of epoxy that is the consistency of peanut butter. I masked off the joint, but this step is optional, but keep in mind that it will be visible if you plan on finishing the interior bright (varnished wood). It's not as critical if you're painting the interior. With a plastic spreader, carefully make a large radius transition (fillet) between the bottom panel and the first side panel (garboard). Remove the masking tape when the epoxy mixture is partially cured and carefully scrape/wipe any unwanted mixture. It's much easier to remove now than having to sand it all off later. At this point, it's also a good time to fillet the transoms to the sides using 3/4" radius tabs between stitches and 1" finished fillets after you've removed the stitches. Let the fillets cure overnight.
Now, repeat the entire fiberglassing process on the inside. Except instead of just doing the bottom panel, make sure both the bottom and the garboard are fiberglassed. This is basically the waterline of the boat. The fillet should allow the fiberglass cloth to smoothly make the bend between boards. Remove the excess cloth when partially cured and let sit overnight. Some people fiberglass up onto the transom at this stage which will make the boat stronger, but that means you have to have already filleted the transoms to the bottom.
Step 5: Installing Interior Parts...
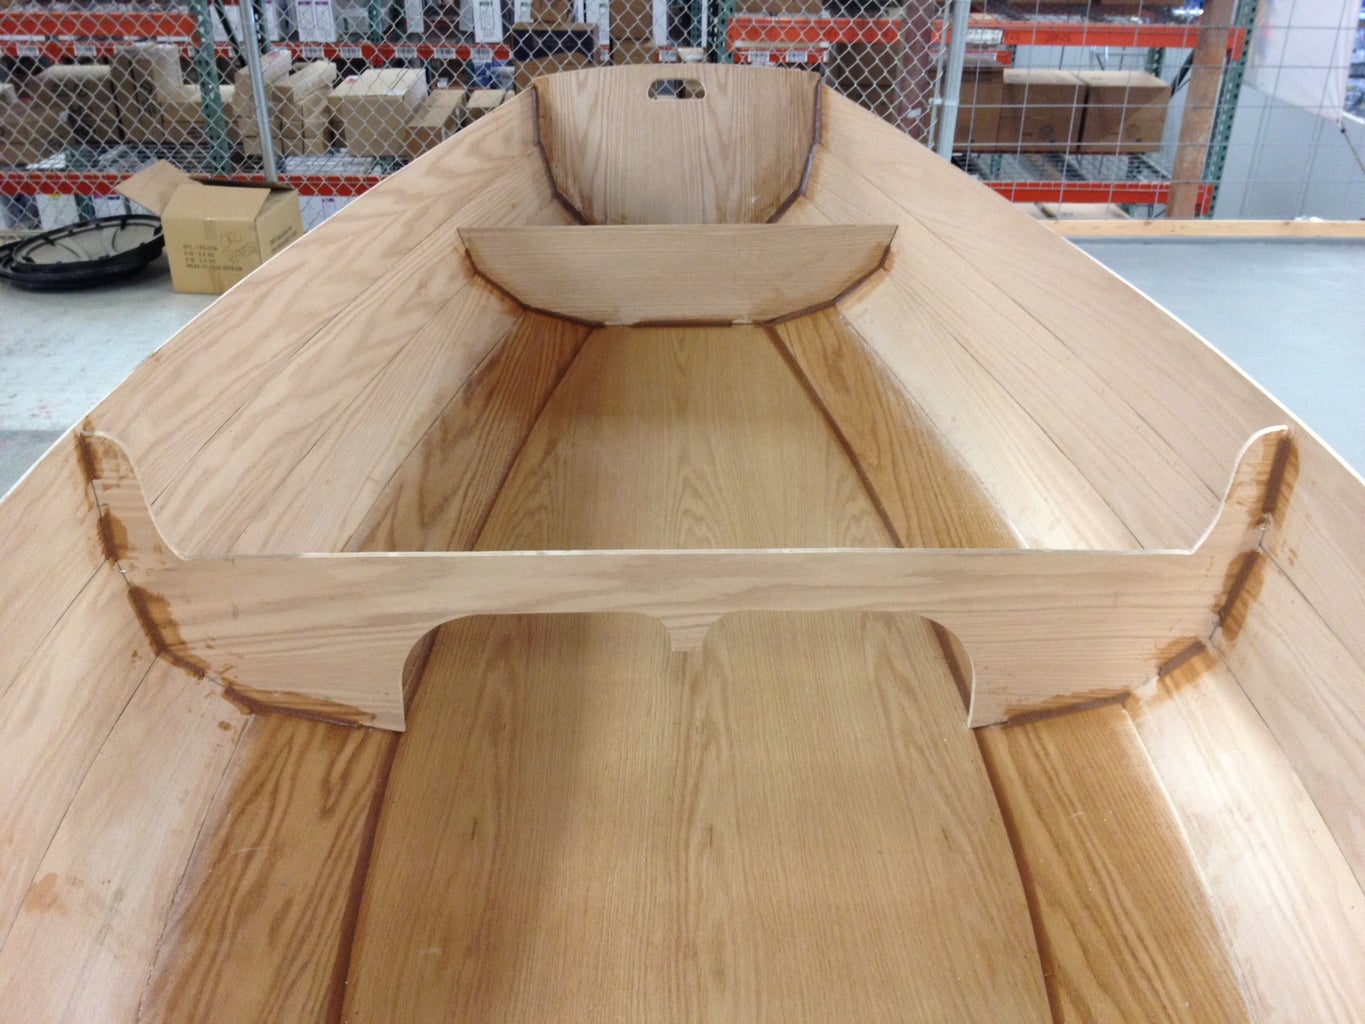
The bulkheads get stitched in place just like the panels. They will make the already stiff (and much heavier boat) completely structurally sound and push/pull the sides into their final shape. Then make 3/4" "tab" fillets between the stitches to lock them in place, remove the stitches and make long, smooth 1" fillets. The smaller fillets will get covered by the larger fillets. I used two different modified plastic spreaders to do this step. Each spreader was cut with a box knife and filed/sanded into its final shape.
While you're doing the previous steps, if you're in a time crunch, go ahead and build the daggerboard trunk. It's made of numerous parts that are pre-coated with a couple layers of unthickened epoxy, then glued together with silica-thickened epoxy. This makes it strong and waterproof as it will be below the waterline so must be completely waterproof.
The daggerboard trunk is the most important part of the boat, especially if you're making a sailboat version (this boat can easily just be used as a rowboat). Not only does it support the center seat (thwart), but it has to transfer all of the force from the sail to the water and if you run the boat aground, it takes all the shock loading from the daggerboard.
The daggerboard gets filleted into place like everything else. Make sure it's perfectly on the centerline of the boat as that will affect its sailing characteristics.
Next, let's make the daggerboard slot in the center thwart. I set up a straight edge with a spiral upcutting router bit. Make sure to enlarge the slots at the end of the center thwart so that it can fit around the fillets of the center bulkhead. Now is the time to ease the edges of the center thwart because you'll be sitting on it a lot, so it needs to be comfortable. Because it's so thin, I only routed the top edge of the center thwart that shows and just hand sanded the edge underneath (it's very problematic to use a round-over bit on the second side of a thin board). Paint all of the thwarts with three coats of unthickened epoxy, especially the undersides. Once the woodworking is done, the thwart can be epoxied into place with peanut butter (or you can jump to cutting the daggerboard slot in the bottom of the hull). Make sure the thwart fits snugly in place. Drop dollops of peanut butter on the top edges of the center bulkhead and daggerboard case and spread it out evenly (make sure none gets inside the slot to interfere with the daggerboard). Firmly seat the thwart (pun intended) into the goop and weight it down. Let it cure overnight.
While you've making sawdust, cut out the mast hole (partner) in the forward thwart by drilling holes in the four corners (for the square mast we're going to make), then cut out the sides, file it smooth, then round over the top edge with the router.
Any time after the bulkhead thwart fillets have cured, you can seal the airtank chambers. Paint the bottom, sides, inside of the bulkhead and transom up to the level where the thwart will be.
Step 6: Rail & Sailboat Parts...
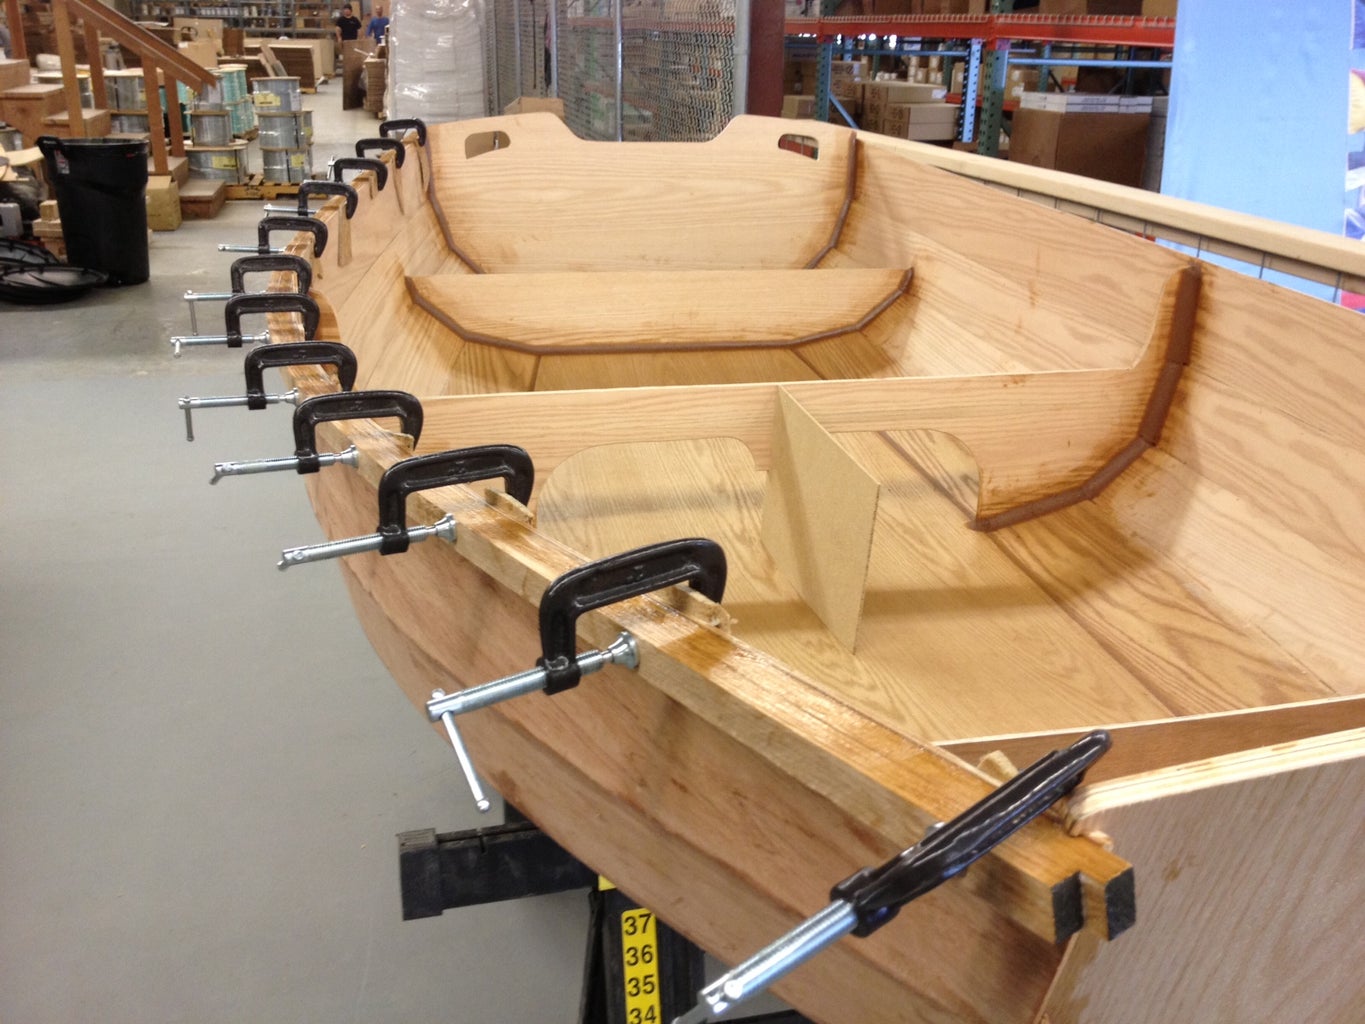
There are several processes in this boat building instructable that can be done concurrently. While you're waiting for the epoxy on one part to cure, you can be doing woodworking or epoxying another part. This step illustrates that point. While you're waiting for the epoxy on the rub rail (outwale) to cure, you can be fabricating the sailboat accessories (e.g. daggerboard, rudder, tiller, spars, etc.).
In order for the outwale to be thick/strong enough to be effective, you'll need to laminate it in two strips on each side. You can't bend a single piece that thick around the curvature of the hull without either breaking the wood or softening it by steaming it which is a complicated process.
Take a strip that's half the final thickness and a little longer than the boat edge (I made mine a bit beefier), mix up some peanut butter with the colloidal silica and carefully spread it on the inside of the strip. Starting at the stern, clamp it in place, perfectly align it with the top edge of the plywood. Now you have a long, springy lever to bend the wood strip along the compound curve. It dips both vertically (shear), and bows out at the widest part of the boat (beam), then back in toward the bow. At least every foot, clamp it as you go, moving forward. More is better. Toward the bow, the strip will get stiffer as it gets shorter. Once clamped in place, scrape/wipe off all the squeeze-out. It's much easier to remove now than after it hardens. Let it sit overnight. You'll have to repeat this three more times, meaning this step takes four days (if you're using "slow" epoxy hardener).
During those four days that you're dealing with the outwale, you can make major progress on the sailboat parts. They're completely separate from the hull. If you're just making a rowboat, then you can skip making these parts.
The daggerboard and rudder are cut out and laminated. Then a bevel is ground onto the leading and trailing edges to make it slice through the water more efficiently. Then they're covered in layers of epoxy. The mast step is assembled. This has to be very strong because all of the force of the sail is transmitted to the boat through the mast step and the mast is a very long lever arm. The rudder cheek plates and tiller also have to be assembled similarly to the daggerboard case.
NOTE: Whenever there's a hole to be drilled into any part of the boat, you must take additional steps to make sure the water doesn't penetrate and damage the wood. The correct procedure is to drill an over-sized hole, completely fill that hole with epoxy (I usually put a piece of masking tape on the back side to act as a dam), then once the epoxy cures, re-drill in the center of the epoxy plug the correct hole size. That makes each hole in the boat possibly a 2 day process, so plan accordingly. You can also use 5 minute epoxy to knock out a bunch of holes quickly, but be careful, they're not kidding. This stuff gets rock hard very quickly and will permanently glue anything touching. This is exactly how you drill the hole for the pivot point for the rudder/cheek plate assembly. If the pin is 1/4", then drill 1/2" hole and fill that with epoxy. Now the 1/4" hole will fit nicely in the center and be completely waterproof.
Since all the parts need several coats of unthickened epoxy and they just about all have holes in them, I hung them up with some twine and painted them on all sides, one layer at a time, for several days. Make sure the rudder doesn't get too thick to fit inside the cheek plates.
Step 7: Making the Spars...
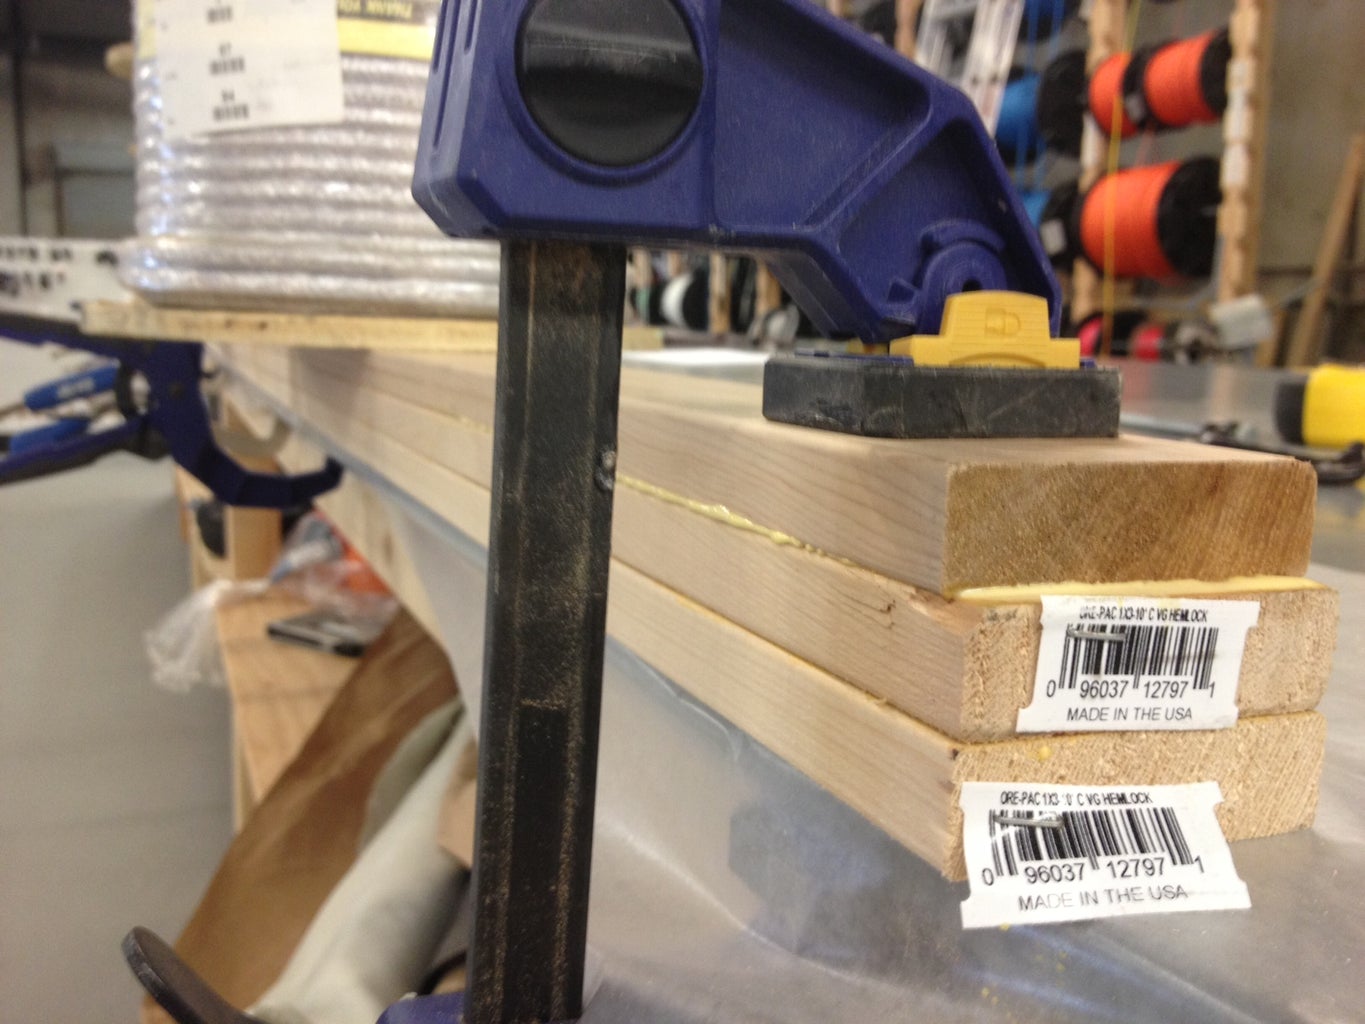
More sailboat parts you can make while waiting for other parts to cure are the spars, the structural parts that support the sail. The mast is another glue up. I used 3 - 1x3's of hemlock. A relatively soft wood, but with a nice tight grain with no knots. A mast would break at a knot, regardless of how strong the wood is. Using the waterproof glue, align the pieces as perfectly as you can then clamp up the assembly and let dry overnight. Then run it through a table saw to get the final dimensions. Use a router and a round-over bit to ease the edges. Cut to length and sand the sharp corners. It should fit easily, but snugly into the forward thwart.
The boom (bottom of sail) is a little more complicated. Cut out the gooseneck (boom pivot point) by using a hole saw first, making sure to clamp it securely to the workbench, then cut out the profile. This gets attached to another piece of 1x3 hemlock, after it's been cut to length and the edges have been rounded over.
The yard (top of sail) is easy. Just cut to length and round over the edges. Drill and fill any holes in the spars at this time. You'll need at least one hole on each end to lash the sail grommets to.
This time, everything gets covered with several coats of varnish, epoxy is not necessary. The varnish protects the wood from water and UV damage.
The reason we had to make at least the mast at this point is because we'll need it in the next step to establish the location of the mast step.
Step 8: Finishing Up the Interior & Exterior...
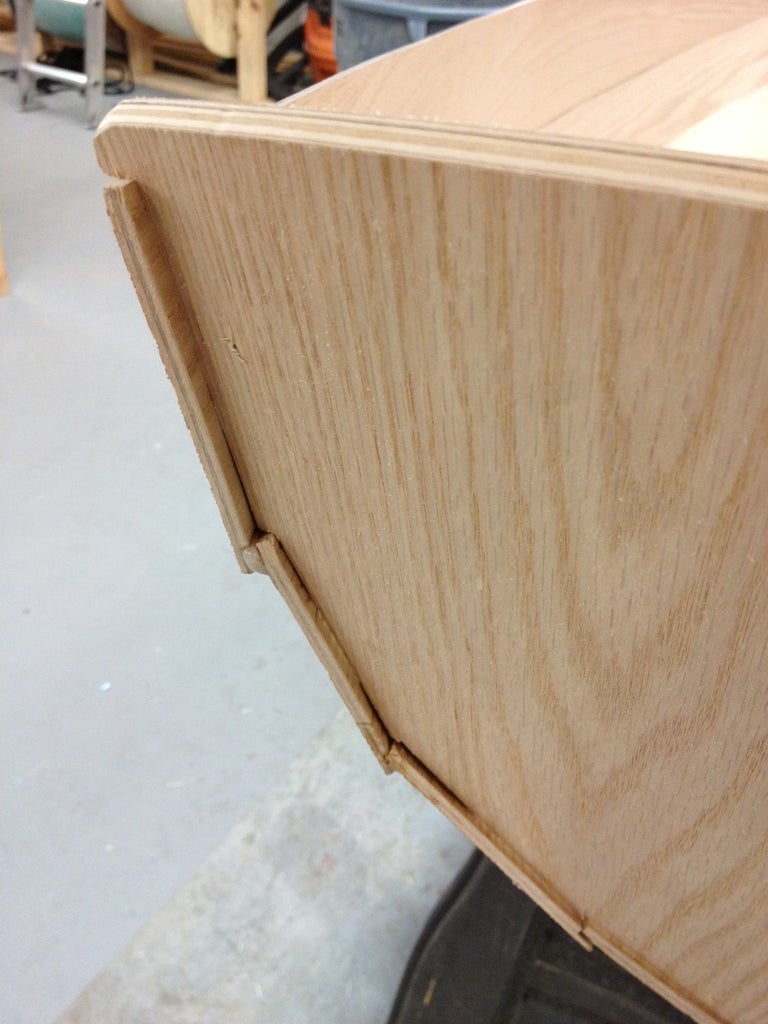
Once the outwales are successfully attached, trim them flush with the face of the transom(s). While you're at it, use a flush cut saw (with no sawtooth offset to mar the wood) to trim the sides flush with the transom. This will show you how well your injected silica mix worked earlier. Now you're ready to install the mast step.
The mast step must be precisely located on the floor (sole) of the boat to give the mast the proper angle (rake). This is very important because it directly affects the boat's ability to sail upwind. Using your mast, insert it into the forward thwart (partner) and into the mast step. With the mast at a 3° angle (mostly vertical but with a small, yet noticeable and graceful tilt toward the stern of the boat), trace the location of the mast step. Use a combination square to make sure it's perfectly aligned side to side (athwartship). You can now set the mast aside. Drill and fill holes in the bottom of the boat so that you can securely screw the mast step from the outside of the hull. The mast base must also be epoxied to the sole with peanut butter. After it's screwed into place but before the epoxy cures, make sure to test fit the mast again and verify the rake angle is correct. It would be a little messy at this point if you had to tweak it, but at least you wouldn't have to cut it off.
Now comes the most unpleasant part of the whole build. On your hands and knees, make a 1" radius fillet on the underside of every part in the boat. I didn't worry about making these pretty, just structural and water tight (these create the flotation tanks that keep the boat from sinking if you capsize). Let that cure overnight.
Next is the scariest part of the build, making the slot in the hull for the daggerboard. Using a drill bit extension, from the inside of the boat, reach down through the daggerboard case and drill a hole at each end of the slot through the bottom of the boat (make sure to use a backer board). Drill a couple holes in between, then take a jigsaw and connect the dots. This weakens the hull enough so that the router won't tear out any extra wood. Note, this step can easily be done prior to affixing the center thwart. Using a flush trim/laminate router bit, let the bearing run around the inside of the daggerboard case. This will make the hole in the hull perfectly match the slot. This is important because you don't want a shoulder on the inside for the daggerboard to hit and you don't want to damage the waterproof lining of the case. Last, ease the sharp edge of the daggerboard slot with the router and a small radius round-over bit.
The skeg must be cut to fit the curve of the hull (rocker), then using silicone bronze screws, attach it to the hull using the same drill and fill/peanut butter techniques. Make sure to snap a chalk line on the centerline of the boat for reference. Then make a 1" fillet where it meets the hull which will support the skeg and make it strong. The skeg keeps the boat tracking straight in the water. I optionally used some fiberglass cloth to cover the skeg and overlap onto the bottom to make the entire assembly stronger and more waterproof. The skeg will take the brunt of the abuse when launching, beaching, loading and unloading, etc. I also installed a stainless steel rubstrake on the aft end of the skeg with this in mind. In wooden boat building, silicone bronze screws are often used because they won't corrode when encapsulated like stainless steel screws can.
Install the skids parallel to the skeg. These are solid pieces of hardwood because they will also take a lot of abuse when the boat is sitting on shore, protecting the thin hull from rocks, etc. They get installed the same way as the skeg, although it's a little tough to bend the wood along the rocker. Scrape off the excess peanut butter once they're screwed in place.
I also installed the optional outboard motor pad at this point because I plan to use an electric trolling motor on the back to quietly putter around the lake in the evenings to relax with the family after work.
That should be the last parts that go into making the boat!
Step 9: Finishing the Hull...
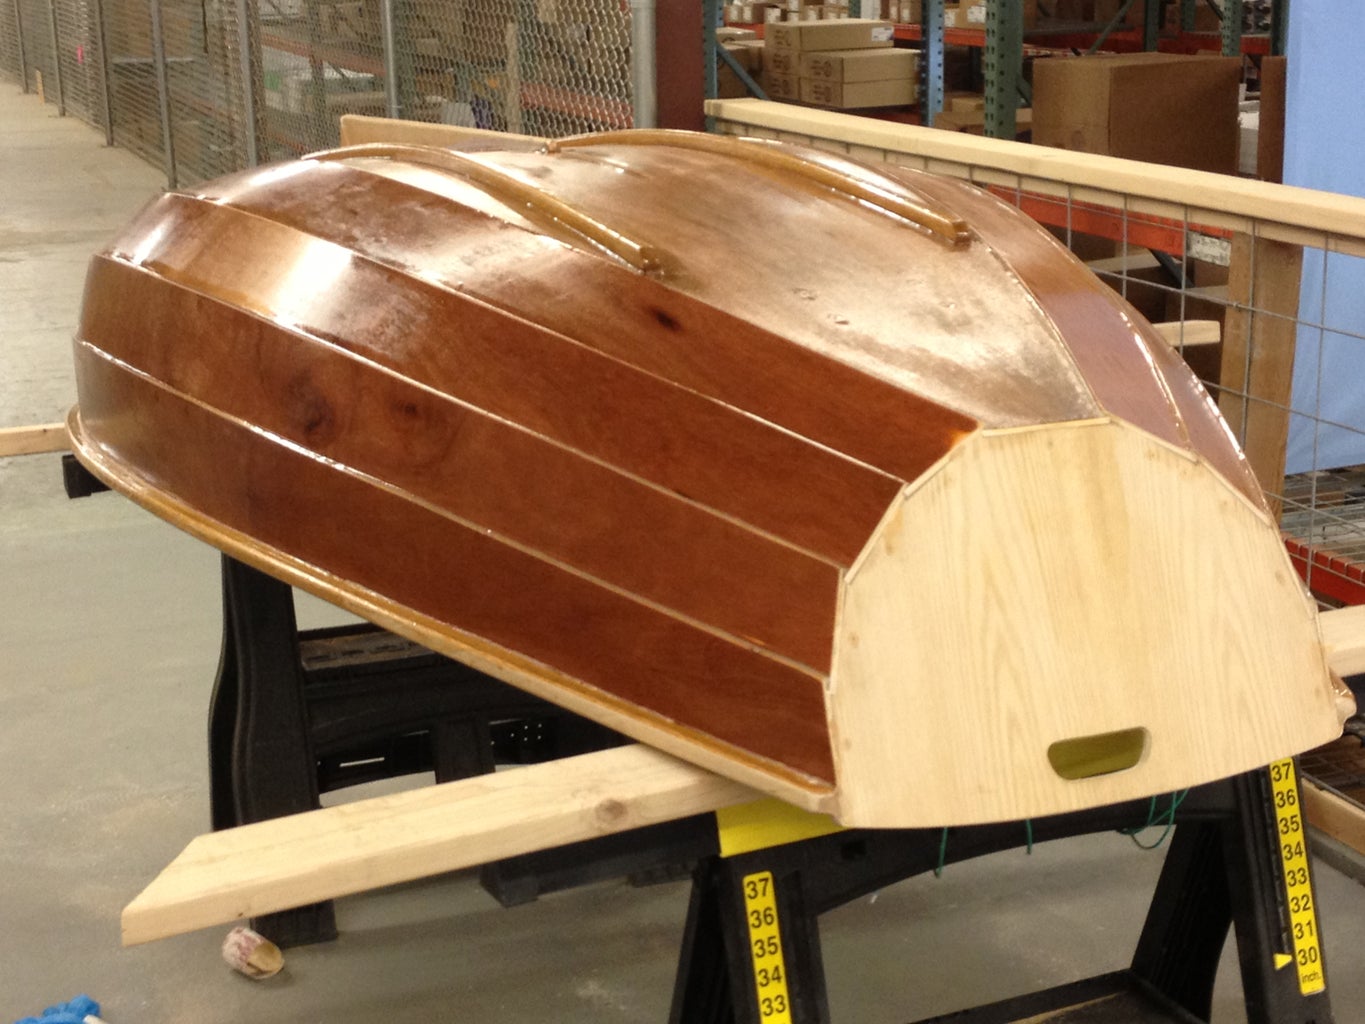
Now comes the last dash to the finish line. One of the more tedious steps is that you now have to sand the entire boat. I actually built the entire boat inside, but for the sanding stage, I took her outside. Several hours of sanding all of the fillets nice and smooth. Everything will show in the finished product whether you paint the boat or leave it "bright" (unpainted). If you've been careful about cleaning up the peanut butter as you go, you should be able to sand the boat with mostly 220 grit. Be careful not to sand through the thin veneer of the plywood. After the sanding is done (make sure to use a dust mask), vacuum the entire boat and then wipe it down with a tack cloth to remove any dust. I also reversed the hose on the shop vac and used it to blow the sawdust off since I was outside.
Next, you must coat the entire interior and exterior with 3-4 coats of unthickened epoxy. This makes the entire boat waterproof. It will also give you an idea of how beautiful the wood will look when varnished. This is why a lot of boat builders decide to leave their boats bright so the beauty of the wood shows through.
Mix up 1 cup batches of unthickened epoxy and pour out large puddles onto the surface. Taking a foam roller, distribute the epoxy in a smooth coat. Now take a wide foam brush and gently smooth (tip) the rolled out surface. This should remove any lap marks or bubbles. Move along to the next area, making sure to not touch the wet parts. Also, make sure no dust or bugs get on your finish or it'll mean even more sanding later.
Start with the exterior first. It'll be much easier to get good by practicing on the convex surfaces. The interior is more tricky because you want to prevent sags and pooling by only applying very thin coats.
Make sure to check with the manufacturer's directions during this step in case you have to deal with "blushing", a thin layer that can sometimes form on the surface of epoxy when it cures. This could cause your layers to not stick to each other. If your epoxy does blush, it's easy to just wipe the entire boat down with a rag soaked in acetone after each coat has cured. Some people sand between coats of epoxy. This is how you would make an extremely smooth/shiny finish, so if you want your boat to be museum quality, invest the effort. I'm planning on banging my boat around so opted out of an extreme, fancy, mirror finish.
I was originally going to paint the exterior of the hull, which would require priming and painting, but I'm leaving it bright for the time being. The good news is that you can always paint later if you change your mind, but if you paint it and change your mind, it's tough to go back. There aren't a lot of pics of this step, which took a couple of days because there wasn't much visible progress after that first coat went on. At this point, any surface that's not painted should be varnished using the same "roll and tip" method as the epoxy, with the optional sanding between coats. Note that epoxy has no UV resistance, so to keep your boat from getting sunburned, you must either paint or varnish every surface. Giving a boat a "museum quality" paint and/or varnish finish can literally take as long as building the boat.
Step 10: Making the Sail...
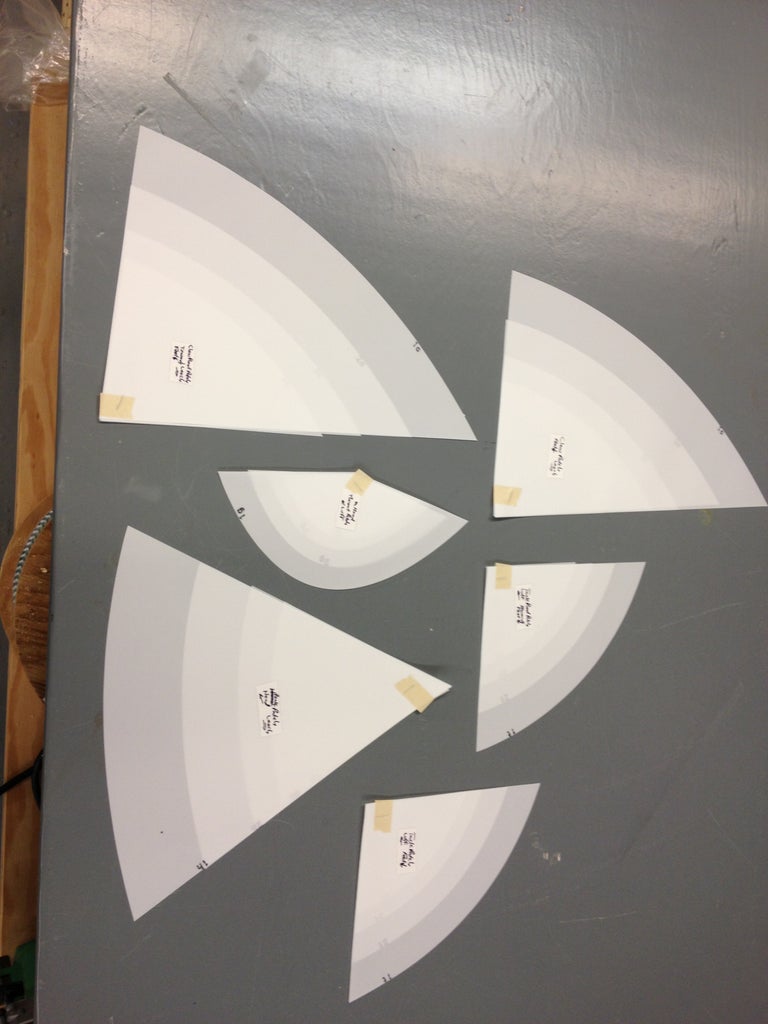
Another step you can do while other parts are curing is make the sail. This particular design uses a "lug" sail, a classic looking sail for small boats with wood masts. It increases the sail area (therefore the force generated by the wind) without it having to be as tall as a modern sailboat mast made of aluminum. There is a kit from an online sailmaking company that you can get for a reasonable price. The Dacron cloth panels are all cut out by a CNC machine, so they fit perfectly together. I used a regular, domestic sewing machine, not an industrial one. The only time I had trouble was when sewing through all 7 layers at the reinforcement patches. When I got to those parts, I had to manually push down on the foot of the sewing machine with a flat-bladed screwdriver (minus) to help push the needle through the Dacron. We jokingly call Philips head screwdrivers "plus".
The panels/parts all come labeled. The directions were a bit confusing because they suggest you make sub-assemblies after the fact to make wrangling the large sail easier but they mention it after you've already sewn the large panels together. It's important to understand what parts go together while the panels are still small and more manageable. For example, the batten pockets are tricky enough to build on a single panel, much less the finished sail. Building the sail was about as difficult for me as building the boat, but it was worth it.
The lug sail gets reinforcement patches on all four corners where you attach it to the spars (bend), and there's also a reefing point for when the wind starts to pick up (freshen). Modern sails have three corners (Marconi rig).
I opted for the less expensive white Dacron sail kit, but there's also a classic red (tanbark) colored kit that's $100 more expensive. Before I sewed a single stitch, I carefully traced every part of the sail kit onto painter's tarp poly film so I can always use the templates to build another sail, all I need to do is buy the tanbark cloth.
Step 11: Rigging Your Sailboat...
This seems to be the trickiest part for most people, probably because there are numerous ways it can be successfully rigged, depending on your experience, preferences or criteria. It's confusing because you have to know what the finished setup will look like in your mind while you're staring at a pile of ropes. I chose a setup that allows the most room in the cockpit for a full-sized adult, so the mainsheet is led forward of the skipper's position. This keeps the skipper's attention forward so they're looking where they're going. I have another boat where the mainsheet is behind the skipper and it takes some practice getting used to.
The lines I made up (rope becomes a line when you give it a job description) were the halyard (hauls the sail up), the mainsheet (adjusts the angle of the sail to the wind = trim) and a traveler bridle (where the mainsheet attaches to the boat). I got fancy and spliced all my ends, but you can just as well use a bowline knot.
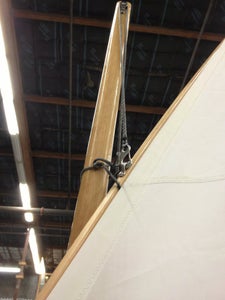
I installed a cheek block at the top of the mast instead of the large diameter hole in the directions. I wanted the halyard to run as smoothly as possible when setting the sail. Then I installed a pair of cleats at the base of the mast, one for the halyard and one for the downhaul (cunningham). With both of these lines pulling in opposite directions, it locks the sail in place, flat, so it effectivley acts like a wing. The main halyard attaches to the gaff with a snap onto a padeye. This allows easy on/easy off when rigging at the boat ramp. I also used a small loop (parrel) around the mast and through the eye to keep the gaff located close to the mast. I looped the downhaul over the boom and down to the cleat to try to keep the gooseneck from twisting. Note, except for the blocks, just about all of the hardware used on rigging a boat this size can come in stainless steel or brass/bronze, depending on the look you're going for. If you plan on installing oarlocks to row the boat, this decision becomes even more important to the final look of the boat.
For the mainsheet, I made a short bridle between the handles on the transom with a small eye tied in the center. This allows a place for the snap on the end of the mainsheet to attach to. I could've just as easily allowed the snap to slide, which would give the bridle the function of a traveler, but would affect its pointing ability (sail upwind). The mainsheet is then run to a block on the end of the boom, then to another block in the middle of the boom. This leaves the main cockpit area unobstructed with running rigging. Make sure your mainsheet is long enough for your boom to swing forward of 90° to the boat, with enough to still come back to the cockpit for the skipper to control. A stop knot at the end of the mainsheet will keep the mainsheet from getting away from you and give you something to grip.
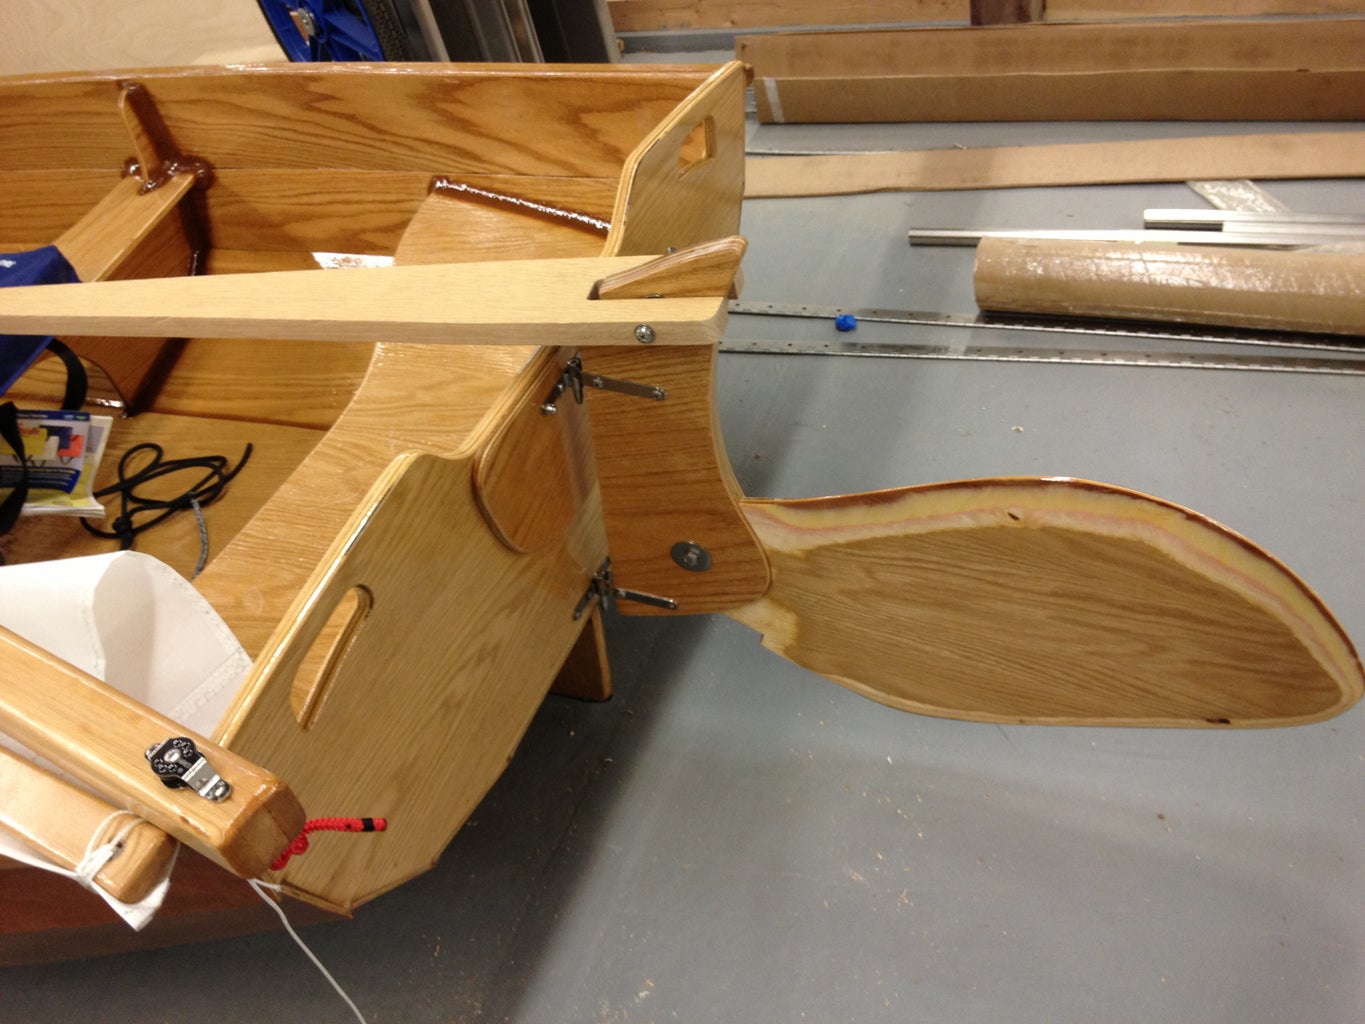
The rudder pivot hardware (gudgeons and pintles) must be installed perfectly vertical and on the exact centerline of the boat so that she will sail well. Drill and fill the necessary holes for this hardware. Be careful with the spacing. It's designed to be easily installed and uninstalled while underway.
With this particular rigging layout, when under sail, the skipper must constantly keep the mainsheet in hand, which is a good idea anyway for safety reasons (if you get hit by a gust of wind = puff, you won't get blown over = capsize). The tension on the mainsheet is easily manageable for any size skipper. On larger boats, the mainsheet is held by a fiddle block with a cam cleat, which is not necessary for a boat this size. With that being said, a possible future upgrade would be to install a block and a camcleat somewhere on the centerline of the boat so that more advanced sailors wouldn't need to constantly have to oppose the tension on the mainsheet. Of course the trade-off would be the hardware would probably be somewhere you might want to sit.
Another upgrade I figured out after actually taking her sailing would be to rig up a bungee/shock cord system that will hold the daggerboard both in an up and down position. With the current setup, the centerboard is held down by gravity and must be pulled out of the slot when beaching.
Step 12: Go SAILING!
Because I wanted to be able to go sailing by myself if needed, I made a dolly out of 2x4's and large pneumatic tires (which makes the dolly float). The dolly fits securely between the center and aft thwarts when driving out to the lake. The sides on the dolly lock against the skids on the bottom of the boat so it can't twist. Roll the sail up with the spars and wrap it with the main halyard. At the designed length, the mast doesn't fit inside the boat, but it seems a bit long, so some people have cut the mast down enough so that it fits inside the boat.
Out at the lake, unload the boat, slide the dolly underneath and you're ready to roll down to the ramp. At the launch, roll the boat out into the water until it floats off the dolly, toss the dolly off to the side out of everybody else's way. Drop the daggerboard into the slot and install the rudder assembly. Facing into the wind (important), stick the mast into the receiver hole (partner), tie off the downhaul (cunningham) and hoist the sail until the downhaul is tight, then cleat off the main halyard. Reave the mainsheet (run the line through the blocks) and you're ready to go sailing.
I've found that this boat sails very well. The lug sail makes it very easy to sail upwind (weather helm), it's a little more tender for a large adult, more so than a boat with a hard chine, like an El Toro/Optimist but it's a lot more graceful looking. The payload is very reasonable for a boat this size. My wife and son can easily (and safely) go sailing with me and I don't even need anyone's help to get it rigged and launched. All in all, this is one of the best projects I've every built. I hope you too can discover the joy of building your own boat and then take her sailing. Remember, in sailing, the wind is free, but nothing else is...
This is my very first Instructable after many years of referencing this excellent site to build numerous cool projects (you should see my next post). Anyway, I hope you enjoy it and please feel free to ask any questions you may have and I'll do my best to answer them. I'm planning on building a larger boat in the near future so stay tuned...

Participated in the On a Budget Contest

Participated in the Wood Contest
Recommendations

Making Time Contest

Made with AI - Autodesk Design & Make - Student Contest

Build-A-Tool Contest

- For Sale/Wanted
- Readers Tips
- Your Yarns.
- Restoration
- Miscellaneous
- DIY Boat Yards
- Boat Building
- Cabin Cruisers
- Free Boat Plans
- Begin Boating
- Boating Terms
- Ropes and Rigs
- Just for Fun
- Celestial Navigation
- Passage Planning
- VHF Marine Radio
- Diagonal Scale
Sailboat Plans
Free Sailboat Plans
A selection of some of the Free Sailboat Plans (pdf) that were published in magazines such as “Popular Mechanics”, "Popular Science" and the "Boat Builder Handbook".
If you need help with lofting out the plans click here for an article here which should help.
- Open Dayboats/Dinghys
- Rowing Boats
Open/Dayboat, Free Sailboat Plans
Everyone who digs boating has heard of the Hobie Cat, the sleek little catamaran that burst on the scene and captured the attention of all the fast-action sailors.

Marked by asymmetrical hulls and special trampoline supports, the Hobie can reach speeds above 20 mph and perform with a rare agility.
But it has one drawback.
It costs mucho dinero.
Thus, we introduce the Hobby Kat, sailboat plans, a build-it-yourself version of the “Hobie” that should cost from half to a third of the commercial version. If you have the moola, of course, go for a Hobie and have the time of your life on the water.
If not, try our Hobby
The homebuilt is not quite the same.
But she sails sweetly and fast—qualities which have made the “Hobie” popular
Even in a light air she’ll slip through the water at a fast clip.
She has no centreboards, leeboards or keel, and needs none.
The inside of each hull has built-in lift, like an airplane wing, so that as the boat heels and one hull digs in the boat is pulled back to windward.
Click Here for the Plans
She can run in very shallow water and the rudders kick up for beaching.
You can carry her on a trailer or even disassemble her.

Many a “stink pot” addict will take a second look at Tern because she planes in modest breezes, is easy to handle, and her streamlined prow arid pod-shaped, “inland scow” type hull offer slight water resistance. Then too, there’s a charm about the tiller of a sailer that’s not matched by the wheel of a motor-powered boat. Part of it is the challenge of making the most of nature’s free-wheeling breezes. Even with her 72sq.ft of sail, this Free Sailboat Plan is remarkably stable, and packs as many as four persons aboard
For thousands of inland lakes, Tern is the answer to sailing water sport, she is rugged and easy to launch
And she’s remarkably easy to build.
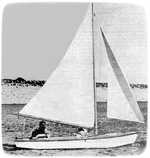
Falcon is a small, speedy, sporty sailboat which handles well. Tests on the original Falcon showed that she could easily out-distance boats of comparable size such as the one design class Snipe and Comet sailers.
And she will pace neck and neck with 18 footers with considerably greater sail spread.

This strong, beamy, eight-foot pram may be sailed either cat-rigged or sloop-rigged.
The dagger-board may be adjusted forward to balance the helm when sailing with the addition of a jib sail.
Oars or a small outboard motor may also be used to power this versatile Free Sailboat Plans.

Dart” is a small two or three person sailing craft, designed for use on protected waters such as bays. lakes, rivers or wherever sheltered waters are found. Its construction will repay the builder handsomely and provide a fast sailing craft, light in weight, easily transportable and cheap to construct with all difficult joinery eliminated
It provides thrilling and economical sport.

The 'Crescent', designed by C. T. Allen, is the ideal sailboat for day sailing on a small lake, river, or protected waters of a bay.
Centreboard design (Fig. 2) reduces Crescent's draft, so Shallow is not a problem.
Its broad beam of over 5½ft. makes it an ideal family boat because there is room for a cockpit large enough to accommodate four adults or two adults and three kids, and side and forward decks big enough to stretch out on when sun bathing.
"Jewel" is a 16' Crescent Sailboat being built by Mike Allen from the free sailboat plans by C.T .Allen in the 1958 "Boat Builders Handbook". And what a superb job Mike is doing check out his photos here .
Click Here for the Free version of the Plans

Sailing enthusiasts and backyard boat builders are not likely to find free boat plans for a sailing pram that can be built faster, lighter, stronger, or less expensively than Graefin-10. Two men can begin work on a Friday evening and have a smart, lively 10-ft. 85-pound sailboat in the water by Sunday evening (it’s been done).

Zephyr Is a refinement of a type of boat developed by the English for use in the rough open waters of the English Channel. Not only is it fast under sail, but it can stand up under punishment. And it’s light enough to be easily loaded atop an auto or light trailer.
Breeze-Baby

Skimming off a brisk wind or with the wind abeam, Breeze-Baby actually planes with one person aboard. Despite her rowboat lines that make her easy to build, she handles easily under her simple sail, an ideal first boat. Simple lines are adapted to plywood construction that’s strong, light and that keeps Breeze-Baby’s bilges dry
You can take her with you atop your car or on a lightweight trailer for summer fun wherever you vacation or get in a week-end’s sailing.

Cat’s Paw is easy to build because of the straight-sided hulls. The sheer line is flat and that simplifies building the form. Bow and stern are straight, so there’s no cockeyed bevel to fit and fuss with
She Is an Ideal boat to learn or practice sailing in because she will forgive so many mistakes.
Cabin Cruiser, Free Sailboat Plans

Previous posts
See What Others Have Posted

Recent Articles
Wooden Boat Events 2024
Apr 14, 24 05:15 AM
- Boat Plan Books
- Boatbuilding Tips
- Glass Cloth
- Stitch and Glue
- Strip Plank
You might like these

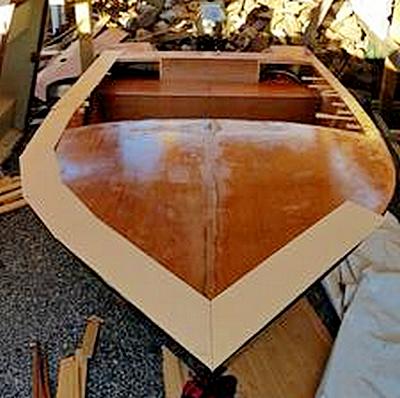
Plywood and Veneer Guide for Marine use.
A guide to plywood for boat building and why you should use the best marine grade you can afford.
DIY Woodboat Building Questions
Woodboat building questions a Forum for wooden boat building, plans, lumber, caulking compounds and other boat building problems.

Boat Books for Wooden Boat Builders
Boat Books a series of boat books based on some of the 1960's, classic, Free Boat Plans that were published in magazines such as "Popular Mechanics", "Popular Science" and the "Boat Builder Handbook".

Build a Boat, tips for the DIY Wooden Boat Builder.
How to Build a Boat, Wooden Boat Building methods for the DIY, backyard, self-builders explained, carvel, lapstrake and plywood

Clench Nails, Fastening for Small Wooden Boats.
How to use Clench Nails, these provide a fast reliable method for fastening small wooden boats.

Wood Screws for Boat Building and Repair.
Wood Screws are the most widely used and versatile fasteners used on wooden boats. Which type to use and how to use them

Timber, Lumber for Boat Building.
A brief description of the most common Timber used for building Wooden Boats how to choose wood for your project boat

Timber Properties
A brief guide to timber properties and wood, characteristics such as strength, stiffness and elasticity for choosing lumber for wooden boat building and restoration.
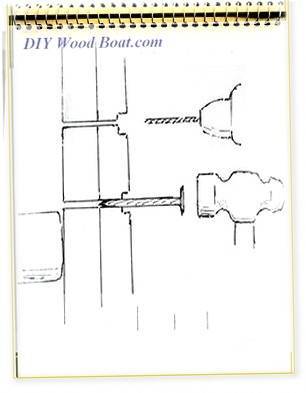
Rivets and Copper Rove Wood Boat Fastenings.
How to use Copper Rivets and Roves construction guide to fasteners on your wooden boat.

Ring Nails for Marine Fastening.
Ring Nails sometimes call Gripfast or ring shank, silicon bronze boat nails are renowned for their holding power. but how to get them out?

Free Motorboat Plans
Free Motorboat Plans for the backyard home builder, build your own speed boat, cabin cruiser, runabout or utility boat using these simple plywood designs.
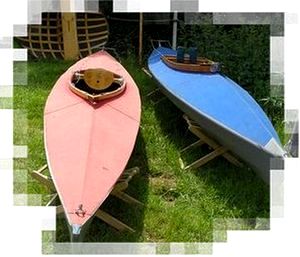
Wooden Boat Kits.
Wooden boat building is easy and inexpensive with wooden boat kits. From row boats and kayaks to sailing cruisers, boat to be proud of

Supplies for Wooden Boat building and Maintenance
Supplies for Wooden Boat Building and restoration, how to choose the materials and marine chandlery for your project.

DIY Woodboat Questions
Woodboat questions and answers forum for all Wooden Boat owners, advice and opinions on all aspects of wooden boat building, restoration and maintenance.

Small Boats, Made of Wood
What Everybody ought to know about building Small Boats, guidance and tips for self-building or restoring.
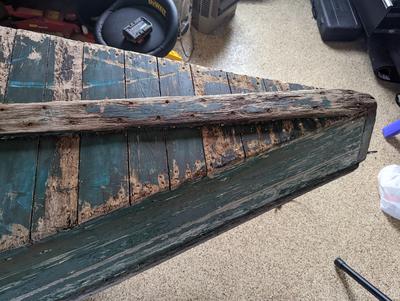
14’ 1956 Chris Craft, side rail how should it be attached?
Apr 12, 24 03:38 AM
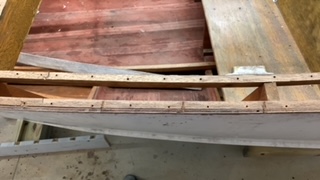
How to laminate plywood on the hull
Apr 10, 24 03:46 AM
Woodboat Restoration questions forum
Woodboat restoration questions Forum, get advice about your Wooden Boat problems in a free, no frills, no need to sign up forum

Epoxy Resin for DIY Wooden Boat Building.
A guide to the epoxy resins and sustainable enrtopy resins to use when building wooden boats with marine plywood.

Wood Rot Repair and Treatment
Wood rot in wooden boats, how to treat, repair and replace rotten timbers in a wooden boat

Privacy Policy
Advertising Policy
Cookie Policy

I am perfectly aware that the majority of Wooden Boat aficionados are sensible folk. However, I need to point out that I am an amateur wooden boat enthusiast simply writing in order to try to help other amateur wooden boat enthusiasts. And while I take every care to ensure that the information in DIY Wood Boat.com is correct, anyone acting on the information on this website does so at their own risk.
- Activities for Kids
- Arts & Crafts
How to Build & Float Your Own Mini Sailboat

Crafting and outdoor exploration come together with this project—learn how to build a boat that floats and sails. The best part? You’ll only need to buy a couple of supplies because the main part of this barge is made from sticks that you find outside. Read on for the step-by-step instructions and you’ll soon have a ship to sail the high seas (or slow streams).
What You’ll Need
1 piece of paper (patterned scrapbook paper is nice, but plain construction paper also works)
2 craft sticks
string or twine
hot glue gun
14 sticks in similar sizes (5-6 inches long works well)
How to Make the Boat
1. Start by wrapping 12 the sticks together with your twine. We used Kid Made Modern Craft Twine ( target.com , $9.99) to add a pop of color, but white string would also work just fine. Tie one end of the twine to the end of one stick and wrap the string around a few more times, then move on to the next stick. Wrap the twine around that stick a few times and then use the same piece of twine to wrap the third stick and so on and so on until 12 of your sticks are connected. (You’ll use two elsewhere.) Don’t worry too much about how many times you loop around or how perfect your wrapping is. Knot off the twine on the last stick. Then, do the same thing on the opposite side of your sticks.
2. Wrap two sticks onto the bottom. Now add two more sticks, one on each end of your boat, to the bottom of your group of sticks. Again, tie a knot on one end of the stick then weave your twine in and out of the connected sticks, looping the twine around each stick and then around the stick on the bottom. Repeat for the second stick.
3. Cut 2 triangles out of your paper. Ours measured 5-inches along the side and bottom, but you may want to adjust based on the length of your sticks. We used Kid Made Modern Print Palooza patterned paper ( target.com , $7.99 for 150 sheets). However, if you have plain construction paper, ask your child to decorate it with stickers, crayons, markers, or any other way you like.
4. Add the craft sticks as your mast. Line up the craft sticks along the edge of the triangle to create your mast. Use a hot glue to secure the craft sticks.
5. Glue the triangles together. Ask your child to cover the two triangles with glue, using the glue stick. Then, press them together to complete your sail.
6. Connect the sail to the raft. Slip the craft stick in between two of the sticks in the middle of your boat. Use a piece of twine to wrap around the craft stick and around the two middle sticks until it feels fairly secure. To give it extra support, add hot glue all around the area where the craft stick and twigs come together.
7. Sail your boat. Once the glue has cooled and dried, your craft is ready for its first voyage. Fill a baby pool or other vessel (even the bath tub!) with water and watch your homemade schooner float.
8. Create some wind. Want to get your boat moving faster? Use a straw to blow it across the water.
9. Take it to the park. For further experimentation, we took our model to the park so it could sail in a real stream. Even after several sails and a few capsizes, our sailboat has held up.
Happy sailing!
Project inspired by Minieco’s handmade boats .
Have you crafted any boats with your kid? Tell us about your design in a comment.
–Julie Seguss
Need some fresh ideas?
Subscribe to our weekly newsletter for expert parenting tips and simple solutions that make life instantly better.
By subscribing you agree to Tinybeans Terms and Privacy Policy
Related reads

Why Are Gen Z Kids Covering Their Noses in Family Photos?

Screen Time for Babies Linked to Sensory Differences in Toddlerhood, Study Shows

Kids Shouldn’t Have to Finish Dinner to Get Dessert, Dietitian Explains

The Questions Parents Should Be Asking Their Pediatrician—but Aren’t

6 Better Phrases to Say Instead of ‘Be Careful’ When Kids Are Taking Risks
- your daily dose

- and connection

- Your daily dose


How to Build a Boat
Classic boat plans from a 1937 issue of Popular Mechanics , updated for the 21st century.
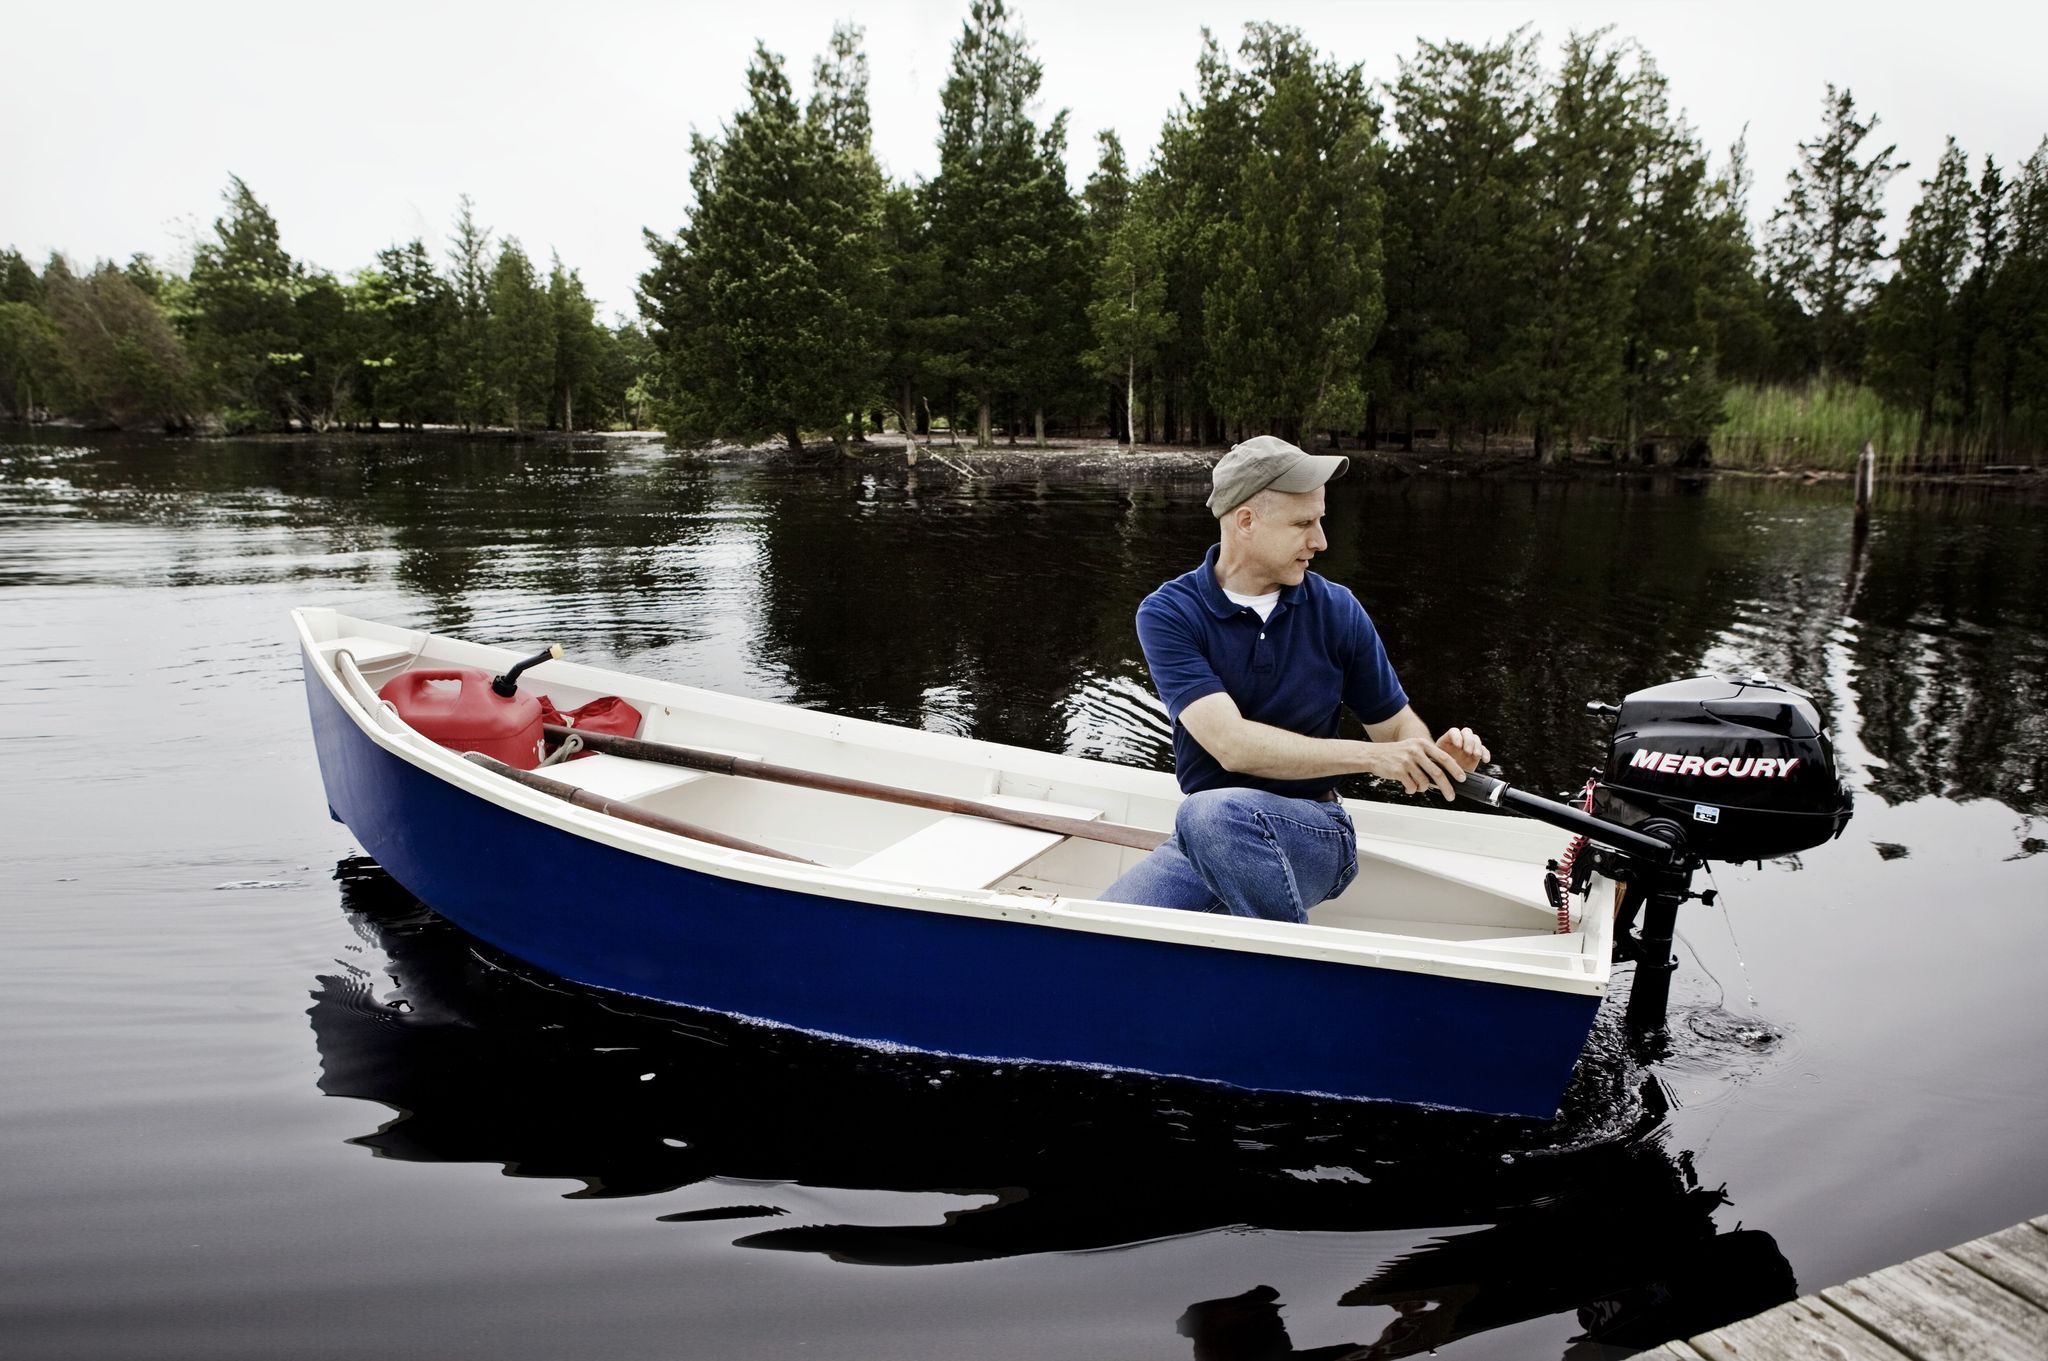
It was a long time since anyone in my family had built a boat. The last was my Uncle Paul. He was a shipbuilder who learned his trade beginning at age 14 in Hamburg, Germany. Every morning, the boy rowed from the family's dock out across the shipping lanes of the Elbe River, which flows into the North Sea.
The trip to the shipyard where he was apprenticed took an hour and a half, longer in winter, when there was fog and floating ice on the water. After three years, Paul received a journeyman's certificate and a berth aboard a gigantic four-masted windjammer named Passat—"trade wind" in English. That was in the 1920s, before the fascists confiscated his family's own small shipyard and the Berendsohns left for America.
A few months ago, I decided to try my hand at the ancestral trade. I've built everything from houses to a blacksmith's forge , but there's no more evocative project than a boat, at least to me. Since before Austronesians first gazed across the Pacific, wooden vessels have stood for craftsmanship and the drive to explore. I sifted through PM's archives looking for a classic design and eventually settled on a 10-foot dinghy from our May 1937 issue . It looked elegant, yet simple enough to build on a pair of sawhorses.
It's been many years since my Uncle Paul was around to lend advice, so I ran the drawings past Timo White, a boatbuilder at Tuckerton Seaport, a small maritime museum on the New Jersey coast. It turned out that Timo was in the midst of restoring a surfboard built from plans in the July 1937 issue of PM. (It was a big year for seafaring projects, I guess.)
He confirmed that the dinghy was a good candidate for a first-time builder and agreed to lend a hand if needed.
Shipyard in the Driveway
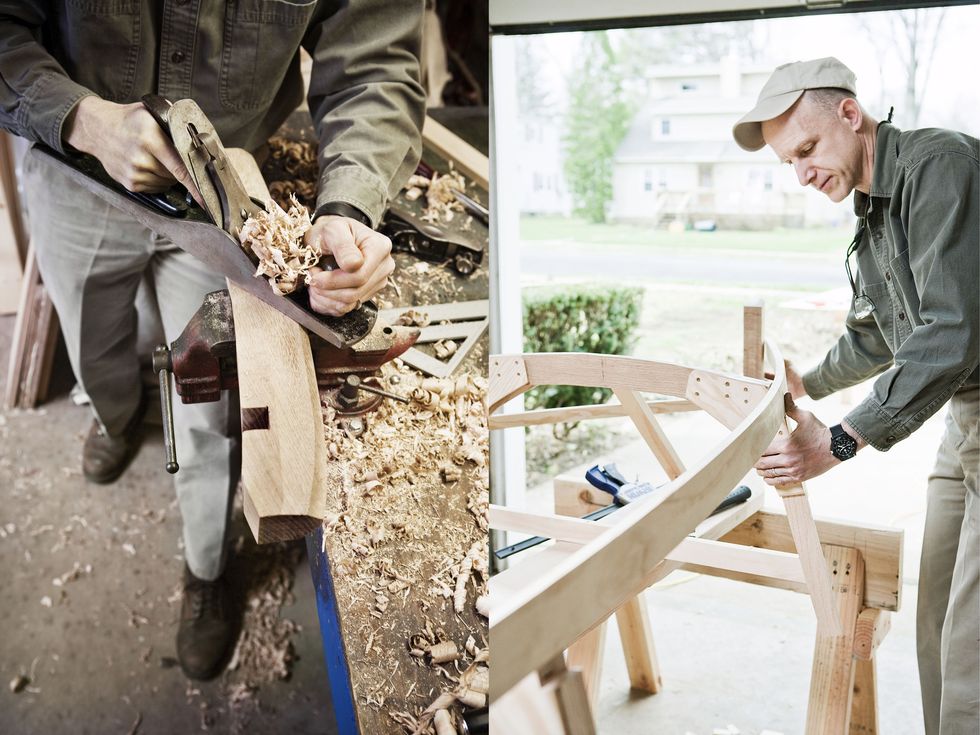
On a wintry early spring morning I set out for Willard Brothers Woodcutters, a sawmill and lumber dealer in Trenton, N.J. You can spend hours there, roaming stacks of delicious-looking walnut, cherry and oak, some of the boards as wide as your arm is long. I bought red oak for the Sea Scout's frames (that was the name of the craft in the plans, and I chose to keep it) and a 2-inch-thick slab of white oak for the wedge-shaped stem at the bow.
Back home, I started making a racket feeding planks through a table saw. My skills were creaky--I've spent too much time in recent years fixing stuff and not enough building--but over a few days my old confidence returned. The Sea Scout began to take form.
Most boats begin with the frames, the ribs that provide structure to the hull. I roughed them into shape, along with the stem and the gracefully shaped stern wall, or transom, which I cut from ¾-inch plywood. Then I braced it all to a building board--which is nothing more than a 2 x 10 with a chalk line marked down the center.

⚠️ To simplify the project, I omitted the mast and centerboard. Instead, I built the Sea Scout, named after the craft in the original article, to be rowed or powered by an outboard motor. She works well in either configuration. You can find the original plans and materials list here.
The boat's skeleton was in place, but each member still needed to be precisely beveled before I could secure the curved planks of the hull. The next step was to clamp thin strips of wood, called battens, to the frame to stand in for the planks, so I could measure and mark all those angles. Then, I took the parts off the board and finished shaping them.
Often, the weather confined me to the garage, but when the sun emerged I worked in the driveway. If you want to get to know the neighbors, start building a boat. Linda from next door asked whether the craft would be sailed, rowed or powered by an outboard motor. Others wondered where I would go with it, how I'd get it there and what I would name it. A truck driver from Tulnoy Lumber, dropping off some marine plywood, approached respectfully. "This is beautiful," he said, with an old-fashioned New York accent as broad as the hand he ran over the frames.
Anatomy of a Boat
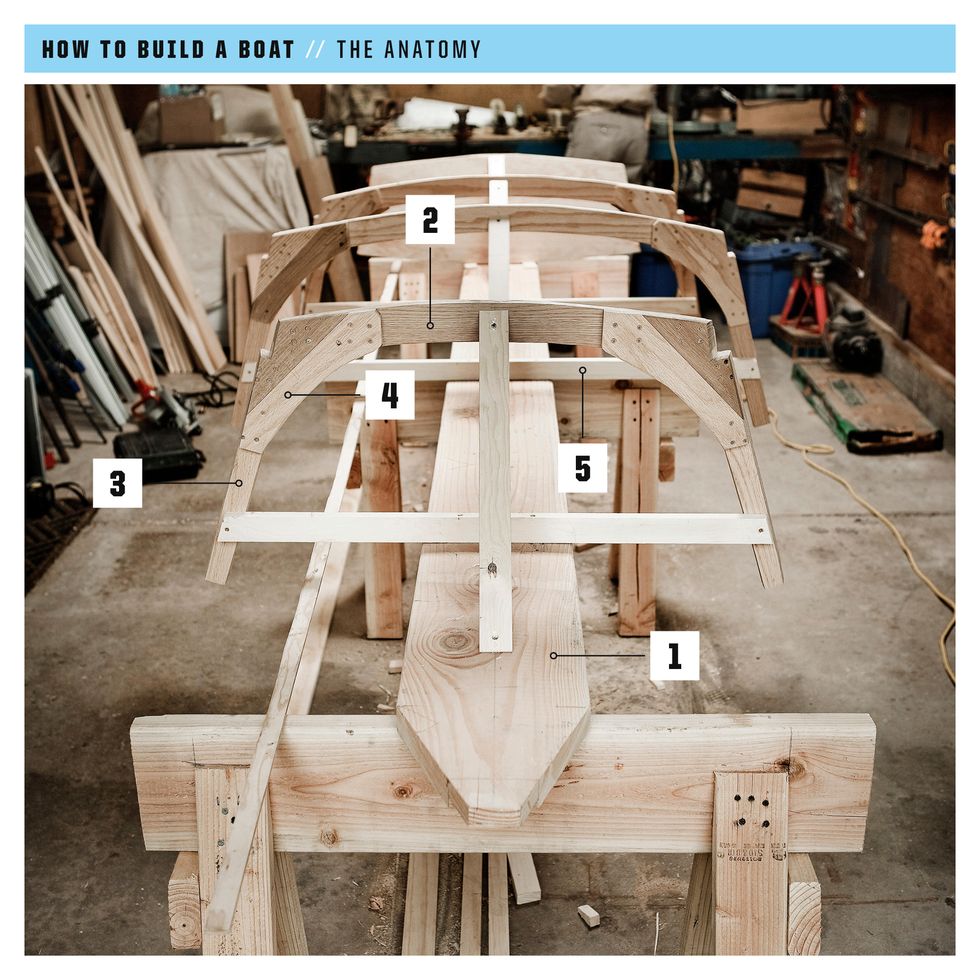
Working the Plank
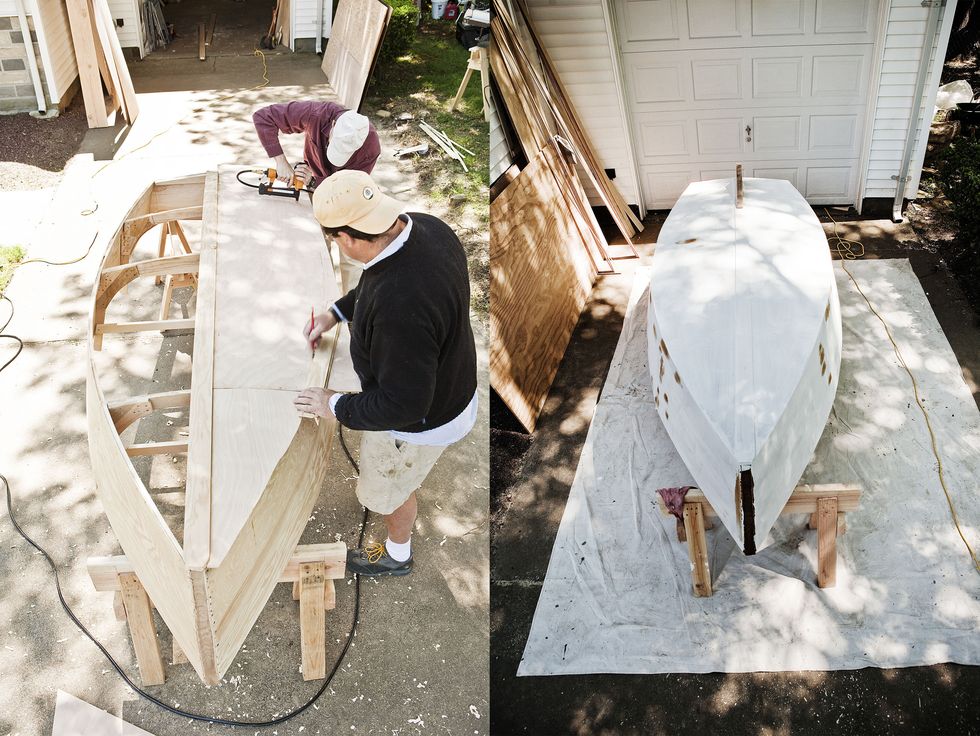
I don't know how Uncle Paul felt about it, but boatbuilding can be acutely frustrating. The bane of my weekends proved to be a small bronze screw. A No. 6 Frearson flat-head, to be exact. Like most modern DIYers, I'd been spoiled by drywall screws and other aggressive fasteners that practically plow into the lumber. Even using a specialized, tapered drill bit and a waxlike lubricant with the unlikely name of Akempucky, I managed to wreck screws by the dozen. The head on one would strip a moment before the screw was fully seated, while another would shear off on the last eighth of a turn, leaving me with a shiny Frearson-head penny.
Timo had tried to downplay the arcana I'd face--"It's more like house carpentry than fine-furniture building," he had said--but I still found myself floundering on occasion. One challenge was that the 1937 article was more an overview than a detailed set of plans. And, though it pains me to find fault with my forebears at Popular Mechanics, the sketch contained suspicious discrepancies. Timo helped me recalibrate some of the dimensions midway through the project—and I had to trim several pieces after they were assembled.
The biggest hurdle came when it was time to plank the hull. The classic way is to bend strips of solid wood to the frames. I'd chosen marine-grade fir plywood instead to save time, but now I was barely able to force the hull's 14-inch sheets into place. There was no way the half-inch plywood I'd planned for the bottom was going to work.
Timo advised me to switch to a special, wafer-thin marine-grade plywood and plank the bottom in two layers. He came swooping in one Thursday morning to show me the technique. He stepped out of his truck with a broad smile, and a block plane in each hand, and my mood lifted. He politely took a sighting down the chine logs where we'd attach the bottom, and spent a few minutes planing them to the last measure of precision. Then we got to work with staples, glue and screws--and in a couple of hours the project went from a plywood flower bed to a small craft with sensuous compound curves.
It was satisfying, but my mistakes still showed in details like the placement of screws and the shape of the stem. "You know what they say," Timo told me. "Putty and paint makes a boat what it ain't." I got out my paintbrushes.
Maiden Voyage
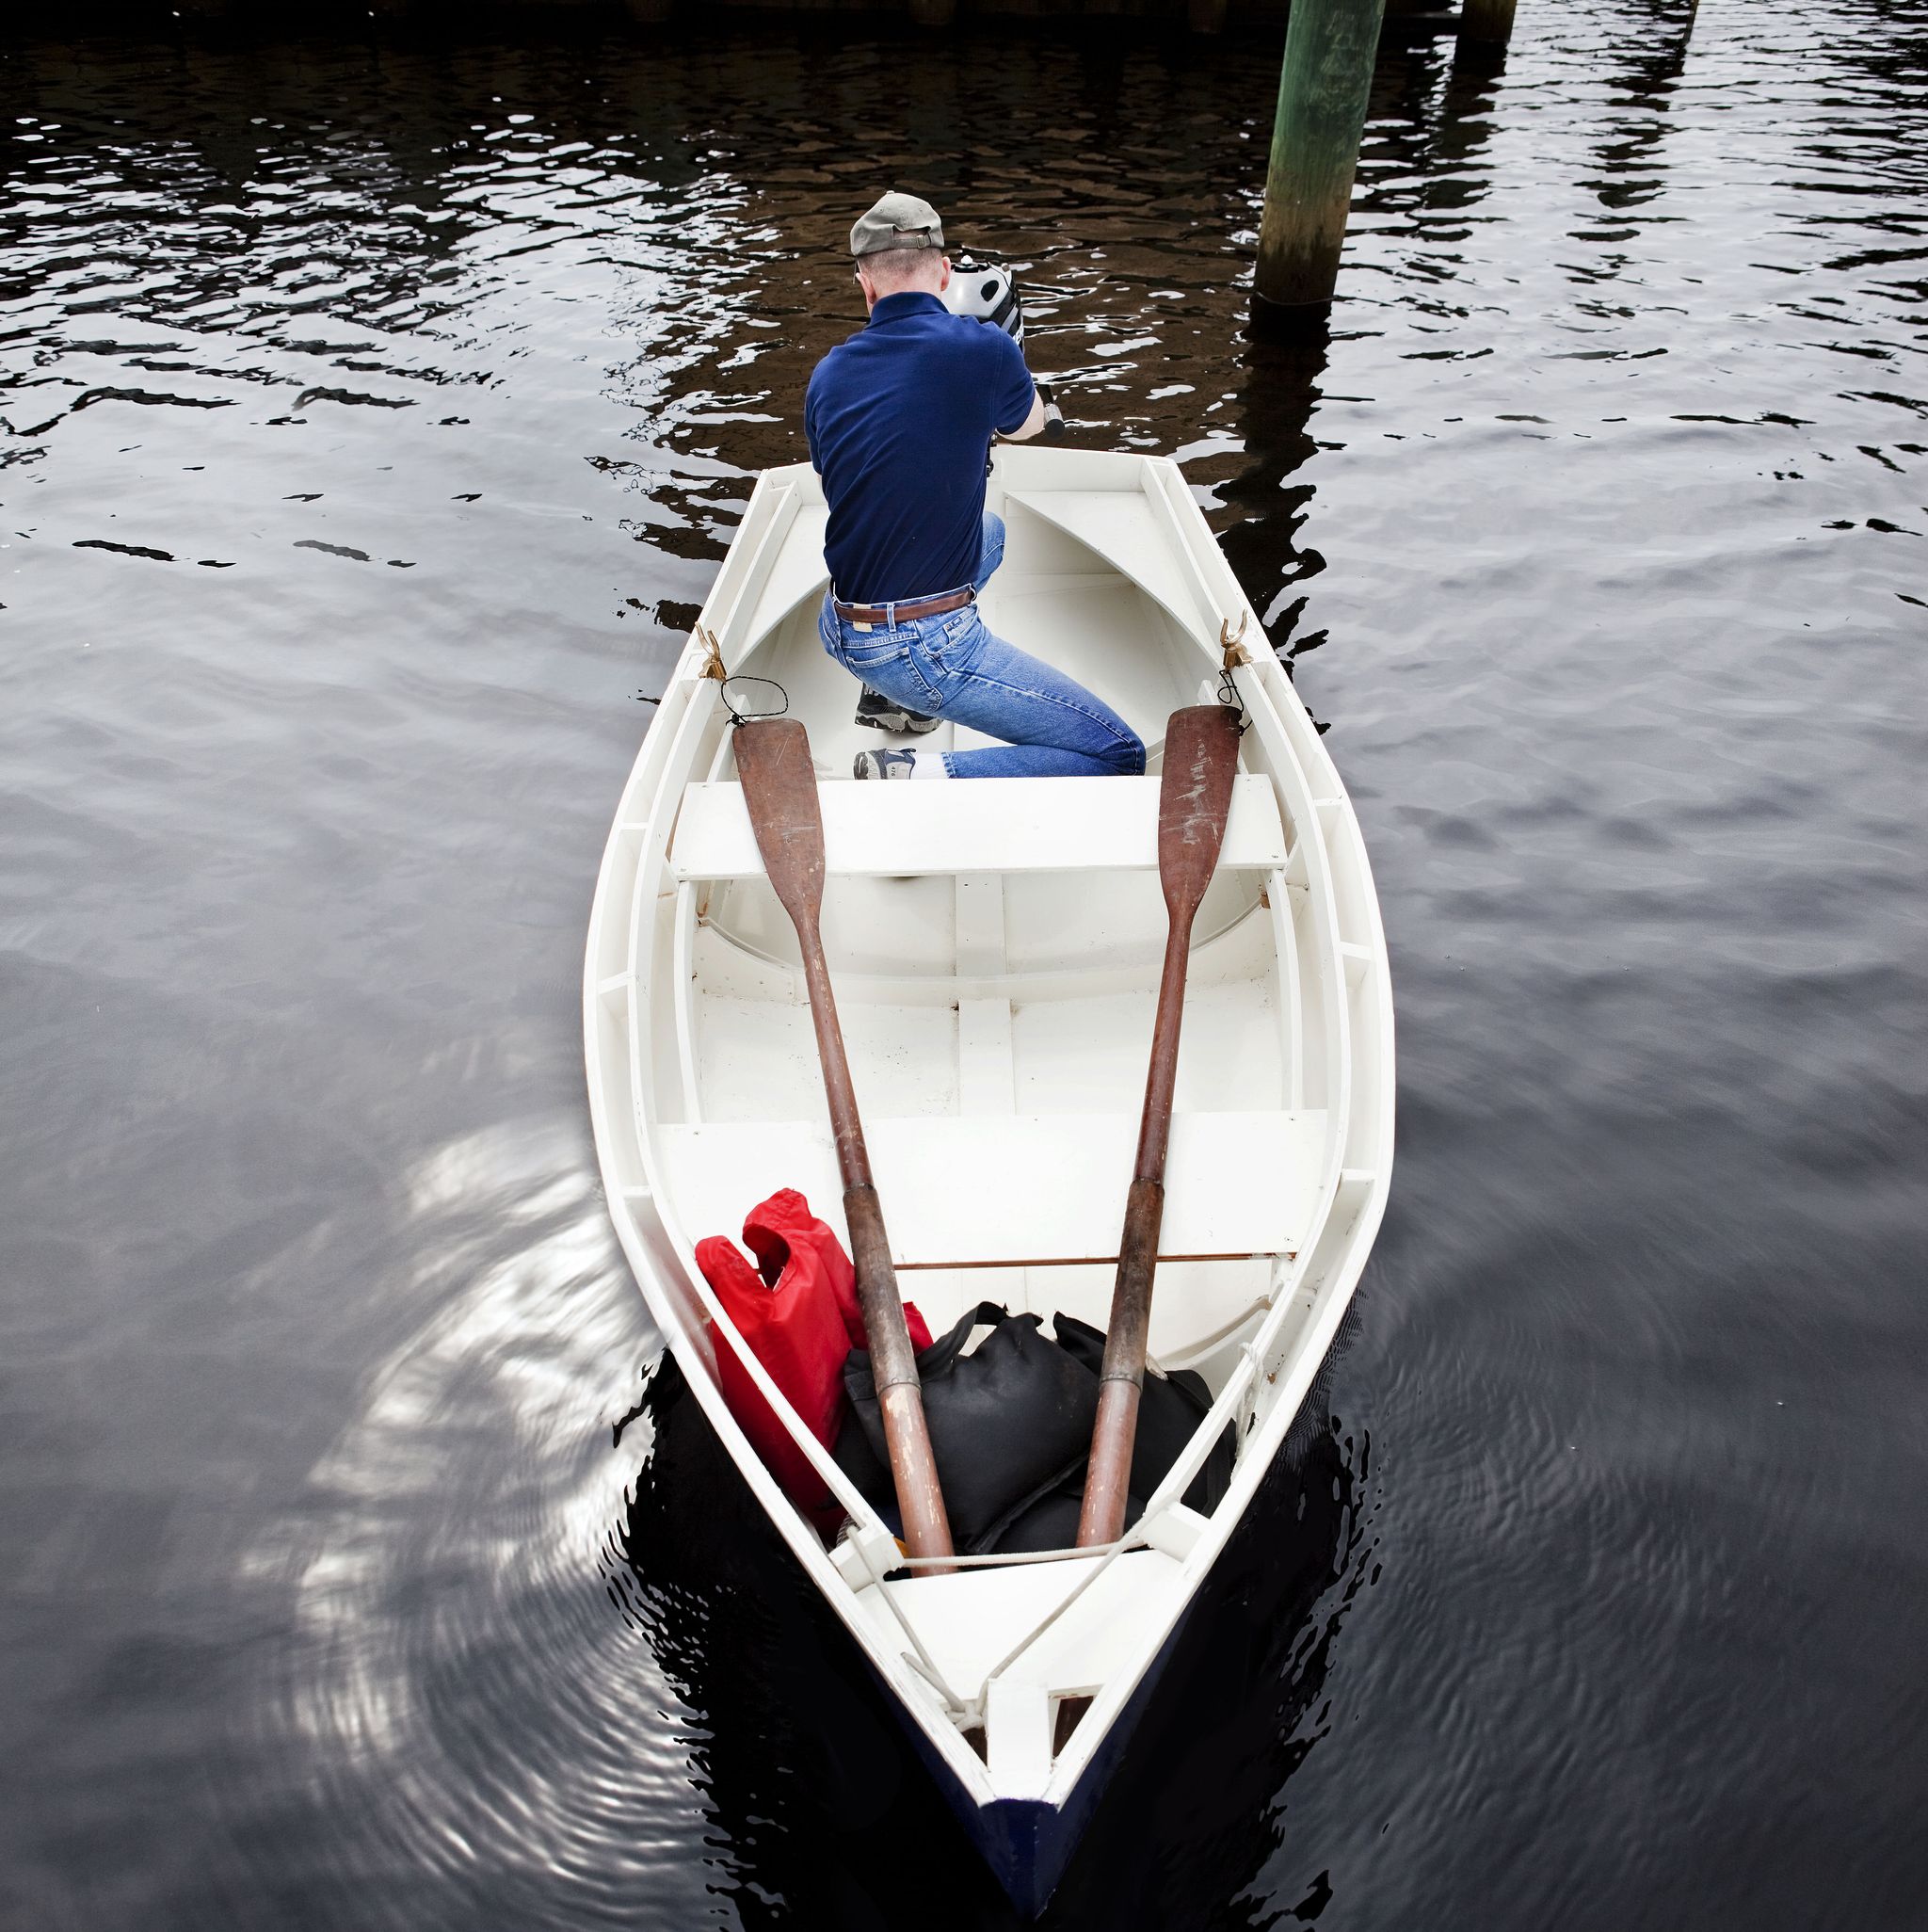
We launched the boat at Tuckerton Seaport on a cool, overcast day that felt more like September than June. Down at the dock, Timo produced a can of Amstel Light in lieu of champagne. "Go ahead," he said, "pour it over the bow." I popped it open and emptied the beer over the paint. "I christen thee Sea Scout," I said. Then we slid the little craft off the dock and into the water.
You might think a feeling of triumph came over me. Not so. The Sea Scout looked very small, almost helpless, as she sat bobbing at the end of the painter, the little rope that Timo had threaded across the bow. I felt humbled. A phrase from the Book of Psalms flashed in my mind: "They that go down to the sea in ships, that do business on great waters."
I wasn't aiming for any great waters myself. I eased off the dock and into the boat. Timo handed me the oars. Awkwardly, I drew the handles back, just above my hips. The craft slid forward gracefully, almost like she was on ice. As Timo watched, I braced the left oar down in the water and swept the surface with the right. The Sea Scout pivoted neatly, unexpectedly elegant and spry.
If the oars were a kick, you can imagine the thrill I felt when I mounted the 2.5-hp Mercury Marine outboard on the transom. It's a clean-running four-stroke engine, compact yet almost zippy on a boat this small. I gave the engine full throttle and cut some nice straight lines and a pleasingly tight curve complete with a crisp little wake.
With the afternoon gone, my first voyage was complete. In the end, I decided to donate the boat and engine to Tuckerton Seaport. Frankly, I needed the space in my garage and driveway: The Sea Scout was a good first foray into wooden boatbuilding, but I knew I could do better—and I'm already sifting through plans.
The Sea Scout, a Decade Later

Ask anybody who’s ever built a boat, and they’ll tell you one thing about it: you’re not the same after you’ve built one. And that goes for me, too. The little boat, which I built back in 2009, shaped me as much—or perhaps more—than I shaped it.
The Sea Scout project brought a flood of mail from our readers, some of whom had built the boat or knew someone who did. One woman still had the boat that her father built. She sent a picture of it and recalled the many pleasant hours she spent with her dad as her father taught her how to sail in it. She kindly offered to donate the boat to us, thinking that perhaps we could put it in our lobby. I wish I could have taken her up on the offer.
When you build a boat, you take your place in the long line of craftspeople—professional and amateurs alike—who have plied that trade and learned about the unique burden of building a craft upon whom someone’s safety and enjoyment will depend. Building a boat is humbling, you remember every mistake you made building the thing as it bobs up and down, and waves wash over its bow or crash into it from the side.
You feel it shudder, but it doesn’t give way as you look over the side at the murky depths. And afterward, you look at every boat with a more knowing eye, a greater respect...and you wonder if you could build it.

Roy Berendsohn has worked for more than 25 years at Popular Mechanics, where he has written on carpentry, masonry, painting, plumbing, electrical, woodworking, blacksmithing, welding, lawn care, chainsaw use, and outdoor power equipment. When he’s not working on his own house, he volunteers with Sovereign Grace Church doing home repair for families in rural, suburban and urban locations throughout central and southern New Jersey.

.css-cuqpxl:before{padding-right:0.3125rem;content:'//';display:inline;} Pop Mech Pro .css-xtujxj:before{padding-left:0.3125rem;content:'//';display:inline;}

US Army Accepts Delivery of First M10 Assault Gun

Underwater UFO is a Threat, Says Ex-Navy Officer

DIY Car Key Programming: Why Pay the Dealer?
Use Induction Heat to Break Free Rusted Bolts
How to Replace Your Car’s Brakes

The Air Force is Resurrecting a B-1 Bomber

Who Killed Harry Houdini?

A New Hypersonic Missile Will Give the F-35 Fangs

The Navy’s New Drone Could Turn into a Ship-Killer

The CIA’s Secret Plan to Turn Psychics Into Spies

Is This the Real Iceberg That Sank the Titanic?

Making Your Sailboat Feel Like Home: Must Have Home Comforts
Choosing to make a sailboat your home is a big decision, and getting your sailboat to feel like home is a challenge. Going from a house to a boat is a big change, with limited space and a definite potential drop in comfort!
But living on a sailboat doesn’t have to mean leaving behind all your favourite parts of life on land. In fact, there are so many things you can do to make living on a boat comfortable – perhaps even more comfortable in some ways that living on a house!

As an Amazon Associate, we earn from qualifying purchases. We also earn from other affiliate programs. This means we may receive a small commission on products purchased through our links at no extra cost to you.
Obviously every person has very different things in mind when they think of home comforts. A lot of people choose to live on a sailboat to escape the clutter of every day life and while this is admirable, there are certain things we’ve found are just nicer to have on board and make sailboat life even more enjoyable.
If you’re planning on cruising longer term then consider making life easier, not harder – you’ll find the weather will do a good enough job of making things tough without you adding to it!
And if you know someone who is moving aboard then take a look at our sailing gift ideas to welcome them into their new home with something they’ll really love (and need!)

Since moving on board our sailboat two years ago I’ve started to find there are simple things I can do that make a sailboat really feel like a home.
I wish I’d thought of doing them sooner, which would have made my first few seasons on board a lot more comfortable!
But as I can’t go back in time I figured I’d share some of my top tips for making a sailboat feel like home so that you don’t have to struggle like I did, and I’ve added tips from other cruisers we’ve met to inspire you further!
Home Touches On A Sailboat

The easiest thing you can do towards making your sailboat feel like home is to add some homely touches. It’s amazing what a difference it makes if you just add a few nice photos or a little hanging ornament or two.
You’ll need to choose things that either hang from the walls or hang freely so they don’t go flying across the boat in a heavy sea. We love these macrame plant hangers for our herbs and bunting is a simple way to add some colour to a plain looking sailboat!
Get Your Sailboat Lighting Right

When we first moved aboard the boat had some lovely low lighting in the cabins, and some awful strip lighting for the galley.
There was absolutely no lighting in the cockpit. One of the easiest ways of making a sailboat feel like home is to add some mood lighting. We bought some simple led fairy lights to hang around the inside of the boat and a popular waterproof Luci light for our cockpit.
Get A Good Nights Sleep With A Gel Infused Mattress
It’s not always easy to sleep on a floating home, so do everything you possibly can to make sure you’re comfortable when you go to bed.
We’ve struggled with being too hot, and with the mattress being too hard. This has resulted in us sleeping in some very strange places in an attempt to get a better nights sleep, usually pretty unsuccessfully!
A lot of our cruising friends have recommended getting a gel infused memory foam mattress topper , which we have our eye on for next season.
The gel infusion helps to control the temperature while you sleep, and this one is designed to ventilate – perfect for hotter climates!
It doesn’t matter how uncomfortable your actual mattress is, this memory foam topper is designed to support you in all the right places. It’s a cheapish solution to an uncomfortable bed!
If you’re looking to upgrade your comfort even more cheaply then consider just buying some nice bedding. Sailing can feel a little too much like camping, so by upgrading your bedding and treating yourself to something that looks and feels really nice you’ll instantly get that homely feeling!

Say Goodbye To Hand-Washing

While you’re sailing the last thing you want to be worrying about is finding a launderette. We found one within easy reach once last season in over six months of sailing. That leaves hand-washing, which really isn’t all that fun.
I actually didn’t mind doing it, but the clothes never felt (or smelt!) as clean as putting it through a full cycle in a proper washing machine. Our friends have one of these and although I was sceptical at first they’re actually pretty amazing! Treat yourself and you won’t have to worry about hand-washing again!
Ditch The Plastic Crockery
Eating off of plastic plates and drinking from plastic cups gets old pretty quickly. It’s one of those strange things that I didn’t think would bother me but really did.
I felt like I was camping all the time, and I wanted to feel a bit more civilised in my sailboat home!
We found Corelle plates to be a perfect compromise. They’re basically impossible to break (though if you somehow manage to make sure you’re careful with the broken shards!). Adam and I are pretty clumsy and they’ve flown across the boat a good few times and never got so much as a dent.
On the same note, these glasses are great. They’re a lot stronger than glass, but feel almost exactly the same. Perfect for a chilled glass of wine or a cold beer.
Get A Proper Cuppa In The Morning

I’m not actually a fan of coffee so this has never been a priority for me, but Adam absolutely loves the stuff.
Having a coffee maker on board is a real home comfort, especially waking in the morning to the smell of freshly brewed coffee (even I love that). Try a travel sized one for small spaces, or go for a stovetop coffee maker that can live on your oven top.
Don’t Feel Under Pressure In The Galley
Some cruisers would go so far as to say a pressure cooker is an essential piece of galley equipment.
It doesn’t use as much electricity as you’d assume, and once it’s on you can leave it to do its thing and come back to a perfectly cooked meal, without sweating over the gas lit stove. Very handy for entertaining too!

Our treat for this season was to buy ourselves a BBQ. After experiencing the heat of the galley and cooking in ridiculous temperatures (or giving up and eating cold baked beans out of the tin), we bought a Cobb BBQ and have absolutely loved it!
Not only has it saved us from galley cooking but it’s also really added to our outdoor lifestyle.
We have enjoyed a lot of BBQs on the beach as well as on the boat and we actually enjoy cooking as there are so many variations to try. We especially love trying out different herbs in the moat to flavour our fish and veg!
If you want to really embrace the eco-friendly way of life then why not try a solar cooker . We don’t have one yet, but have friends that swear by it.
You’ll need to be in sunny climates for this to work, and be prepared to do a little forward planning as you’ll want to start cooking your meal during peak hours to get the maximum cooking time, but overall this is an excellent solution to a very hot, sweaty galley!
Make Sure You Have Music On Board
Get a waterproof speaker so that you can enjoy listening to music and audio books (get a free trial of audible here – we pay for a subscription now when we never pay for anything because we’re so addicted!) while sailing, relaxing in the cockpit or chilling on the beach.
We treated ourselves to one this season and have used it nearly every day. It’s absolutely worth the money for that little bit of home. There are lots of cheaper alternatives but we love our JBL Charge. You can find out why here.

Hopefully that’s given you lots of inspiration for making your sailboat feel like home. We certainly feel that our sailboat is full of a lot more home comforts than when we first started out, and I’m sure we’ll keep adding as we continue our journey!
If you’ve got any more handy ways to turn a sailboat from a vessel into a house then please do let us know in the comments section below!
Similar Posts
Tepai cruising tax-how to pay online.

Must Have Galley Equipment For Sailboat Cooking 2024

Gill Sailing Gear 2024: Is It Worth The Hype?

Lewmar Delta Anchor Review On Our 38ft Sailboat

Life On Board During Lockdown In Greece

Sailing Stories
What a nice list! We’re still trying to work out the light issue on our boat. My architect husband is really fussy. 🙂
Thanks for reading! Ooo wow, having an architect husband must be pretty useful for living on a boat! Let us know what you go for with the lighting!
- Pingback: The Best Books On Sailing For Beginners | Two Get Lost
Leave a Reply Cancel reply
Your email address will not be published. Required fields are marked *
- PRO Courses Guides New Tech Help Pro Expert Videos About wikiHow Pro Upgrade Sign In
- EDIT Edit this Article
- EXPLORE Tech Help Pro About Us Random Article Quizzes Request a New Article Community Dashboard This Or That Game Popular Categories Arts and Entertainment Artwork Books Movies Computers and Electronics Computers Phone Skills Technology Hacks Health Men's Health Mental Health Women's Health Relationships Dating Love Relationship Issues Hobbies and Crafts Crafts Drawing Games Education & Communication Communication Skills Personal Development Studying Personal Care and Style Fashion Hair Care Personal Hygiene Youth Personal Care School Stuff Dating All Categories Arts and Entertainment Finance and Business Home and Garden Relationship Quizzes Cars & Other Vehicles Food and Entertaining Personal Care and Style Sports and Fitness Computers and Electronics Health Pets and Animals Travel Education & Communication Hobbies and Crafts Philosophy and Religion Work World Family Life Holidays and Traditions Relationships Youth
- Browse Articles
- Learn Something New
- Quizzes Hot
- This Or That Game New
- Train Your Brain
- Explore More
- Support wikiHow
- About wikiHow
- Log in / Sign up
- Hobbies and Crafts
- Woodworking
- Wooden Sports Equipment
How to Build a Boat
Last Updated: January 21, 2024 Approved
wikiHow is a “wiki,” similar to Wikipedia, which means that many of our articles are co-written by multiple authors. To create this article, 45 people, some anonymous, worked to edit and improve it over time. wikiHow marks an article as reader-approved once it receives enough positive feedback. In this case, several readers have written to tell us that this article was helpful to them, earning it our reader-approved status. This article has been viewed 289,961 times. Learn more...
Little boats are perfect for trips around the lake. They fit on the roof of your car and in the back of truck beds, making them perfect for spontaneous camping trips. This article describes a method for building a canoe, (12'x30", with 11" depth), using a stitch and glue style of boat building.
Building the Frame

- A long stick or batten is used to draw a line between these points giving the outlines of the canoe's panels. Make sure the lines drawn for the panels are all fair, smooth curves.
- Only three panels are needed per side. The four half sheets of 8' plywood are used to make 12 boat panels, then these 12 panels are put together in matching pairs with butt blocks or scarf joints to make up the total 6 panels or 3 per side.
- Finger joints, using a dovetail template and a router will also make good joints to join the panels. You have to allow for the 1" overlap of each panel when making the finger joint, as this gives the boat an attractive finished look.
- This system makes a simple but very nice boat and has a recognizable canoe look and shape with a gentle "v" bottom, rather than a flat bottom.

- Once you have cut the panels out, use a woodworkers rasp (file) to smooth up the edges as close to the lines on the panel as possible. A small block plane could be used instead.
- Now you can put the panel pieces together as stated above with finger joints, scarves or butt blocks. More specific instructions on how to do each of these joints is easily available online.

- This job is easier and faster if you lay the two matching panels (the corresponding panels on either side) together and drill the holes.
- This boat has only three panels per side, with each of the three being the same on either side of the canoe.

- Lay the two bottom panels on top of each other and wire the center/bottom edges together, but don't pull the wire too tight. Leave the wire loose, so you can open the bottom two panels up like a book. This will be the bottom of your canoe.
- Now, starting in the center, wire (stitch) on the next panel, putting a few stitches on each side of the center line. Keep working from side to side doing a few on each side until you get to the ends.
- When you get to the upper panels, line up the ends and stitch them together. Try to keep them as even as possible, with a nice canoe end curve. You should begin to see the canoe coming together at this point. [2] X Research source

- Is it fair, with nice flowing lines and no twist? If not tighten or loosen the wire stitches as necessary, or even add a stitch if needed. Make sure it looks pleasing to the eye.
- Check to see if there is any twist in the canoe, using winding sticks. Make sure the panel edges are all sitting on top of each other nice and tight and not overlapping at any point.
- You can also do a trick called cutting a transition joint, which is a 1/4 or 3/8" notch cut 24-36" (depending on the width of the panel and length of the canoe) into the bottom front edge of the top panels. This gives you a nice smooth side. More detailed instructions on how to do a transition joint can be found in many books covering stitch and glue boat building or on the internet.
- Finally, be sure that the panels are not pushed out from each other at any one point, you want nice, smooth-stitched seams.
Bonding the Panels

- Try to cover each edge about an inch on either side of the joint, making sure that it soaks into the joint to get a good bond. Make it look like you're painting a strip down the joint. Remember that the joints of the panels and stems only get epoxied on the inside for now.
- Repeat this process for each of the joints. Try not to let the epoxy run down the sides of the panels -- you only want it on the joint, no runs. If you have any runs, use another brush to wipe them up. This just makes life easier when it comes to sanding the inside of the boat. Remember to check the outside of the seams for runs as well.
- Put two coats of epoxy on the joints and stems (stems are the ends of the boat), letting the epoxy dry before re-coating. Be sure the stems are pulled tightly together (using the stitches) before applying the epoxy. Don't use clamps to pull the stems ends together, stitches only!
- Each coat of epoxy needs about 24 hours to dry, so try to have a little patience while dreaming of that smooth glassy lake!

- Do this with care, as the panels' joints are still fragile at this point. Try not to break the epoxy join, and don't leave any wire in the boat.
- If you pull out a wire and the joint opens, put a stitch back in and epoxy that joint area again.

- Mix the wood flour and epoxy to a smooth creamy mixture -- it shouldn't be runny. Apply this fillet to the joints that you put the epoxy on.
- Make a nice smooth bead about 1-1/2-2" wide over the center of each joint, then apply a smooth bead of fillet to the inside of the stem ends.
- Make the stem end fillets about 3/4" thick on the inside -- although this adds weight, it has the benefit of making the stem nice and strong.
- However, you should be careful not to add too much epoxy, as it can become brittle.

- Apply another coat of epoxy, smoothing it over the fiberglass until it turns clear. To make the joint as smooth as possible, add just enough epoxy to turn the fiberglass clear, then use a squeegee to remove any excess. Remember that applying too much epoxy is as bad as applying too little.
- Be gentle while doing this, as you don't want to push the fresh fillet mix out of the joint when you push down on the fiberglass with the squeegee.
- When you get to the stems, add a 3" wide strip of fiberglass to the inside of the stems (over the fillet). Allow the stem end fiberglass to come down over the center strip of fiberglass tape, as this will make one complete, strong joint.
- You will need to add a second coat of epoxy to these tapes after the first coat cures, again waiting 24 hours between each coat.

- Now use a fine rasp (woodworkers file) to smooth over the edges of the bottom and lower panel joints, being careful not to splinter the thin plywood. Then use sandpaper (80 grit) to smooth up the joint edge, being careful not to sand too deep into the plywood.
- Sand the entire outside of the boat, using a 120 grit sandpaper. Make sure to clean up any drips and runs from the epoxy that ran through the joints. Remember to sand with care - don't sand into the thin layers of the 1/8' plywood as this takes away from the canoe's outer skin and leaves hollow flat spots.
- When the sanding is done wipe off the excess dust using a cheesecloth, then use compressed air and a clean cloth to remove the more stubborn dust. Sweep the floor, and wait until the dust has settled before proceeding.

- Lightly sand the epoxy-coated outside of the boat with 120 grit paper. This is only necessary to provide a tooth for the next coat of epoxy and fiberglass to hold to.
- Now it's time to add fiberglass cloth to the outside of the boat. The fiberglass can weigh anywhere between 4 oz and 8oz, depending on the intended use of the canoe. The larger the fiberglass the heavier the canoe will be as the heavier fiberglass requires more epoxy.
- Use the same technique of applying the fiberglass to the outside of the boat, then applying a layer of epoxy on top. If you have never done this before, it's a good idea to read as much as you can about it first. Being informed will help you do a really nice job on the boat.

- If you wait until the epoxy hardens, it will be very hard to trim the excess fiberglass cloth from the edges of the canoe.
- To trim the fiberglass cloth, use a razor knife and trim off the cloth along the gunnel's edges. Be gentle while trimming -- try not to pull on the cloth as it is still wet and it will move and cause you problems.

- Be aware that it might take more than two coats to fill the weave of the cloth depending on the type and weight of the cloth.
- With the fiberglass on and trimmed, give the outside a light sanding with 220 grit sandpaper, then clean off all dust. You can now clear coat or paint the boat.
Finishing the Job

- Gunnels give a completed look to the canoe, while also serving to protect the sides of the canoe as rub rails.
- Each gunnel should be about 1-1-1/4"x3/8-1/2" square, with the top outside and inside edges rounded over. Use epoxy and brass or bronze screws to attach the gunnels at the front 24-30" of the gunnels. You can use the epoxy and spring clamps to attach the gunnels to the canoe until the epoxy dries.
- At the stem ends on top of the canoe you can fit small decks, on top of the rails or between them, if you take the time and effort to make a good fit. Flush decks look the best.

- When all the sanding is done, it's time to coat the inside of the boat with. For best results, do this in two or three thin layers of epoxy, waiting 24 hours between coats.
- When this is all done you can sand the last coat lightly with a 120 grit sandpaper and then a 220 grit to get a really smooth finish.
- Wipe away any dust, then paint or varnish the inside.

- All seats should be about 1-1-1/2" from the bottom of the canoe, not hanging from the gunnels.
- On a light canoe (such as this one) with a low freeboard, it's best to keep the center of gravity as low in the boat as possible.

Community Q&A
- Read all you can find about stitch and glue boat building. The more you know the less problems you'll have and the happier you'll be. Thanks Helpful 1 Not Helpful 0
- Don't get into a hurry, this is very hard to control, but an issue you must work on. Thanks Helpful 1 Not Helpful 0
- Only use epoxy plenty fresh air (ventilation) when boat building to avoid possible permanent nerve damage caused by inhaling fumes. Thanks Helpful 1 Not Helpful 0

- A wooden boat won't sink; it may swamp, but will still float, so if you fall out and the boat fills with water, stay with it, it could save your life. Thanks Helpful 34 Not Helpful 9
- Keep the area you work in clean, well vented and a fire extinguisher on hand all the time. Thanks Helpful 21 Not Helpful 11
- Epoxy is toxic and you can get very sick from prolonged exposure to epoxy. Try not to breath the fumes or let the epoxy (or its components) come in contact with your skin. Use safety gear, safety glass' prevent splatter into your eyes, an air filter (charcoal) and lots of ventilation are recommended, rubber or vinyl gloves, and an old long sleeve shirt. Thanks Helpful 2 Not Helpful 1
- Always use Personal Flotation Devices (PFDs) when you are in a boat. Do not sit on your PFDs. Certain states and local laws specifically require PFDs for young people. Thanks Helpful 2 Not Helpful 2
You Might Also Like

- ↑ https://www.christinedemerchant.com/stitch-and-glue-boatbuilding.html
- ↑ https://www.epoxyworks.com/index.php/bonding-with-fillets/
- ↑ https://www.youtube.com/watch?v=_tkR9hMq2wY
About This Article
To build a simple boat, lay the keel of the boat and then add ribs to form the shape of the boat. The ribs should taper to a point at the bow of most boats, curve outward in the middle, and narrow at the stern. To build the hull, you’ll want to use either strips of wood or sheets of fiberglass. Then, once you’ve completed the hull, paint the boat with special marine paint that won’t come off in the water. For more detailed instructions, read on! Did this summary help you? Yes No
- Send fan mail to authors
Reader Success Stories
Alan Houghey
Nov 18, 2021
Did this article help you?
Kobus Van Baalen
Dec 28, 2017
Joseph Slivinsky
Jan 14, 2018
Halt O'Carrick
May 8, 2017
Ayaan Gupta
Nov 2, 2018

Featured Articles

Trending Articles

Watch Articles

- Terms of Use
- Privacy Policy
- Do Not Sell or Share My Info
- Not Selling Info
Don’t miss out! Sign up for
wikiHow’s newsletter
- About Crafts by Amanda
- Visit Our Recipe Site
- Work With Us
- Free Newsletters
- Join our Facebook craft group
- Tutorial Index
- Adult Crafts
- Crafts for Kids
- Crafts for Seniors
- Recycled Crafts
- Seasonal Crafts
- Holiday Crafts
- Free Printables
- Craft Collections
- Bath & Body
- Beach Crafts
- Clay Pot Crafts
- Decoupage Crafts for Adults
- DIY Gift ideas
- Garden Crafts
- Home Decor Projects
- Kitchen Crafts
- Light Bulb Crafts
- Luminary Crafts
- Mason Jar Crafts
- Photo Display Ideas
- Recycled Crafts for Adults
- Wearable Crafts for Adults
- Animal Crafts for Kids
- Back to School Crafts
- Beach Crafts for Kids
- Camp Crafts
- Cardboard Tube Crafts for Kids
- Decoupage Crafts for Kids
- Easy Crafts for Kids
- Nature Crafts for Kids
- Other Kid’s Crafts
- Paper Plate Crafts for Kids
- Recycled Crafts for Kids
- Slimes, Doughs, & Clay
- Wearable Crafts for Kids
- 4th of July Crafts
- Christmas Crafts
- Earth Day Crafts
- Easter Crafts
- Father’s Day Crafts
- Halloween Crafts
- Memorial Day Crafts
- Mother’s Day Crafts
- New Year’s
- Other Holidays
- Patriot Day Crafts
- St. Patrick’s Day Crafts
- Thanksgiving Crafts
- Valentine’s Day Crafts
- Winter Crafts
- Spring Crafts
- Summer Crafts
- Fall Crafts
- Skip to primary navigation
- Skip to main content
- Skip to primary sidebar
- Skip to footer
Crafts by Amanda
crafts for adults and kid's crafts
DIY Concrete and Driftwood Sailboat
Author by Jane and Sonja on July 22, 2019 Updated on December 6, 2020
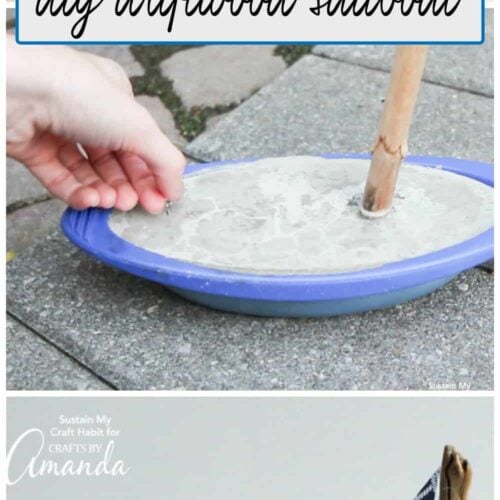
While you won’t want to try floating it, this DIY concrete and driftwood sailboat is a breezy nautical or coastal decor idea for your home or cottage. It would look great in the same room displaying this DIY Driftwood Crab Wall Art !
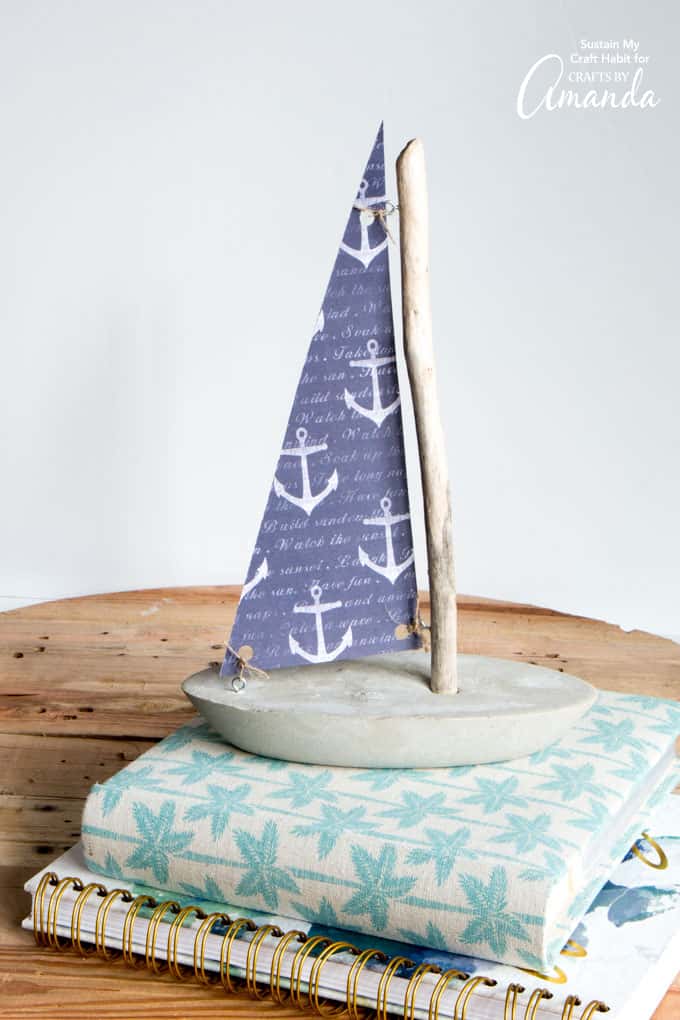
Hello! Sonja from Sustain My Craft Habit here. Ever since I made these DIY stepping stones with the kids this summer, the urge to make stuff with concrete has hit. There’s just something so gratifying about mixing fluid ingredients like sand, cement, and water together to make something solid, and well… concrete!
We’ve been making over our small family cottage over the past few months. We decided that a concrete and driftwood sailboat would be the perfect nautical touch to our beach-themed bedrooms .
We love the irony of the base being the least likely thing on Earth to float: concrete! In the end, the industrial hard concrete boat with the rustic natural driftwood mast make the perfect combination.
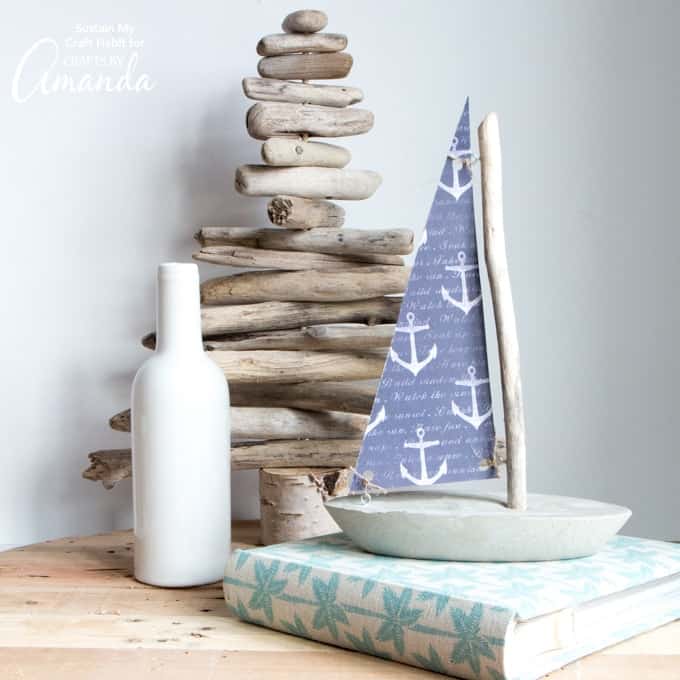
Check out the video for making these adorable driftwood sailboats below!
Supplies Needed for these Sailboats
- boat-shaped mold (e.g. a beach toy)
- straight driftwood piece, about 12” long
- vegetable oil
- sand for concrete
- Portland cement
- container with water
- container for mixing
- measuring cup
- spoons for scooping ingredients and for mixing
- drill and small drill bit
- 12”x12” nautical themed scrapbook paper
- natural twine
- pencil, ruler
- scissors, glue
Instructions for Making a DIY Concrete and Driftwood Sailboat
Making the concrete boat.
- Start to make your DIY concrete and driftwood sailboat by generously coating your boat mold with a release agent such as vegetable oil.
- Use a measuring cup to measure equal amounts of sand and cement (two cups of each in this case). Thoroughly blend them together.
- The amount of water that you need to add to the mixture will depend on the moisture level of the sand to begin with. Start by adding a half part (e.g. 1 cup) of water to the cement mixture. It’s better to start with less water and then add more if needed. You’re aiming for a thick dough-like consistency.
- My mixture felt quite thin, so I added a bit more each of the sand and cement to the mixture.
- Either pour or scoop your concrete mixture in your mold. Don’t overfill.
- Gently tap the mold on the table top to level the concrete and help move air bubbles to the surface.
- Place the filled boat mold on a level surface and let sit for at least one hour before inserting the driftwood mast.
Note: If the concrete appears to be drying too quickly (e.g. hot weather), consider spraying the surface with water at the beginning to keep it from cracking. Cement cures not dries and needs to stay moist to cure properly.
Adding the Sailboat Mast and Eyelets
- Once the concrete has firmed up a bit, try inserting the driftwood mast, about 1/3 of the way from the front of the boat. It should be able to stand up on its own. If not, wait another hour and try to insert the driftwood again. Jiggle the boat to help the cement settle around the driftwood.
- Insert a small eyelet close to the back of the boat before the concrete sets completely. Let the concrete boat completely cure 24-48 hours.
- Remove concrete from mold.
- Gently sand all edges.
- Drill two small eyelet holes in the driftwood mast: 1” from the top and 1” from the surface of the concrete boat. Ensure that the holes are facing towards the back of the boat.
- Screw eyelets into each of the drilled pilot holes.

Mounting the Sail
- Measure the distances between the three eyelets to determine how the sail needs to be cut. Add an extra 1” to the length and width of the triangle.
- Use those measures to mark and then cut a triangular shaped sail from the nautical scrap book paper.
- Use the cut sail as a template to cut a second sail. Ensure that the pattern on the print is in the same direction for both pieces of paper. (Note: this step isn’t necessary if you use 2-sided scrapbook paper).
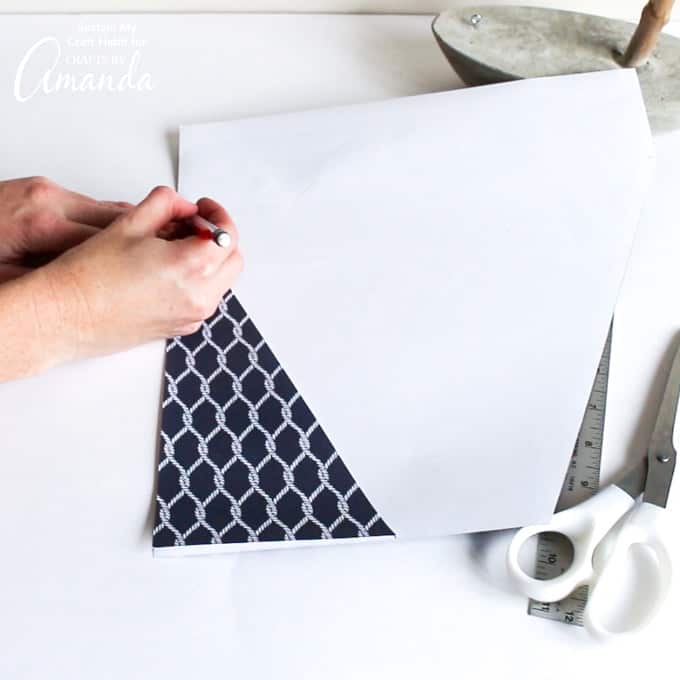
- Using a double sided tape, apply tape to back side of one cut triangle. Stick the two wrong sides together and trim away any uneven edges.
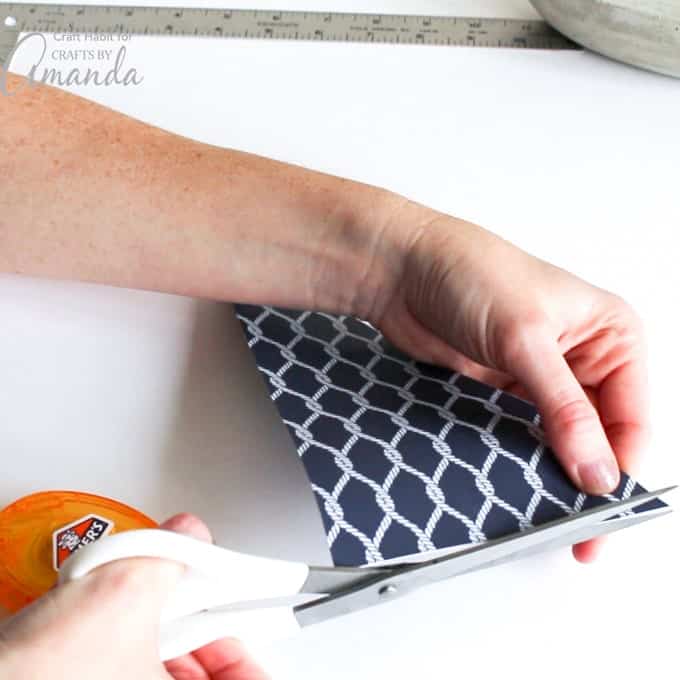
- Hold the cut triangle up to your sailboat to roughly mark the placement of the holes. Alternatively, you can measure the distance between the eyelets (length and width) and mark them onto the triangle cut paper. Using a hole punch, insert your cut paper and punch one hole over top of your markings.
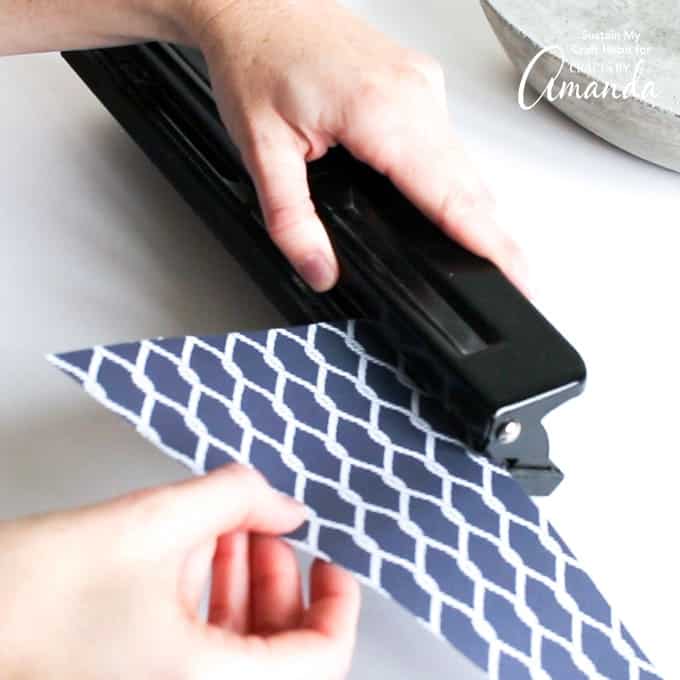
- Begin attaching the sail to the boat by aligning the hole punches on the paper with the eyelets on the boat. Loosely tie them together using a pieces of cut twine.
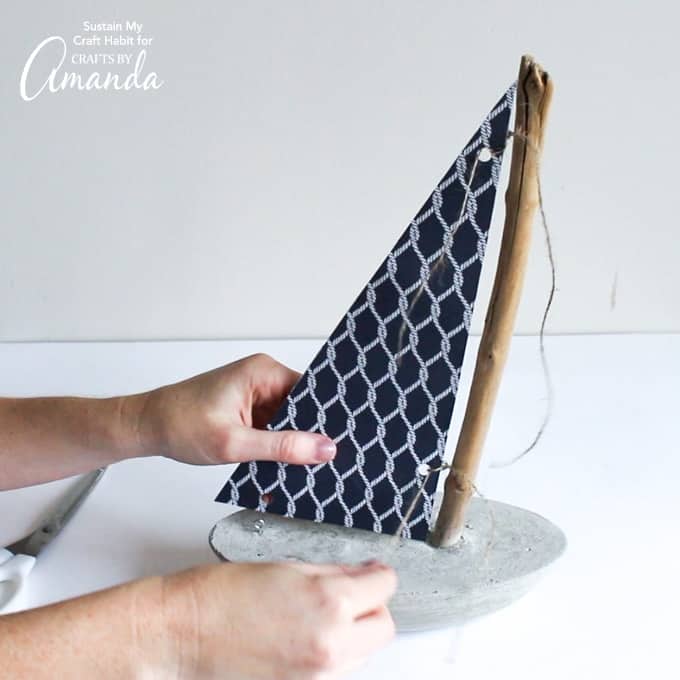
- There you go! A beautiful nautical driftwood sailboat that’s perfect for your coastal decorating. We think this piece would be great for the cottage or home, especially in a beach-themed nursery or bedroom. It would also make a great gift idea for any sailboat lover!
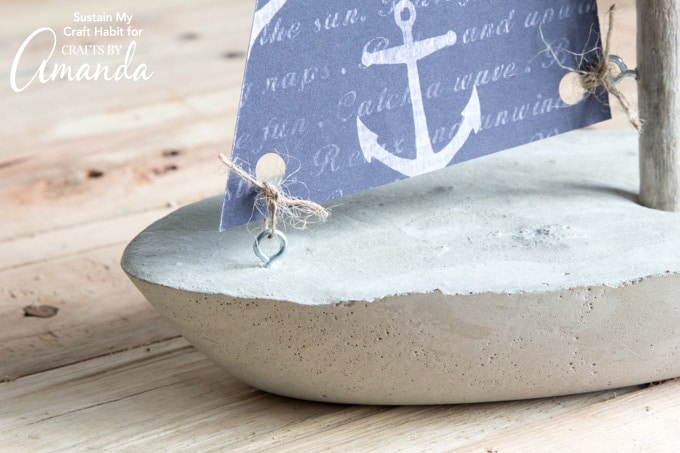
Where would you put your DIY concrete and driftwood sailboat? Looking for more nautical and beach themed home decor? Make sure to check out the projects below!
- DIY Driftwood Signs
- Clay Pot Lighthouse
- Driftwood Art with Starfish
- Cottage Style Beach Frames
- Coastal Branch Tree for Christmas
- Weathered Beach Flag
- boat-shaped mold e.g. a beach toy
- straight driftwood piece about 12” long
- 3 eyelets
- 12 ”x12” nautical themed scrapbook paper
- pencil ruler
- scissors glue
Instructions
- Use a measuring cup to measure equal amounts of sand and cement (two cups of each in this case). Thoroughly blend them together.
- Place the filled boat mold on a level surface and let for at least one hour before inserting the driftwood mast.
- Note: If the concrete appears to be drying too quickly (e.g. hot weather), consider spraying the surface with water at the beginning to keep it from cracking. Cement cures, not dry. And needs to stay moist to cure properly.
- Remove concrete from the mold.
- Use those measures to mark and then cut a triangular shaped sail from the nautical scrapbook paper.
- Using a double sided piece of tape, apply tape to back side of one cut triangle. Stick the two wrong sides together and trim away any uneven edges.
- Hold the cut triangle up to your sailboat to roughly mark the placement of the holes. Alternatively, you can measure the distance between the eyelets (length and width) and mark them onto the triangle cut paper. Using a hole punch, insert your cut paper and punch one hole over top of your markings.
- Begin attaching the sail to the boat by aligning the hole punches on the paper with the eyelets on the boat. Loosely tie them together using a piece of cut twine.
This post originally appeared here on Oct 27, 2017.
- Recent Posts
- Halloween Ribbon Wreath - September 26, 2023
- Vacation Photo Jar - July 25, 2023
- Patriotic Painted Rocks - June 6, 2023
Reader Interactions
Free tutorials + free craft book.
Get your copy of of "5 Christmas Ornaments to Make" when you subscribe!
October 28, 2017 at 2:40 am
you sisters are genius….. this is something you can out anywhere… and so easy to make one too…
loved your craftiness… :)
Jane and Sonja says
November 21, 2017 at 1:18 pm
Thank you so much Jam! We really appreciate your kindness.
Leave a Reply Cancel reply
Your email address will not be published. Required fields are marked *
All Time Favorites

Deco Mesh Pumpkin Wreath…
Adorn your door this fall with a pretty deco mesh ... Go To project

Winter Luminaries: Snowy Pinecone…
Make pretty winter luminaries that appear to be covered ... Go To project

Ladybug Painted Rocks…
I'm going to show you how to make these adorable ... Go To project

20 Uses for Prescription Pill…
You've been collecting prescription pill bottles for ... Go To project
Meet the Family

Founder and Designer

Editorial Manager

Social Media Manager
As seen on:.

- Jar Photo Frames
- No-Sew Roman Shade
- Paper Flowers
- How to Make a Scrunchie
- Mermaid Slime
- Meet the Creative Team
- Work with Us
- Privacy Policy
- Accessibility
Images/text copyright Amanda Formaro 2020. To feature a post from Crafts by Amanda, you may use one photo credited and linked back directly to the project post.
Free Tutorials + FREE CRAFT BOOK!
GET YOUR COPY OF OF "5 CHRISTMAS ORNAMENTS TO MAKE" WHEN YOU SUBSCRIBE!
Rate This Recipe
Victim ID’d in deadly Lake Cumberland boating accident
Russell Co., Ky. (WKYT) - UPDATE : Russell County Coroner Mark Coots, tells WKYT, 37-year-old Anthony J. Williams was killed in the crash.
ORIGINAL: One person is dead and another has been injured after a vessel collided with Cemetery Island on Lake Cumberland early Saturday morning, according to The Department of Fish & Wildlife.
The incident occurred at about 1:30 a.m. Saturday. One victim was found injured, while the other was pronounced dead at the scene, after the body was discovered by a diver from Russell County Search & Rescue, who also responded.
“You’re just -- you’re running things through your mind, you know ‘what’s going on? Have we lost a life? Or do we have someone badly injured?’,” said Sergeant Wayne Wilson, who got the call early Saturday morning. “From that very moment until you get to the scene, you’re trying to gather information.”
The rescued individual received immediate medical attention for injuries sustained during the accident.
Sergeant Wilson said the lack of light out on the water contributed to the dangerous conditions faced by those involved, such as not being able to see floating objects including logs and trash.
“They were operating after dark and that enhances the dangers,” he said. “You can’t see those things floating in the water.”
According to Sergeant Wilson, it is important to maintain a safe speed which boating on the water, and to wear a life jacket to prevent drowning deaths.
This story is still developing and will update as more details become available.
Copyright 2024 WKYT. All rights reserved.

Victim identified in deadly Scott County crash

Couple arrested burglarizing home of victim in fatal Wayne County accident

Multiple individuals displaced after house fire in Lexington

Lexington Police investigate afternoon shooting
Latest news.

Top Stories: WKYT News at 11:00 PM - 04/28/2024

WATCH | Dozens take part in 31st Annual Lexington AIDS Walk

Lexington pharmacy discusses safe drug disposal

Laurel Co. road reopened after crash

Dozens take part in 31st Annual Lexington AIDS Walk
Coast Guard Sector Charleston rescues eight stuck in boat off James Island
CHARLESTON, S.C. (WCSC) - The Coast Guard says it rescued eight people from a boat after it ran aground near James Island Saturday evening.
Coast Guard Sector Charleston received a report at 4:15 p.m. from a person aboard the boat who said their vessel had gotten stuck on the Stono River with eight people on board and there were several injuries.
Coast Guard crews were dispatched in a small response boat. Barrier Island Ocean Rescue, James Island Fire and Rescue and the South Carolina Department of Natural Resources also responded.
The boat crew arrived on scene and was able to safely take one injured passenger to EMS at the Sol Legare Public Boat Landing to be treated.
Six of the remaining people were taken to shore without incident while one stayed behind to wait for a salvage crew.
The commercial salvage crew was able to unground the boat and take it and the remaining passenger to safety.
“We extend our heartfelt gratitude to our local maritime partners for their invaluable assistance during this case,” Petty Officer 3rd Class Kanon Juneau, a member of the responding team, said. “We remind all mariners that safety on the water involves traveling at safe speeds, keeping safety equipment onboard, and being vigilant and aware of your surroundings.”
Copyright 2024 WCSC. All rights reserved.

2 dead in hit-and-run auto-pedestrian crash in Downtown Charleston

Family frustrated over problem with new Lennar home in Moncks Corner

4 teenagers die in high-speed chase after trooper uses PIT maneuver

Fire reported at Mount Pleasant Seafood

W. Richardson Avenue reopened after rollover crash
Latest news.

Families gather to celebrate 17 years of the Charleston Parks Conservancy

VIDEO: Families gather to celebrate 17 years of the Charleston Parks Conservancy

VIDEO: 2 dead in hit-and-run auto-pedestrian crash in Downtown Charleston

Early voting for $200 million Dorchester District Two referendum to begin
Cookies on GOV.UK
We use some essential cookies to make this website work.
We’d like to set additional cookies to understand how you use GOV.UK, remember your settings and improve government services.
We also use cookies set by other sites to help us deliver content from their services.
You have accepted additional cookies. You can change your cookie settings at any time.
You have rejected additional cookies. You can change your cookie settings at any time.
- Entering and staying in the UK
- Refugees, asylum and human rights
- Asylum decisions and appeals
- Statistics relating to Illegal Migration
- Home Office
Additional statistics relating to Illegal Migration (April 2024)
Updated 26 April 2024

© Crown copyright 2024
This publication is licensed under the terms of the Open Government Licence v3.0 except where otherwise stated. To view this licence, visit nationalarchives.gov.uk/doc/open-government-licence/version/3 or write to the Information Policy Team, The National Archives, Kew, London TW9 4DU, or email: [email protected] .
Where we have identified any third party copyright information you will need to obtain permission from the copyright holders concerned.
This publication is available at https://www.gov.uk/government/statistics/statistics-relating-to-the-illegal-migration-bill/additional-statistics-relating-to-illegal-migration-march-2024
This ad hoc statistical release provides an update with the latest available Home Office data at the end of March 2024, and with some additional information for the first part of April.
The publication of this information supports the Prime Minister’s statement made on 22 April 2024. It is provisional data derived from internal operational MI (Management Information) unless otherwise indicated, and therefore may not correspond exactly to subsequent official statistics releases.
A selection of Statistics from Home Office operational systems relating to the Illegal Migration Act were first published on 24 April 2023 to support parliamentary debates on the Act and have been subsequently updated on several occasions.
Statistics on the number of migrants detected crossing the English Channel in small boats are updated daily by the Home Office and published on GOV.UK.
Comprehensive data on small boat arrivals is published by the Home Office in the statistical report on small boats and irregular migration as part of the regular quarterly Home Office Immigration system statistics . The Home Office publishes a wide range of statistics relating to the operation of the asylum system in the Immigration system statistics. The next quarterly publication will be on 23 May.
Provisional operational data shows that between 1 January and 21 April 2024 there were:
- 6,265 small boat arrivals compared to 5,049 in the same period last year, an increase of 24%
- together, Vietnamese (1,266) and Afghan (1,216) arrivals comprised 40% of the total arrivals in this period and are the top 2 nationalities arriving so far in 2024
- Vietnamese nationals make up 20% of all arrivals so far this year compared to less than 3% (125) in the same period last year; this represents a ten-fold year-on-year increase in Vietnamese arrivals
- Afghan nationals make up 19% of all arrivals so far this year, which is broadly similar to the proportion of arrivals in the same period last year (22% - 1,098)
- there were 3,783 arrivals of all other nationalities compared to 3,826 in the same period last year, which is a decrease of 1%
- in the 12 months to 21 April 2024 there were 30,653 small boat arrivals compared to 45,755 in the calendar year 2022, a decrease of 33%
- in the 12 months to 21 April 2024 there were 2,515 Vietnamese arrivals; in the preceding 12-month period there were 509, which represents an almost five-fold increase year-on-year in Vietnamese arrivals
- Afghan arrivals made up 19% (5,872) of all arrivals in the 12 months to 21 April 2024, which is the same as the proportion of all arrivals in the preceding 12-month period (19% - 8,681)
- of the remaining nationalities there were 22,266 arrivals on small boats in the 12 months to 21 April 2024
Of the 129,407 initial asylum decisions received between 15 April 2023 and 14 April 2024, 93,431 were substantive decisions (56,834 grants and 36,597 refusals, which is a grant rate of 61%). This represents the highest annual number of substantive decisions on asylum cases in more than 20 years. Please see data table ‘Asy_D02’ of the Immigration system statistics data tables for full details.
The asylum initial decision WIP has decreased by 39% from 135,959 on 31 December 2022 to 83,154 on 14 April 2024, a reduction of 52,805.
The number of hotels used to accommodate asylum seekers has decreased from 398 on 22 October 2023 to 267 on 7 April 2024.
Home Office statistics published in February 2024 show that the accommodated asylum population (hotel population) on 31 December 2023 was 45,768. Provisional Home Office MI shows that the volume of asylum applicants in hotels has also decreased further between January and April 2024.
In the 12 months to 31 March 2024 there were 6,720 illegal working visits, an increase of 59% compared with the 12 months to 31 March 2023 when there were 4,237. This also represents an increase of 79% compared to January to December 2022, when there were 3,755 illegal working visits.
In the 12 months to 31 March 2024 the volume and value of civil penalties issued for illegal working was 1,676 and £30.49m. This is a 52% and 56% increase (respectively) when compared to the preceding 12-month period (1,105 and £19.49m).
In the 12 months ending 31 March 2024 there were 26,027 returns, of which 5,976 were Albanian nationals. In the preceding 12-month period ending 31 March 2023 there were 16,786 returns of which 2,419 were Albanian nationals. This equates to a year-on-year increase of 55% in all returns and almost two and half times more Albanian nationals. In the year ending 31 December 2022 there were 14,623 returns, of which 1,940 were Albanian nationals.
The volume of enforced returns has increased by 69% from 4,159 in the year ending 31 March 23 to 7,030 in the year ending 31 March 2024. In the year ending 31 December 2022 there were 3,821 enforced returns.
Provisional data quoted on this page has been extracted from live operational databases and may differ from other statistics published subsequently. The next update of the quarterly Home Office Immigration system statistics will be published on 23 May 2024.
Is this page useful?
- Yes this page is useful
- No this page is not useful
Help us improve GOV.UK
Don’t include personal or financial information like your National Insurance number or credit card details.
To help us improve GOV.UK, we’d like to know more about your visit today. We’ll send you a link to a feedback form. It will take only 2 minutes to fill in. Don’t worry we won’t send you spam or share your email address with anyone.
Small boat migrant arrivals by late April at highest level ever
More than 7,000 people have entered the UK by crossing the English Channel in a small boat since the start of the year.
Sunday 28 April 2024 19:19, UK

The number of migrants that have crossed the Channel in small boats during the first four months of the year is at its highest ever level.
Some 7,167 people have arrived on UK shores after travelling by small boat from the continent between 1 January to 27 April, with 902 entering just this past week
This compares to 5,745 for the same period last year. The previous record was 6,691 in 2022.
Politics latest: Key voter on Humza Yousaf's future will make proposals to 'help him out of a tight corne r'
The figures come after Rishi Sunak has staked much of his political future on getting the number of migrant boat crossings down.
On Sky's Sunday Morning With Trevor Phillips programme he said migrants travelling to Ireland after arriving in the UK on small boats was a sign the Rwanda scheme was already working as a deterrent.
"People are worried about coming here and that demonstrates exactly what I'm saying," he told Sky News.
More on Migrant Crossings

UK will 'not take back asylum seekers from Ireland until France takes back Channel migrants'

Ireland pledging emergency legislation to send asylum seekers back to UK in wake of Rwanda bill being passed

Migrants spotted in the Channel and rescued by coastguard
Related Topics:
- Migrant crossings
"If people come to our country illegally, but know that they won't be able to stay there, they are much less likely to come, and that's why the Rwanda scheme is so important."
However, the news that migrants are crossing from Northern Ireland into the Republic has sparked an outcry in the country, and prompted the government in Dublin to announce they are planning emergency legislation to send asylum seekers back to Britain.
More than 80% of recent arrivals in the republic came via the land border with Northern Ireland, Irish justice minister Helen McEntee told a parliamentary committee last week.
Read more: Rishi Sunak pledge tracker: PM's progress on five goals PM can no longer blame political opponents if Rwanda scheme fails How much of an impact will Rwanda act have?

Stopping the boats was one of the government's five priorities set out by the prime minister after he took office in 2023.
The latest figures have been seized upon by Labour, with shadow immigration minister Stephen Kinnock saying: "This is the blunt reality behind all of Rishi Sunak's empty boasts: more people have arrived by small boats so far this year than ever before and more people are having to be rescued.
"What will it take for Rishi Sunak to wake up and realise that his plan is not working?
"We desperately need a Labour government in place to get a grip of this issue.
"Our plan would strengthen Britain's border security, crush the smuggling gangs, clear the asylum backlog, end hotel use, and set up a new returns and enforcement unit so those with no right to be in the UK are swiftly returned."
Read more: Tory MP and doctor Dan Poulter defects to Labour Humza Yousaf to reject pact with Alex Salmond's Alba Party
Please use Chrome browser for a more accessible video player

Earlier this week, the prime minister said the government would "begin the process of removing those identified for the first flight" to Rwanda.
Mr Sunak said that they had increased detention spaces to 2,200 and had 200 caseworkers "ready and waiting" to process asylum claims.
He added that 25 courtrooms and 150 judges had been provided to deal with any legal cases quickly.
A Home Office spokesperson said: "The unacceptable number of people who continue to cross the Channel demonstrates exactly why we are operationalising our plans to get flights off the ground to Rwanda as soon as possible.
"We continue to work closely with French police who are facing increasing violence and disruption on their beaches as they work tirelessly to prevent these dangerous, illegal and unnecessary journeys.
"We remain committed to building on the successes that saw arrivals drop by more than a third last year, including tougher legislation and agreements with international partners, in order to save lives and stop the boats."
Related Topics

Inspired by Aaron Rodgers, Bernhard Langer making rapid return to PGA TOUR Champions
Change Text Size
Bernhard Langer will make his PGA TOUR Champions return at next week’s Insperity Invitational presented by United Healthcare, just three months after the 66-year-old tore his left Achilles tendon.
“Statistically, they say that guys win the most tournaments from age 50 to 55 on the PGA TOUR Champions, and then they kind of drop off,” Langer said in a statement. “I’m trying to continue to prove them wrong.”
“Part of my training is doing other things, like ping-pong and other sports," Langer said. "So I played pickleball with some of my friends. My opponent lobbed me and I did a few steps back, jumped up and hit it and as I landed, I heard this loud noise and pain in my leg. I went down on the ground and at first I thought I hit something walking backwards but as I looked around there me was nothing there and I realized most likely it’s a torn Achilles tendon.
“I immediately started talking about, ‘Well, what does this mean?” he continued. "Because I had no idea, how long will I be out? Will I ever be back?”
Bernhard Langer’s remarkable recovery after Achilles injury
Langer's doctors quickly alleviated his worries, projecting a full recovery if he followed the physical therapy plan. Langer spent more than a month wearing a boot on his left foot but shed it by the end of March when he was able to stand on his own for the first time. Shortly after, he was cleared to begin working out and hitting balls.
“That was an amazing feeling, that I can actually stand again because I didn’t stood for weeks,” Langer said.
Langer found inspiration in New York Jets quarterback Aaron Rodgers, who underwent the same Achilles surgery last September. Rodgers’ accelerated timeline, which allowed the star quarterback to throw a football within three months, provided Langer a roadmap.
“That lifted my spirits, hearing he was back on the field throwing the ball after eight or nine weeks," Langer said. "That encouraged me that I may do something similar."
Bernhard Langer | Swing Theory | Driver, iron, wedge
It’s a remarkable recovery for Langer, who has defied his age and expectations many times before. Langer has won more than 130 professional golf tournaments around the world throughout his career. A three-time winner on the PGA TOUR, including the 1985 and 1993 Masters, Langer also has 12 major victories on the PGA TOUR Champions. He is one of only five players to have won tournaments on all six continents where golf is played. He has played on 10 Ryder Cup teams and captained the European squad to victory in 2004.
Langer won twice last year, including the U.S. Senior Open, to pass Hale Irwin for most victories on Champions Tour. Langer has finished in the top-five in more than 40 percent of his Champions Tour starts. The ageless Langer has accumulated 28 titles after the age of 57, and 13 of his wins have come following his 60th birthday. The only player to win after turning 64, which he has done four times, Langer is also the only player in history to win every major on the senior swing.
He doesn’t intend for this injury to derail that pace: “My goal was always to be the best I can be and I think if I get back to being my best again, even at my age, I still think I’m competitive and win.”

This ‘supereasy ramen’ recipe shows how…
Share this:.
- Click to share on Facebook (Opens in new window)
- Click to share on X (Opens in new window)
Daily e-Edition
Evening e-Edition
- Things to Do
- Top Workplaces
- Advertising
- Classifieds
Breaking News
Teenage woman killed, four other injured in one-car rollover crash in willington, things to do restaurants food drink, subscriber only, this ‘supereasy ramen’ recipe shows how easy it is to make the japanese noodle dish at home.

This photo shows the ingredients to cook ramen easily in Tokyo, on April 22, 2024. Ramen noodles are so popular they have become one reason to visit Japan. But ramen can easily be cooked at home too, especially if you can find the ingredients at your neighborhood Asian grocery store. (AP Photo/Yuri Kageyama)

A ramen noodled is added to the soup being cooked in Tokyo, on April 22, 2024. Ramen noodles are so popular they have become one reason to visit Japan. But ramen can easily be cooked at home too, especially if you can find the ingredients at your neighborhood Asian grocery store. (AP Photo/Yuri Kageyama)

This photo shows a bowl of ramen noodle cooked easily in Tokyo, on April 22, 2024. Ramen noodles are so popular they have become one reason to visit Japan. But ramen can easily be cooked at home too, especially if you can find the ingredients at your neighborhood Asian grocery store. (AP Photo/Yuri Kageyama)
By The Associated Press
TOKYO (AP) — Ramen noodles are so popular they have become one reason to visit Japan. But ramen can easily be cooked at home too, especially if you can find the ingredients at your neighborhood Asian grocery store.
A Japanese cookbook author who goes by one name, Rii, believes food should be more than delicious — it must be easy to make.
Her book, “Lunches Children Love,” is about making cute bento lunches filled with laughing faces and animals made out of food. And she shares recipes for adults on her Instagram account (only in Japanese), including healthy vegetarian rice gruel and curry.
Rii shared this ramen recipe with The Associated Press. It uses packaged noodles, since making ramen noodles from scratch is a long and complicated process.
SUPEREASY RAMEN, By RII
Start to finish: 20 minutes
Servings: 5
INGREDIENTS:
Five packages ramen noodles (120 grams or about 4 ounces each)
7.5 cups water
Half a cup soy sauce
5 tablespoons Japanese mentsuyu soup base sauce
2 tablespoons oyster sauce
2 tablespoons chicken soup stock
3 tablespoons chicken oil
1 tablespoon sesame seed oil
Some grated garlic and grated sesame seeds
Boil the water in a large pot. Add the sauces and other ingredients to the boiling water. Then add the noodles and cook until tender. Add your favorite toppings, such as chopped green onions, canned or packaged “menma” bamboo shoots and a sliced boiled egg. Serve in a bowl.
More in Things to Do

Orange crush: Boats packed with revelers tour Amsterdam canals to celebrate the king’s birthday

Arts | ‘Connecticut’s Bookshelf’ exhibit pays tribute to local literary favorites and facts

Advice | Wine walkabout: We visit Tuscany wine country and eat well with a chef’s recipe
Why you might have heard paul simon’s ‘the sound of silence’ at spanish mass.

Step-by-Step Guide: How to Make an Origami Sailboat – Easy DIY Instructions
Alex Morgan

Origami, the art of paper folding, offers a creative and meditative way to engage in a hands-on activity. Making an origami sailboat is a delightful project that can be enjoyed by people of all ages. In this article, we will provide you with a step-by-step guide to make an origami sailboat, along with some tips and tricks to enhance your folding techniques.
To begin with, you will need a few materials for making an origami sailboat. The most essential material is paper, preferably square in shape. It is recommended to use thin and crisp paper to achieve clean and precise folds. Origami-specific paper or solid-colored craft paper works well for this project.
Now, let’s dive into the step-by-step guide. The process involves a series of folds and creases to transform a simple piece of paper into a charming sailboat. We will go through each step in detail, starting with folding the paper diagonally to create a triangle shape. Next, we will fold the corners to the center, followed by folding the bottom edges upward.
After that, we will fold the paper in half to create a smaller triangle shape. This will form the base structure of the sailboat. Then, we will move on to creating the sail by folding and shaping a portion of the paper. We will make the necessary adjustments and finishing touches to perfect our origami sailboat.
Throughout the process, we will provide you with various tips and tricks to improve your folding techniques and make the process easier and more enjoyable. we will explore different variations and designs for your origami sailboat, including making it larger or smaller, as well as adding additional details to make it more personalized and unique.
Origami sailboats can be a delightful decorative item or a fun toy for children. So grab your paper and get ready to embark on a creative journey as we guide you through the steps of making your very own origami sailboat.
Key takeaway:
- Making an origami sailboat requires folding paper in specific steps, resulting in a beautiful creation.
- Using the right type and size of paper is crucial for making a successful origami sailboat.
- Attention to detail and following the step-by-step guide is essential for achieving the desired result.
Materials Required for Making an Origami Sailboat
To make an origami sailboat, you will need the following materials:
- A square piece of origami paper
- A clean, flat surface
- Optional: ruler or bone folder for precise folds
To begin, place the origami paper colored-side down on the flat surface. Fold the paper in half diagonally, creating a triangle . Then, unfold the triangle and fold the paper in half horizontally. Unfold the paper once again and bring the top two corners of the square together, forming a smaller triangle . Hold the left and right corners of the triangle and pull them apart while pushing the center downward, shaping the paper into a diamond .
Next, fold the bottom corner of the diamond up towards the top corner. Flip the paper over and repeat the previous step on the other side. Open the flaps on the left and right sides to create the sail of the boat. Fold the bottom edge of the paper up to create the hull of the sailboat.
It is important to note that specific origami instructions should be followed for the sailboat design you wish to create. Feel free to explore different origami sailboat designs, experiment with colors and patterns of origami paper, and enjoy the process of making unique sailboats.
What type and size of paper is best for making an Origami Sailboat?
When creating an Origami Sailboat , the choice of paper is essential in determining the final outcome. Consider the following options:
- Origami paper: This is the go-to option for crafting Origami Sailboats . It is specifically designed for origami projects, offering a thin and lightweight texture. Typically, origami paper measures around 6 inches by 6 inches, which is suitable for most sailboat designs.
- Paper for larger sailboats: If you’re planning to make larger sailboats, opt for larger-sized origami paper or any square paper of your preference. Keep in mind that using bigger paper will result in a bigger sailboat.
- Regular paper: In the absence of origami paper, you can use regular paper such as printer paper or colored construction paper. Just ensure that the paper is square-shaped, as folding may be challenging with rectangular paper.
- Paper thickness: The thickness of the paper plays a role in the sturdiness of your sailboat. Thicker paper will offer better shape retention, while thinner paper may be more delicate. Experiment with different thicknesses to find your personal preference.
Remember, the best paper for making an Origami Sailboat is one that you feel comfortable working with and allows you to achieve the desired folding and shaping. Happy folding!
Fun fact: Origami originated in Japan and has been practiced for over a thousand years. It is not only an art form but also a means to cultivate patience and attention to detail.
Step-by-Step Guide to Make an Origami Sailboat
Get ready to sail away on a creative journey as we dive into the step-by-step guide to crafting your very own origami sailboat . We’ll start by folding the paper diagonally and then move on to folding the corners to the center. Next, we’ll take a look at folding the bottom edges and folding the paper in half. Then, we’ll create the sail of our origami sailboat before adding those final finishing touches and adjustments . Let’s get folding and set sail on this origami adventure !
Step 1: Folding the Paper Diagonally
To create an origami sailboat , you will first need to fold the paper diagonally. Here are the steps:
Step 1: Start with a square piece of paper.
Step 2: Place the paper on a flat surface, with one corner pointing towards you.
Step 3: Fold the bottom corner diagonally up towards the opposite corner to create a triangle shape. Make sure to align the edges perfectly.
Step 4: To ensure a crisp crease, press down firmly along the fold.
Step 5: Unfold the paper back to its original square shape. You should now have a diagonal crease running from one corner to another.
Origami , an ancient Japanese art of paper folding, has been practiced since the 6th century. Its exact origins remain unknown, but it was initially used for ceremonies and eventually became a popular recreational activity. The word “ origami ” comes from the Japanese words “ oru ” (to fold) and “ kami ” (paper). Throughout the centuries, various folding techniques and designs, including the origami sailboat , have been developed. Today, origami serves as a widely enjoyed hobby that fosters creativity and provides relaxation.
Step 2: Folding the Corners to the Center
To fold the corners to the center in making an origami sailboat, follow these steps:
1. Unfold your folded paper to reveal the square shape.
2. Hold the paper with the unfolded side facing down.
3. Fold the top right corner diagonally towards the center of the paper.
4. Crease the fold well to secure it.
5. Repeat the same diagonal fold with the top left corner, bringing it towards the center.
6. Crease the fold firmly.
7. You should now have a triangular shape with two flaps on each side.
8. Fold both flaps inward towards the center, tucking them inside the triangular shape.
9. Press down to secure the folds.
10. After completing Step 2: Folding the Corners to the Center , you can proceed to the next step to continue creating your origami sailboat.
By following these instructions for Step 2 , you will successfully fold the corners to the center, creating the foundation for the rest of the origami sailboat.
Step 3: Folding the Bottom Edges
In Step 3, fold the bottom edges of the origami sailboat following these steps:
1. Turn the paper over so the folded diagonal line is facing downward.
2. Fold the bottom edge of the paper upwards, aligning it with the center crease.
3. Make a firm crease along the folded edge.
4. Repeat the same fold on the other side of the paper, bringing the bottom edge up to the center crease.
5. Ensure both folds are symmetrical and parallel.
6. Make a firm crease along the second folded edge.
7. Unfold the bottom edges back to their original position.
Following these steps will create a clean and precise fold along the bottom edges of the paper, forming a stable base for the origami sailboat to stand upright and sail smoothly.
Step 4: Folding the Paper in Half
- Take the diagonally folded paper from Step 1.
- Hold the top corner of the paper and fold it carefully to meet the bottom corner.
- Ensure perfect alignment of the paper edges.
- Press down firmly to create a sharp crease in the middle.
- Unfold the paper to reveal a vertical folded line down the center.
- Your paper is now folded in half, creating a clean and symmetrical shape for the base of your origami sailboat.
Pro-tip: When folding the paper in half, use your fingertips to gently guide the paper along the crease line for a smooth and precise fold.
Step 5: Creating the Sail of the Origami Sailboat
1. Fold the top edge of the paper diagonally to the bottom edge, firmly creasing the fold.
2. Unfold the previous step and repeat it in the opposite direction, firmly creasing the fold.
3. Rotate the paper so that one corner is pointing towards you.
4. Fold the left corner upwards, aligning it with the top center point of the paper, and crease the fold firmly.
5. Repeat the previous step with the right corner, folding it upwards and aligning it with the top center point of the paper, creasing the fold firmly.
6. Fold the bottom edge of the paper upwards, creating a small flap, and crease the fold firmly.
7. Open up the flap and tuck it into the pocket created by folding the corners to hold the sail in place.
I remember learning how to create the sail of an origami sailboat at a summer camp. One of the counselors showed us the steps, and it was mesmerizing to see a simple piece of paper transform into a boat with a beautiful sail . We spent the afternoon racing our sailboats in a small pond, proudly displaying our creations. This fun and memorable experience sparked my love for origami, and I have since continued to explore different origami designs and share the joy of creating with others.
Step 6: Finishing Touches and Adjustments
After completing the previous steps of folding the paper diagonally, folding the corners to the center, folding the bottom edges, folding the paper in half, and creating the sail of the origami sailboat , it’s time for step 6: finishing touches and adjustments.
To add finishing touches , smooth out any creases or wrinkles on the paper by gently running your fingers over them.
Next, ensure that all the folds are crisp and well-defined . Adjust any edges or corners that are not aligned properly to create a symmetrical sailboat.
Take a moment to examine your origami sailboat and make any necessary adjustments to ensure it stands upright and is balanced.
If you want to personalize your sailboat, decorate it with markers, stickers, or other embellishments. Be mindful not to add too much weight to the paper.
Once you are satisfied with the overall appearance and stability of your origami sailboat , your finishing touches and adjustments are complete.
The art of origami originated in Japan and has been practiced for centuries. Buddhist monks from China introduced it in the sixth century. Origami evolved from a religious and ceremonial practice into a popular form of entertainment. Different techniques and designs, including the origami sailboat , were developed over time. Today, people of all ages enjoy origami as a creative and meditative art form. The origami sailboat , with its simple yet elegant design, remains a favorite choice for beginners and experienced origami enthusiasts.
Tips and Tricks for Making an Origami Sailboat
Making an origami sailboat requires Tips and Tricks for the best results. Start with a square sheet of paper, either origami paper or a square cut from a regular sheet. Follow the folding diagram carefully, paying attention to the arrows and instructions. Use your fingernail or a bone folder for crisp folds that make the sailboat hold its shape. When folding corners, align the edges accurately for stability. Apply a small amount of glue for added durability if desired. With these Tips and Tricks , you can create an impressive origami sailboat. Practice and have patience, as precision and attention to detail are necessary. Enjoy the process and have fun exploring this wonderful art form!
Origami Sailboat Variations and Designs
There are several variations and designs for making origami sailboats:
– Classic Sailboat: This design is simple and easy to make. It consists of a triangular sail and a boat-shaped base.
– Double Sailboat: For a unique design, try making a double sailboat. It features two sails and a more intricate folding pattern.
– Colorful Sailboat: Add color to your sailboat by using different colored paper. This can make it more visually appealing and vibrant.
– Elaborate Sailboat: For a challenge, attempt to create an elaborate sailboat design. This design may involve more complex folds and additional details, like a mast or deck.
– Miniature Sailboat: Scale down the size for a cute and tiny version. Miniature origami sailboats can be used as decorations or as part of a larger origami scene.
– Custom Designs: Once you’ve mastered the basic sailboat designs, feel free to get creative and experiment with your own variations. Try different sail shapes, hull designs, or incorporate origami techniques from other models.
Remember to follow the folding instructions carefully and have fun exploring the various origami sailboat variations and designs!
How to make a larger or smaller Origami Sailboat?
To make a larger or smaller Origami Sailboat , follow these steps:
1. Choose the appropriate size of paper: When making a larger sailboat, use a larger square paper, such as 12×12 inches . For a smaller sailboat, use a smaller square paper, such as 4×4 inches .
2. Fold the paper diagonally: Fold the paper in half diagonally to form a triangle.
3. Fold the corners to the center: Take the right corner and fold it towards the center, then repeat with the left corner. This creates a smaller triangle.
4. Fold the bottom edges: Take the bottom edge of the triangle and fold it upwards, aligning it with the top edge. Repeat this fold on the backside of the triangle.
5. Fold the paper in half: Fold the entire triangle in half along the center crease, bringing the bottom point up to meet the top point.
6. Create the sail of the Origami Sailboat : Open up the top layer and fold it downwards along the center crease, creating a sail shape. You can adjust the size of the sail by folding more or less of the paper.
7. Finish with the finishing touches and adjustments: Make any necessary adjustments to the sailboat, such as creating a crease to hold the sail in place or shaping the bottom edges to resemble a boat.
By following these steps, you can easily make a larger or smaller Origami Sailboat to suit your preferences.
Adding additional details to the Origami Sailboat
Adding additional details to the origami sailboat enhances its appearance and makes it more visually appealing. Follow these steps:
1. Choose decorative paper: Select patterned or colored paper to add visual interest.
2. Add texture: Use embossing or foil to create texture on the paper for a unique and artistic touch.
3. Attach embellishments: Glue small beads, sequins, or other decorative elements to add sparkle and dimension.
4. Create designs: Use markers, colored pencils, or watercolors to draw patterns on the sail and hull.
5. Add stickers: Personalize the sailboat or match a specific theme with small stickers or decals.
6. Apply glitter or metallic accents: Add shimmer and shine to certain parts of the sailboat using glitter glue or metallic markers.
7. Experiment with different folds: Try additional folding techniques or origami models to create unique shapes or features.
By following these steps, you can transform your origami sailboat into a true work of art.
Some Facts About How To Make An Origami Sailboat:
- ✅ Making an origami sailboat requires folding a square piece of paper. (Source: Origami Guide)
- ✅ The origami sailboat can be used as a decoration or a gift tag. (Source: wikiHow)
- ✅ The steps to make an origami sailboat include folding the paper in half and folding the bottom flaps over to form an origami hat. (Source: wikiHow)
- ✅ Some tips for making an origami sailboat include using wax paper for floating on water and using colored paper for a more creative look. (Source: wikiHow)
- ✅ Instructions for making an origami sailboat have been translated into multiple languages, including Spanish and Russian. (Source: wikiHow)
Frequently Asked Questions
How do i make an origami sailboat using paper.
To make an origami sailboat, you will need a square piece of paper. Start by folding the bottom point of the paper up to the top point, then unfold this step. Next, fold the right point over to the left point and unfold it. Continue by folding the right point over to the central point and folding the left point over to the central point. These steps will help you create the basic structure of the sailboat.
Can I use any type of paper to make an origami sailboat?
Yes, you can use any paper that can be cut into a square shape. Craft paper, copy paper, or even colorful origami paper are all suitable options for making an origami sailboat. The choice of paper is up to your personal preference and the desired look of the final sailboat.
How can I decorate my origami sailboat?
You can decorate your origami sailboat in any way you like. You can use markers, colored pencils, or stickers to add designs or patterns to the sailboat. This allows you to personalize the sailboat and make it unique. Get creative and have fun with the decoration process!
What are some other uses for an origami sailboat?
An origami sailboat can be used in various ways. It can be a decorative item at a kids party, a table place card, a card embellishment, part of a hanging display or garland, or even a baby mobile. The versatility of the origami sailboat makes it a fun and adaptable craft for different occasions.
Are there more advanced origami boat designs I can try?
Yes, there are other origami boat designs that you can fold. While specific details about these designs are not provided in the sources, you can explore origami resources and books to find more intricate and challenging boat models. This allows you to further develop your origami skills and enhance your creativity.
What precautions should I take while making an origami sailboat?
While making an origami sailboat, take precautions to avoid paper cuts. Be mindful of how you handle the paper and folding techniques. If needed, seek the assistance of an adult or someone more experienced. When using scissors or other sharp tools, be cautious and handle them with care to prevent accidents.
About the author
Leave a Reply Cancel reply
Your email address will not be published. Required fields are marked *
Save my name, email, and website in this browser for the next time I comment.
Latest posts

The history of sailing – from ancient times to modern adventures
History of Sailing Sailing is a time-honored tradition that has evolved over millennia, from its humble beginnings as a means of transportation to a beloved modern-day recreational activity. The history of sailing is a fascinating journey that spans cultures and centuries, rich in innovation and adventure. In this article, we’ll explore the remarkable evolution of…

Sailing Solo: Adventures and Challenges of Single-Handed Sailing
Solo Sailing Sailing has always been a pursuit of freedom, adventure, and self-discovery. While sailing with a crew is a fantastic experience, there’s a unique allure to sailing solo – just you, the wind, and the open sea. Single-handed sailing, as it’s often called, is a journey of self-reliance, resilience, and the ultimate test of…

Sustainable Sailing: Eco-Friendly Practices on the boat
Eco Friendly Sailing Sailing is an exhilarating and timeless way to explore the beauty of the open water, but it’s important to remember that our oceans and environment need our protection. Sustainable sailing, which involves eco-friendly practices and mindful decision-making, allows sailors to enjoy their adventures while minimizing their impact on the environment. In this…
How can I get pesky squirrels to stop chewing my deck furniture?
You can’t make them stop chewing, but these deterrents may help limit the damage.
We have a deck and a few oak trees in our backyard in Silver Spring, Md. Several years ago, we replaced deck furniture made of wood and cast iron with new pieces made of aluminum. Last fall, we noticed squirrels had been gnawing on it. So when we covered the furniture with a tarp for the winter, we sprinkled it with a lot of cayenne pepper. We hoped that would stop the squirrels. But when we took off the covers a couple of weeks ago, the damage looks worse. I know squirrels are rodents and need to sharpen their teeth. Is there anything we can do to get them to stop chewing on the furniture?
There is no fail-safe way to prevent squirrels from chewing on materials they find attractive, but you can probably limit the damage.
As you note, squirrels are rodents, and, as such, they need to gnaw on stiff materials to wear down their upper and lower incisors, which grow throughout their lifetimes. In the woods, that allows squirrels to open nuts and rip apart stumps. In a yard, these animals chew wood, plastic, upholstery, asphalt roofing and much more — even soft metals. Squirrel teeth are no match for steel. But squirrels can bite into aluminum lawn furniture, aluminum flashing and copper wiring.
When squirrels chew their way into attics or other parts of houses, plugging the entry holes can go a long way toward preventing additional damage. You’re trying to protect furniture that’s out in the open, at least in good weather. But in both cases, one good place to start is to make your yard as inhospitable as possible to squirrels.
Feed dogs or cats indoors. Take down bird feeders, or at least switch to ones that are designed to keep out squirrels. Rake up acorns or other nuts frequently when they fall, usually from late summer into early winter. You can also try to keep squirrels from climbing into the trees to harvest nuts that haven’t yet fallen. The Maryland Department of Natural Resources suggests trimming away branches within 6 feet of the ground and then wrapping an 18-inch-long sheet metal cylinder around the trunk with the top of the cylinder about 4½ feet above the ground.
Squirrels usually avoid materials with tastes or scents they find disagreeable. Besides cayenne, peppermint is high on the list. Some people also report success with black pepper, vinegar, garlic and Irish Spring soap. But those scents need to be fresh to have any hope of working. The red pepper flakes you sprinkled around your furniture in the fall before you spread the tarp could easily have become stale during the winter. Or maybe there was enough ventilation under the tarp to blow the pepper away from the parts squirrels chewed.
During months when you are on the deck regularly, though, scents might be more effective as long as you reapply them frequently, especially after rain. Watch what happens. If a homemade concoction or a purchased product works for a while and then squirrels come back, perhaps they’ve figured out that the smell isn’t in the metal. Try switching to a different recipe. Peppermint oil alone or peppermint mixed with garlic or hot sauce might last longer than something mixed only with water.
It’s also possible that painting the furniture with a finish mixed with cayenne might work, because squirrels would refresh the smell as they gnaw. Rymar Industries , a manufacturer of stains and other finishes for decks, wood siding, log homes and fences, used to sell 2-ounce packages of Rymar Chew Stop, which it advertised as “a natural pepper additive that may help prevent animals from chewing on wood.”
A company representative said the Environmental Protection Agency no longer allows that product to be sold on its own, but Rymar incorporates it in other products.
There is also a long tradition of mixing cayenne into paint for the bottoms of boats, supposedly to help keep barnacles from growing there. You might want to experiment on some scrap pieces of aluminum — maybe a pot or two from a Goodwill store. A packet of Chew Stop was enough to treat 2 gallons of paint, which gives some idea of proportions if you make your own red-hot paint.
And understanding the reason squirrels chew might lead you to some other clever solutions. Can you make chair and table legs less attractive for chewing by wrapping them with soft material? Cushions might make edges of seats less vulnerable. And over the winter, tightly fitting furniture covers might work better than tarps. An even better solution for the winter would be to bring the furniture into a garage or garden structure — one you monitor occasionally to make sure squirrels haven’t chewed into them.
Trapping squirrels is another solution, but as with scents, it’s usually only a short-term fix. Where there is good squirrel habitat — for example, a yard like yours, with oak trees — new squirrels will move in, even if you remove the animals that are there now.
State and local regulations for trapping vary. In Maryland, homeowners need a permit (it’s free) from the state Department of Natural Resources to trap and shoot squirrels outside of hunting season, and permits are granted only when an animal is actively causing property damage or is a threat to public health and safety. Call the department’s nuisance wildlife hotline at 877-463-6497 for advice and a possible referral to a private licensed Wildlife Control trapper or exterminator.
If you do decide to trap, there’s the issue of what to do with any squirrels you catch. Hiring a pro solves that problem. WildlifeHelp.org , which in Maryland is supported partly by the Department of Natural Resources, notes that many states don’t permit people to move trapped squirrels to a different property because of concerns about spreading disease or releasing animals where they won’t survive. If you trap a squirrel that’s gotten into your attic, rapidly plugging the entry, moving a nest with babies outside (so the mother can move the babies), and then releasing the trapped squirrel might make sense. But in most cases, if you trap, it makes no sense to then release the squirrel on your lot.
Have a problem in your home? Send questions to [email protected] . Put “How To” in the subject line, tell us where you live and try to include a photo.


IMAGES
VIDEO
COMMENTS
For example, the 21ft gaff-rigged cutter I'm currently building will end up costing between $33,000 and $35,000, fully outfitted—several thousand dollars more than the new prices of a couple of popular fiberglass boats near the same size. And yes, since it's wood, it will demand more maintenance.
The sailboat hull can be constructed in a step-by-step process. Here is how you can construct a strong and durable sailboat hull: Step 1. Create the hull mold: Start by building a robust and long-lasting frame that accurately represents the shape and size of the hull. Step 2.
Let the primer coat dry completely as per instructions. Use a brush or roller to apply the desired paint color, starting from the top and working down. Allow the paint to dry between coats and apply more coats if needed. To varnish the sailboat, apply a thin and even coat in the direction of the wood grain.
Sailboats that you can build from home will likely be a small boat under 20 feet. These could be from many different boat suppliers such as B&B Yachts, Brooks Boat Designs, and Chase Small Craft. Boat plans will vary based on your budget and how much time you have on your hands. Based on my previous experience, building your own boat will take ...
Building an 11ft Plywood Boat from start to finish using the Stitch and Glue method. Pointing out mistakes and how to avoid them.BOAT PLANS: https://plywood...
Step 1: Cutting Out the Parts... First, you'll need boat building plans. I purchased some very nice ones from a popular boat building website because I had a specific style in mind to build, a "pram". It's a Norwegian design with lots of buoyancy in the bow and building a pointy boat is a little more difficult.
When building a wooden sailboat, it is important to pay attention to every step, including the installation of the cabin and interior features. To install these features, follow the following steps: 1. First, measure and cut the materials for the cabin walls, floor, and ceiling. 2.
It costs mucho dinero. Thus, we introduce the Hobby Kat, sailboat plans, a build-it-yourself version of the "Hobie" that should cost from half to a third of the commercial version. If you have the moola, of course, go for a Hobie and have the time of. your life on the water. If not, try our Hobby. The homebuilt is not quite the same.
Line up the craft sticks along the edge of the triangle to create your mast. Use a hot glue to secure the craft sticks. 5. Glue the triangles together. Ask your child to cover the two triangles with glue, using the glue stick. Then, press them together to complete your sail. 6. Connect the sail to the raft.
The next step was to clamp thin strips of wood, called battens, to the frame to stand in for the planks, so I could measure and mark all those angles. Then, I took the parts off the board and ...
1. Draw the front of the sail. The front of the sail is called the luff curve. The luff curve is the most important part of the sail because the rest of the sail's integrity depends on it. The luff curve at front of the sail relates to how your mast will bend. The luff curve won't match the curve of the mast.
2D Paper Sailboat Making Out of Color Paper for makers. Its a DIY origami sailing boat making video tutorial where I've shown how to make a paper boat that h...
Learn how to make a paper boat with a sail! This sailboat is a very easy traditional origami model. NEW: check out my new 2 minute easy origami boat model! h...
How to install a DIY watermaker: https://youtu.be/BOdRNNPina0***Update 2021/11/16***It's been over two and a half years since we installed our watermaker. It...
Begin on a boat rigged with one sail. Choose a boat with a single sail or perhaps just the mainsail and a jib (the small sail located in front the main sail). Starting on a boat that's rigged with only one sail will make learning sailing basics easier and less complicated. 6. Practice capsizing your vessel.
Lighting can help make your sailboat feel like home. When we first moved aboard the boat had some lovely low lighting in the cabins, and some awful strip lighting for the galley. There was absolutely no lighting in the cockpit. One of the easiest ways of making a sailboat feel like home is to add some mood lighting.
Apply epoxy and fiberglass to the outside of the boat. Once the dust has settled, you can apply a thin, even coat of epoxy to the smooth, bare wood on the outside of the canoe using a good foam brush. Again, 24 hours to wait for the epoxy to dry. Lightly sand the epoxy-coated outside of the boat with 120 grit paper.
Insert a small eyelet close to the back of the boat before the concrete sets completely. Let the concrete boat completely cure 24-48 hours. Remove concrete from the mold. Gently sand all edges. Drill two small eyelet holes in the driftwood mast: 1" from the top and 1" from the surface of the concrete boat.
How To Make A Boat Models With Cardboard #4 - Do It YourselfThis is a boat that made from cardboard. You can do it at home. How to make a boat models with c...
At Gray, our journalists report, write, edit and produce the news content that informs the communities we serve. Click here to learn more about our approach to artificial intelligence.
Ukraine also has started making FPVs and other drones in factories — with a pledge to make 1 million this year — but many drones sent to Ukrainian troops are being made by regular people at ...
CHARLESTON, S.C. (WCSC) - The Coast Guard says it rescued eight people from a boat after it ran aground near James Island Saturday evening. Coast Guard Sector Charleston received a report at 4:15 p.m. from a person aboard the boat who said their vessel had gotten stuck on the Stono River with eight people on board and there were several injuries.
Types of Sails. Sailing enthusiasts, get ready to set sail with a deeper understanding of the different types of sails.From the iconic mainsail to the versatile jib/genoa and the exhilarating spinnaker, each sub-section will unveil the unique characteristics and functions of these sails.So, grab your compass and join us as we explore the world of sails and unravel the secrets to harnessing the ...
Vietnamese nationals make up 20% of all arrivals so far this year compared to less than 3% (125) in the same period last year; this represents a ten-fold year-on-year increase in Vietnamese arrivals
Small boat migrant arrivals by late April at highest level ever. More than 7,000 people have entered the UK by crossing the English Channel in a small boat since the start of the year.
Most nursing home residents will need much more daily care to live healthy and safe lives." A Centers for Medicare and Medicaid Services study in 2001 found that nursing home residents need at ...
Langer tore the Achilles while playing pickleball on Feb. 1 at Woodfield Country Club in Boca Raton, Florida. He underwent surgery to repair the tendon the next day. In a recent interview with the ...
Five packages ramen noodles (120 grams or about 4 ounces each) 7.5 cups water. Half a cup soy sauce. 5 tablespoons Japanese mentsuyu soup base sauce
Pro-tip: When folding the paper in half, use your fingertips to gently guide the paper along the crease line for a smooth and precise fold. Step 5: Creating the Sail of the Origami Sailboat. 1. Fold the top edge of the paper diagonally to the bottom edge, firmly creasing the fold. 2.
An even better solution for the winter would be to bring the furniture into a garage or garden structure — one you monitor occasionally to make sure squirrels haven't chewed into them.