- Fair American
- Tools and Techniques
- Kit Database
- Bluenose Canadian Schooner

Making Sails for Model Ships
December 3, 2017
On my Model Shipways Bluenose build , I debated whether or not to make the sails. Many (most?) ship models do not include full sails. The Model Shipways kit was designed with sails, and includes the sail cloth as part of the kit. The inclusion of sails was actually one of the factors that led me to select this kit for my second build.
With the booms and gaffs rigged and installed, I would basically be finished with the build if I omit the sails. The remaining rigging is all attached to sails, so I’d leave it off if I didn’t include sails. However, the sails really do add something to the model, especially for a schooner like this.
So, I decided to make sails. I’ve never made sails before, so this will be a learning experience. Here’s how I ended up doing it…
Choosing How Sails are Displayed
An important decision to make before you start is how you’ll be displaying sails. There are three different ways you can go:
- For Display
(I made those last two names up).
Furled sails are sails that are lowered. Many modelers choose to do furled sails on their ships. The advantage is that the sails don’t cover everything up and make a model look like a bunch of cloth. When doing furled sails, you typically don’t make the full sail, instead making smaller version. The sail is put in place, but is bunched up and tied to the appropriate boom or gaff.
Realistic sails try to show the sails rigged and set as they would be while the ship is actually at sea. Ships adjusted their sails depending on the situation. In most cases, some sails would be raised while others would be lowered. Some sails might be set off to one side. Realistic sails would try to show the ship in some kind of ‘real’ sailing state.
Making sails simply ‘for display’ is what I’m doing. I’m making all the sails, and installing them all in their raised state. I’m not going to set any sails off to the sides – everything is just going to be installed straight and even. You’d probably never see a ship at sea actually set like this, but I think it works well for a model.
When to Make Sails
From what I can tell, the general practice is to make the sails before rigging and installing the booms and gaffs. Several of the sails need to be laced onto the booms and gaffs, and that is nearly impossible to do directly on the ship.
The standard process seems to be:
- Build the booms and gaffs.
- Make the sails based on the plans.
- Attach sails to the booms and gaffs as appropriate.
- Install and rig the booms and gaffs.
- Add the additional rigging for each sail.
I’m not confident that all my booms and gaffs are 100% accurately sized, and I suspect that the dimensions of my sails might need to be adjusted to fit my particular ship. So, I intentionally put off making sails until I had installed all the booms and gaffs.
Once I had everything installed on the ship, I could make templates for the sails that take into account both the plans and the size/shape of my actual build.
Of course, this means that I had a bunch of rigging for the booms and gaffs that would need to be un-done so the booms and gaffs could be removed. That was fine with me, because I had avoided the use of glue when securing the rigging. Everything was either tied off (easy to un-tie), or attached with a hook or shackle (easy to remove).
So, my process is:
- Build the booms and gaffs .
- Install and rig the booms and gaffs .
- Make the sails based on the actual layout of my ship.
- De-rig the booms and gaffs, and remove them from the ship.
- Re-install the booms and gaffs, and their rigging.
For me, this approach (while more work) has several advantages:
- Initially, I’m able to focus on getting the booms and gaffs properly installed and rigged, without the sails getting in the way.
- I can start with sail templates based on the plans, and adjust as necessary to fit the exact size/shape of my ship.
- Once sails are ready to install, I can quickly get them rigged without spending any time on the other rigging for the booms and gaffs, since those runs are already done and just need to be re-tied/attached.
Paper Templates
Making the actual sails starts with making paper templates. Some of the sails were too big to use normal paper, so I picked up a roll of white craft paper.
For each sail, I took a piece of paper and laid it over the plans. I marked the corners of the sail, then used a ruler to draw lines between the marks, giving me the outline of the sail. Some sails have curves that I had to hand-draw.
Once the shape was laid out on the paper, I cut the paper to shape.

A paper template for the jib sail.
Next I positioned the paper template on the actual ship in the correct spot. I took note of anything that didn’t fit just right, and adjusted the template as necessary. Some sails needed to be made slightly smaller, while some had to be made slightly larger.
To help me visualize the sail, I also marked where the hems on the edges will go, along with any other key elements of the sail. For the edge hems, I’ll be folding the fabric over and sewing it. I’ll be shooting for a 1/16″ hem, so I used that size for the markings on the template.
The actual sails on the ship were made from strips of cloth, not one big piece. To simulate this, I’ll just be sewing lines onto the cloth. For some of the sails, I went ahead and marked these lines on the template since they need to be oriented correctly according to the plans.
The main and fore sails also have reef bands , which run horizontally along the lower portion of the sail. These were marked as well.
Preparing the Sail Cloth
Once I was satisfied with the template, I got out the sail cloth. Model Shipways includes sail cloth with the kit. This cloth is a medium weight cotton cloth in an off-white color. The kit includes enough to make all the sails, assuming you get everything right on the first try. I knew that wasn’t going to work, so I ordered two more packages of sail cloth from them. It was relatively inexpensive – about $7 for each package of cloth.
Sails on a ship were rarely bright white. I’ve seen that many modelers will dye their sail cloth to get a desired shade. There are many tricks for this, like dipping the material in coffee. I felt that the off-white color of the Model Shipways cloth was fine, so I didn’t dye my cloth.
If you’re wanting to use other sail cloth, look for something lightweight. Almost all fabric is going to be too thick and out of scale, so just do the best you can. I actually used some fabric from a local hobby store for a few ‘test runs’, and learned a few things. Look for fabric with a tight knit, so the fabric doesn’t start to come apart as you cut it. Also look for something without too much stretch, as stretchy fabric can distort the shape of the sails as you sew them.
Ideally, you want to wash, dry, and iron the sail cloth before you start. Most fabric will shrink a little during this process, so you want this out of the way before you start cutting things to size. Doing this will also release any wrinkles in the fabric. (I was too excited to get started, and didn’t do this.)
Once you’ve got your fabric ready and your template sized, you’re ready to cut some fabric.
I used a fabric marker to do all the markings on the fabric. I picked this up at a local hobby store in the sewing section for a couple dollars. This marker uses special ink that disappears as it evaporates. This means I can draw all over the fabric, and within a few hours the ink is gone. I found this to give much better results than using a pencil and trying to erase markings.

The paper template is used to mark up the fabric being used for the sail.
A note on marking fabric…since I’m going to be folding over the edges of the sail to create hems, one side of the sail is going to look better than the other. Often, you pick a ‘display side’ of the ship, and put ugly stuff (like the worse sail side) so it isn’t visible from the display side. I found that with the way I was marking, folding, and sewing the cloth, I wanted the markings on the display side. Making sure I marked the display side ensured that I as I worked I ended up with all the ugly stuff on the back.
First the outline of the sail is marked on the fabric. Be sure to leave extra space on all sides outside of the sail.
A second outline is made 1/16″ outside of the first outline. This is the hem that I want to end up with on the finished sail.
A third outline is made 1/2″ outside of the second outline. This one doesn’t have to be perfect…this is just a guide for cutting the fabric.
You can also mark the reef lines and strips at this point if desired. I typically didn’t mark the strips, since I was able to position those accurately using my sewing machine.

The fabric is trimmed, leaving excess material around the edges.
Once everything is marked, I cut the fabric along the outer-most outline. I used a rotary cutter (like a pizza cutter), which gave much better results than scissors.
To make sails you have to do a lot of sewing. I have no experience sewing. Doing all this by hand with a needle and thread was not practical, so I bought a cheap little ‘hobby’ sewing machine. That machine was junk, and broke within the first 20 minutes. Since I’m hoping to keep this hobby going for a few decades, I decided to go ahead and invest in a real sewing machine.
At my local hobby store, the staff helped me select a good quality machine. I got it for under $200. The advantages of a real machine include:
- It won’t jam.
- Variable speeds.
- Selectable stitch length and width (critical for trying to get the stitching remotely close to ‘scale’).
- Many different computer-controlled stitch types, so you can do more than just a simple straight stitch. This would end up making the reef bands much better.
It took me a few hours to get the hang of using the machine, but my skill level increased quickly. While I certainly couldn’t sew a shirt or a pair of pants, by the second or third sail I was flying along like a pro.
Since you’ll be sewing, you’ll need thread. There are three main considerations with the thread.
First is the color. This is a matter of personal preference. I’ve seen some models where the stitching on the sails was very high-contrast (dark brown thread on white cloth). I’ve also seen some where the thread was the same color as the cloth. I felt like the stitching shouldn’t stand out too much , and I wanted to rely on the texture of the thread to define the lines rather than the color. So, I went with a ‘natural’ color thread that ended up being really close to the color of the cloth.
The second consideration is the thread material. A hobby store will likely have hundreds of different kinds of thread. There are synthetic materials and natural materials. I went with a cotton thread. Why? No really good reason except that all my rigging lines are cotton and the sail cloth is cotton, so it seemed like a good idea.
The final consideration is quantity. I have no idea how to predict the amount of thread that will be needed (there may be some ‘trick’ to it that the pros know). Initially I bought one spool of the thread. That only made two sails. When I went back to by more, they were out of that exact thread, so I had to order more online. That caused a week delay in making sails. Obviously you wan the thread to be the same on all the sails, so buy a lot of the same thread up front. Thread is cheap, and it is better to have some leftover than to run out.
Sewing the Edges
On to sewing.
The first step is to sew the hems on the edges. I start with the longest edge first, then do the opposite edge, continuing on until all edges are sewn. The cloth is folded over at the first outline (the line that defines the actual edge of the sail) and pinned into place. The 1/16″ line that indicates the edge of the hem should be inside the sail. Since the cloth was cut 1/2″ past that line (on that third outline), there is some extra material here that makes pinning easier. I’ll cut that off later.

The edges are folded over to create a hem and pinned in place.

The hem is sewn on the edge.
The cloth then goes into the machine and gets stitched up. I used the machine’s reverse feature to double-stitch the first couple stitches to secure the thread, then just ran a straight stitch down the edge, staying between the edge of the sail and the 1/16″ hem marking. I used a small stitch length so things weren’t too out of scale.

My machine lets me set the position of the needle, allowing me to get really close to the edge.
Once the stitch was complete, the extra thread was clipped off. I used a pair of sharp scissors to carefully cut off the extra cloth along the 1/16″ hem line.

A completed edge hem, about 1/16″ wide.
This was repeated for each edge.

Two edges meet in a corner.
Adding ‘Strips’
To simulate the strips of material, some modelers simply draw lines on the cloth. I decided to run a stitch for each strip instead. It is more work, but it goes pretty fast

The ‘strips’ of sail sail cloth are simulated with stitches. Each sail has a unique strip layout shown on the plans.
The width of the strips is indicated on the plans, as well as the layout of the strips. It turned out that the width of the strips matched with space between the needle on my sewing machine and the edge of the ‘foot’. So I didn’t need to mark the strips on the fabric – I just positioned the fabric under the foot and ran the material through the machine.
Reef Bands and Points
The large lower sails (main sail and fore sail) have reef bands . These are horizontal bands across the sails. My sewing machine has a setting that creates a stitch that looks like a ladder (or railroad tracks?). I adjusted the stitch length and width to get the desired size, then ran this stitch across the sail to create the reef bands.
I ran this right over the strip lines. This is easier than doing the reef bands first and trying to start/stop the strip lines at the bands, and you can’t really tell the difference.

Reef bands were sewn in using a different stitch pattern on my machine.
At each point where a strip line crosses the reef band, there is a short rope that goes through the sail. These ropes were used to secure the sail when it was lowered and bundled up. I cut a bunch of 1″ long pieces of 0.008″ tan rigging line and punched them through at the appropriate spots. I used a small bit of fabric glue on each side to keep these ropes flat against the sail instead of sticking out.
Corner Attachment Points
The sails typically have rigging lines attached to the corners of the sails. This means you need something in each corner to attach a rigging line to. From my research, it looks like most sails had a rope that ran around the outside edge of the sail, and that rope would form an eye at the sail corners to create the attachment points.
I decided not to add this rope. I wasn’t confident I could make it look good, and I thought the tan line would stand out too much.
So, I simply sewed brass rings (made from wire) into each corner. This was done manually with a needle and thread.

Anchor points in the corners were made from brass wire and sewn in.
Finishing Up
Once everything is sewn and I’m happy with the results, there are a few final steps.
I do a final pass to trim anything that looks bad (edges of hems, loose threads, etc.).
After all my disappearing fabric markings have evaporated and disappeared, I iron the sail to flatten it out and remove any remaining wrinkles.
Finally, I use some fabric glue along any exposed fabric edges (like the hems) to keep them from fraying. I also use a little fabric glue on the ends of stitches to ensure they don’t come loose.
Then the sail is ready to install!

A few completed sails on the ship.
- Click to share on Twitter (Opens in new window)
- Click to share on Facebook (Opens in new window)
- Click to share on Reddit (Opens in new window)
- Click to share on Tumblr (Opens in new window)
- Click to share on Pinterest (Opens in new window)
- Phantom NY Pilot Boat
- Model Ship Kit Database
Copyright © 2018 SuburbanShipModeler.com The text, photos, and content are copyright of this site unless otherwise noted.
Photos were taken by the author unless otherwise noted. All brands and trademarks referenced are the property of their respective owners.
Discover more from The Suburban Ship Modeler
Subscribe now to keep reading and get access to the full archive.
Type your email…
Continue reading
- About EH? Sails
Star 45 Class
Soling 1m class, canterbury j class, 10 rater class, 36/600 class, columbia 42 class, infinity 54 class, santa barbara class, wheeler class, vintage classes, we offer both sails and building in any class you are interested. there are too many to list them all. please visit the amya site by clicking on this link., click on the images below to enlarge view., ec12 cpm505, j class polymax.
Sail Prices All sails are designed and built to meet AMYA class specifications. Depending on class or make of model, sails are equipped with:
- Draft stripes $5
- Jib luff wire (where specified)
- Main luff slugs, tie points or jackwire
- Class insignia
- Sail numbers (main only)
- Country Designation on Main $10
- Jib numbers $10 (2 digits), add $5 per number if want 3 or 4 digit
- Colored corner patches in either Star or Oval shapes (black, white, kevlar, red, green or blue) Other colors available upon request.
Note: Sail numbers, draft stripes and class insignia - Either Insignia fabric or inked on style.
Materials available
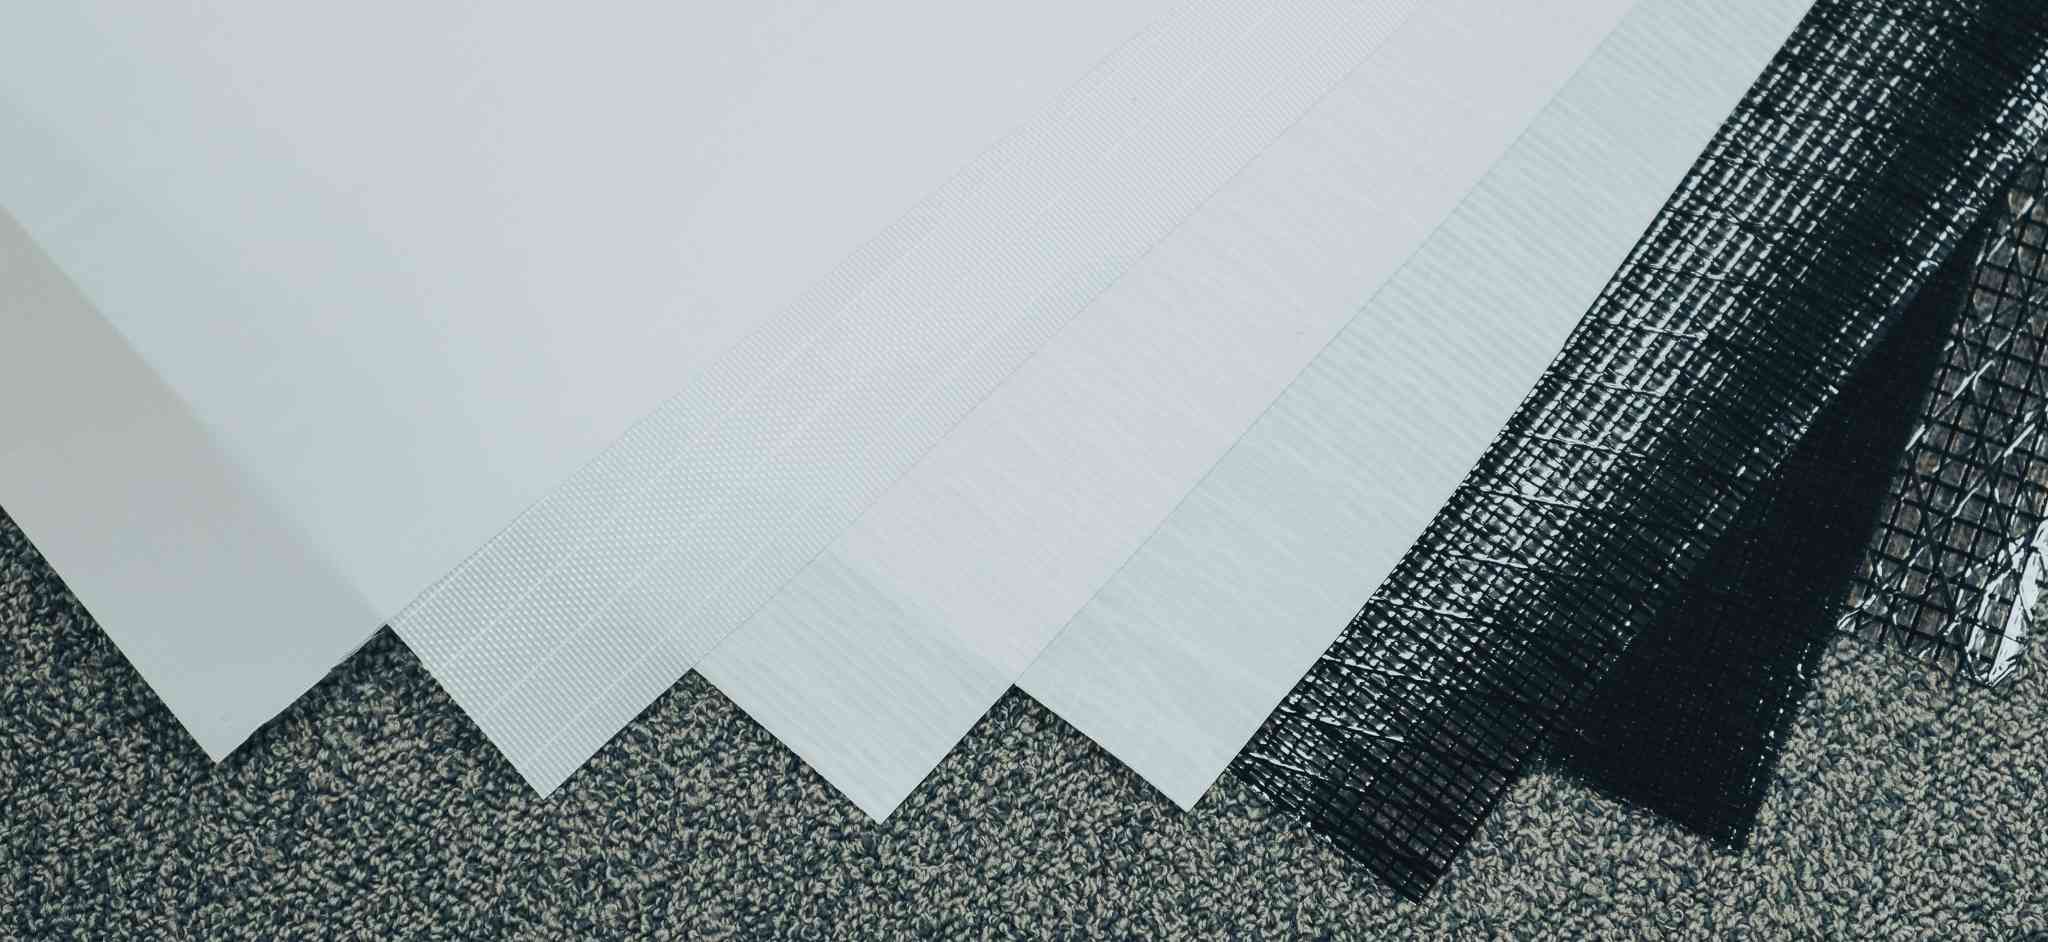
- CPM505 - Mylar/scrim laminate
- PX75 Mylar film both sides with reinforcing threads
- 1.4 Mil Mylar
- 2.0 Mil Mylar
- 3.0 Mil Mylar
- 2.5 Polykote - PU Coated Woven Polyester Fabric (Midrange > J-Class)
- 2.1 Polymax - PU Coated Woven Polyester Fabric (Light to Midrange J-Class)
- Icarex - lightweight Polyester colored fabric.
- Other weights and materials available upon request
Sail Prices Note: Prices on the most common boats for which we have made sails. If you have other fabric suggestions you want us to consider, depending on availability, we can supply prices based on fabric cost.
- "A", "B" or "C" Suit of CPM505, PX75, or 2 mil Mylar fabric $180
- Main only 505, PX75, Mylar $120
- Jib only 505, PX75, Mylar $90
- Suit 2.1 Polymax $395
- Suit 2.5 Polykote $485
- Suit ODLO4 black Mylar $530
- Main only 2.1 Polymax $227, 2.5 Polykote $285
- Jib only 2.1 Polymax $145, 2.5 Polykote $190
- Suit Mylar dependent on choice of film discussed $???
- "B" Main for heavier winds 2.5 Polykote $285
- Note: Polymax vs Polykote - Since Polymax is not as firm as Polykote, it will respond and show wind changes along the luff line sooner than Polykote. We recommend Polykote for winds above 8 to 10 knots. Polymax can be used up to 12 to 15 knots if you want to keep that traditional look.
- CPM505 Suit $170
- PX75 "B" suit $175
- 2mil, 3mil or 1.4mil suit $140
- "B" suit PX75 $140
- "C" suit 3mil with reinforced seams $140
- Note: Rule change 6.1 - 2020, no thickness is required. Any woven polyester fabric $120
- Columbia 42 (C42) (A or B suit) Per class rules Suit $120. If only "B" main $65
© 2024 EHSails, All Rights Reserve
3 Waterside Lane, Essex, CT 06426 860-304-7007

Sirius Sails
Starting on 11/1/23, I will be refunding all current orders, in the order they were placed. I plan on refunding these over the next 3 months. I apologize for not doing this earlier. For those who wish to continue with their order, please send an email. I don't know when these will be processed due to my health, but they will be done in in placement order.
Don 11/1/23
Model Yacht Sails
Sirius Sails With Distributed Camber
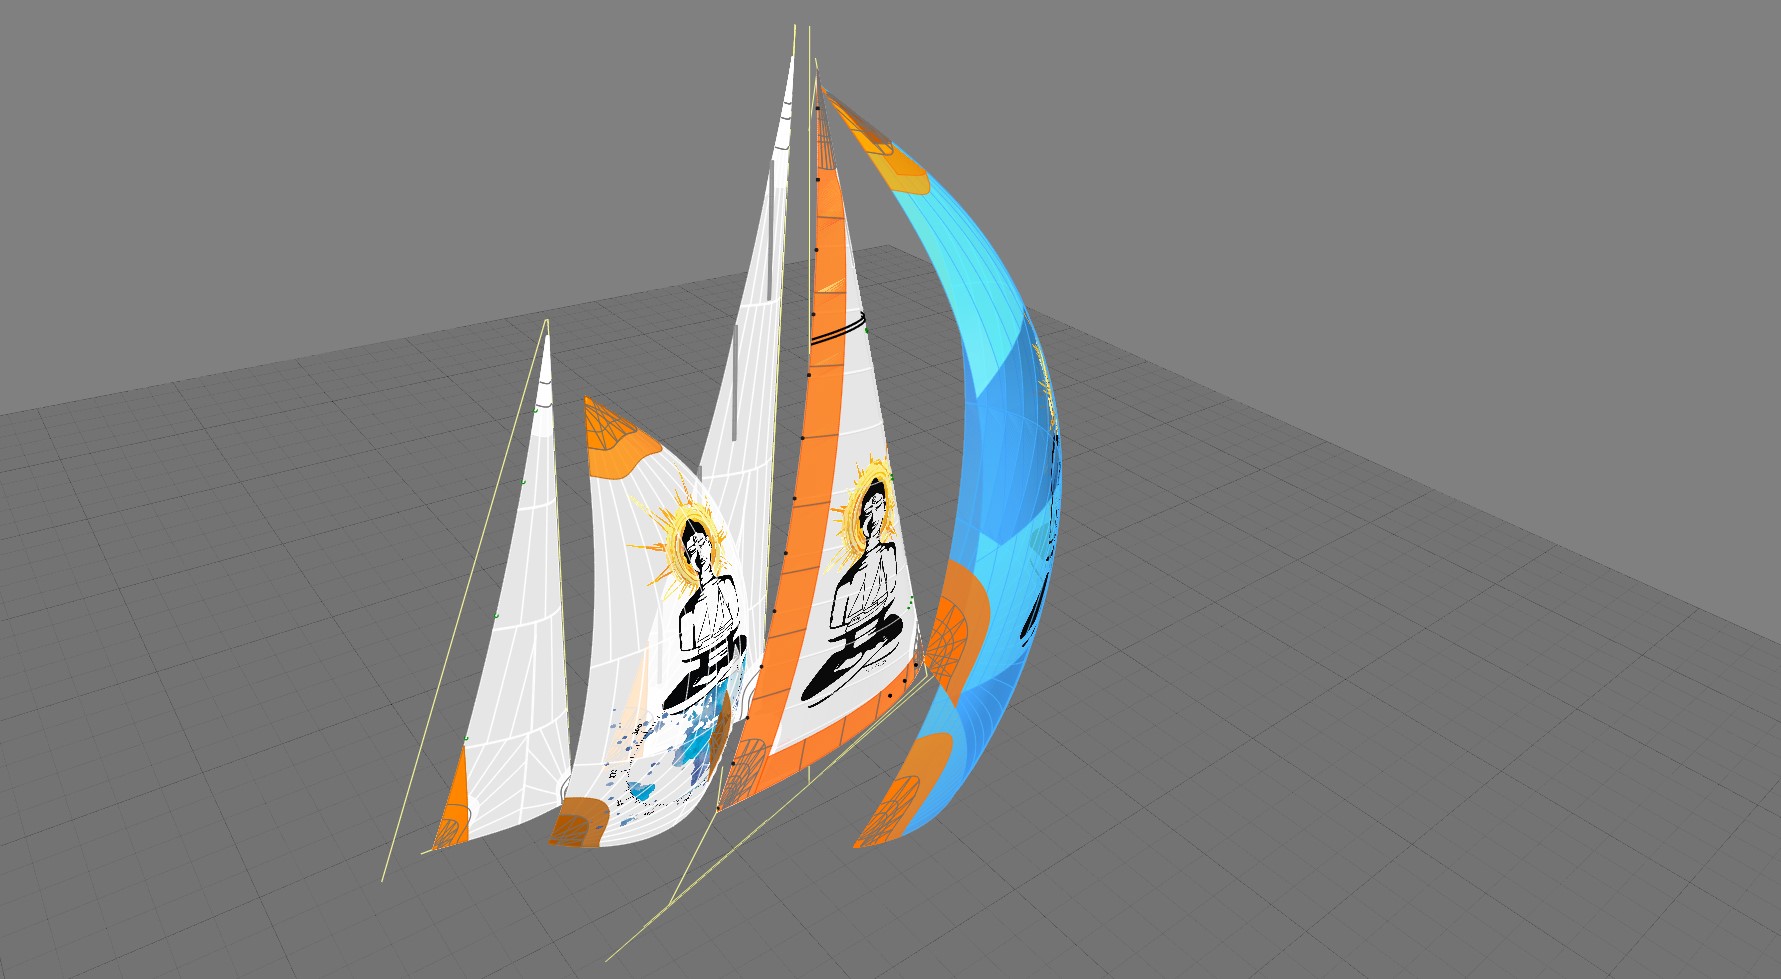
Sirius Sails Model Yacht Sails incorporating sailmaking technology that produces true airfoil shapes by adapting full sized sailmaking design and broad seaming techniques to model yacht sails.
Note the distributed camber placement, powerful airfoil shapes, and low drag leech design.
Note: I have added the new North Sails NorLam PX75 and 1.0 oz Dyneema (previously known as Cuban Fiber) sail cloths. The 1.0 North Sails Dyneema is shown below on the US1M. The new PX75 is very similar to the old PX75 but is a touch lighter and only has the X-Plys; we also have a good supply of TriSpi 25, 40, and 50 as well as several iCarex colors.

Sirius Sails is now manufacturing all AMYA Sailboat Class Sails with exception of the full sized J boat. All of these model yacht sails are in production and include a design specific trim guide. Other classes and custom sail designs are available upon request.

Sirius Sails with Distributed Camber™ are the newest technology
In sailmaking for model yachts. They are 3D computer designed and built using proprietary broad seaming techniques that produce airfoil shapes identical to those used on full-sized yachts.
The trim and performance limitations of older model yacht sailmaking technology (sailboards and sail blocks), which produce various circular arc shapes, have been eliminated. The pictures show the powerful distributed camber placement and low drag leech shapes.
Sirius Sails with Distributed Camber™ create:
- High lift to drag ratios in all wind speeds
- Higher forward drive and lower heel vectors
- Impressive acceleration
- Tighter sheeting angles
than are possible with sailboard or sail block made sails. Sirius Sails unique design allows maximized performance in the upper and lower wind range of the sail. Restricted wind range performance has been eliminated. Also, since Sirius Sails' proprietary sail design software and seaming tools allow precise control of camber and its location, custom-tailored designs are used for each model yacht type.
Testimonials
"In my youth, I worked for Hood Sails and what you claim is true. Your sail design approach is far superior to block made sails. If we sailed our models longer distances, everyone would appreciate and want Sirius Sails."
"Just a note on the sails for my ODOM. They are really great... yesterday at our meet the sails really out performed all the other boats. I finally got them tuned just right and up wind and down and they were superb."
"The boat was ON FIRE! These sails are very very fast! Acceleration was terrific and pointing ability was outstanding! I had no problem going higher and much much faster then every boat in the fleet."
"Service First Class and some. Sails being the engine, WOW. Words escape me, perhaps, Rolls Royce could come to mind."
"I have been sailing RC boats since 1975. Your sails are the most dramatic performance enhancement I have seen since then."
"Got the sails and they look great! I held the main up by the corners and it was stunning!"
"The acceleration in the puffs left the fleet behind..... you could hear the jaws drop!"
"I put the sails on my boat and followed your trim guide - we now have one fast boat! Thanks for your help."
"They look and trim like the sails on my J24.....and are fast! I am amazed at what you have done!"
"All I can say about your sails is they are - EXCELLENT! Beautiful shape in both very light and heavy air and was able to out point the other four boats I sailed with. Your sails are the third set I have had on the boat and they are by far the best. I will be sending you some photos of the boat on the water. Great sails at a very good price........... Did I mention that they are EXCELLENT!"
"This was the first time I raced the boat with the CPM 505 Sails. The boat speed was excellent and I had no trouble pointing with others or higher. When footing a bit, the boat was very fast. We sailed 11 races. I was 2nd in the first race and then had a string of firsts the next 5 races."
"We have three of the six new suits of your sails on the water. Each of the guys are very pleased. I am ecstatic with mine. My new boat, in the water for the 3rd time is performing beyond anything I expected and far better than my other sails. My overall results for our last three weeks sailing have been 3rd, 2nd and today first, winning by five points over 12 races."
"I was a tail-end to mid-fleet finisher at best. Same boat, same skipper, but with your sails, I am in contention every race and even have won some races for the first time."
"Went sailing today and had a wonderful day on the lake-still getting the boat tuned up but I feel I have NO excuses with the boat or rig. Thank you for the wonderful sails."
"We have three of the six new suits of your sails on the water. Each of the guys are very pleased. I am ecstatic with mine. My new boat, in the water for the 3rd time is performing beyond anything I expected and far better than my other sails. My overall results for our last three weeks sailing have been 3rd, 2nd and today first, winning by five points over 12 races."
Now being distributed to 50 U.S. states and over 30 countries around the world.


Welcome to the World of Model Yachting
Welcome aboard.

Sailing Fast and Looking Good ...

Windjammin Sails has white sails to custom printed designs..

As well as Trispi, Mylar, and CPM 505 to choose from.

Remote Controlled Sailboat Products
Soling one meter sails.

V32 RC Sailboat Sails

RG65 Dragon Force Sails

Dragon Flite 95 Sails

Sail Numbers

Sailboat Receivers

- Masting, rigging and sails

- Remember me Not recommended on shared computers
Forgot your password?
Your best sail cloth and technique
By steven sturgis March 11, 2015 in Masting, rigging and sails
- Reply to this topic
- Start new topic
Recommended Posts
Steven sturgis.
Hi every one. I have been looking for the best sail cloth for my Flying Fish build. I would like to get a lot of suggestions that I can look at. Please include where the cloth can be bought. Do you change the color with dyes? do you age the cloth some how? How do you add detail to the sails? All sail makers are welcome to post their designs I know a lot of you don't put on sail because it covers the rigging so anyone that does would be a great asset to the topic. Looking forward to seeing your tricks and designs.
sail techniques http://modelshipworl...-and-technique/
Link to comment
Share on other sites.

Click on the Nautical Research Guild Home Page straight up to the top of the page, then, click on Ship Modeling Resources, then, click on Ship Modeling Database of Articles, Then click Rigging and Sails, then click the pdf "Making and forming sails for your model."
I could have pasted the direct link, but thought it better for you to see everything that was available here on MSW.
You can go to a Joanne's or any yard goods store and buy Egyptian cotton, almost silk like. Coffee and/or tea make good stains, very controllable.
I'm certain there will be other suggestions to follow....
- tasmanian and LFrankCPA

Thank you twintrow. I did look at that but some one needs to go back and up date the links. About 80% don't work any more. I was going for full rigged full sails. Can you do that in paper? 1/8 scale
Im sure this is old hat to the expert modelers but passing on that knowledge is needed by the next generation of builders
- JerseyCity Frankie

I make sails for models in scale 1:75 with seams of the cloths sewing marked with single thread ( courtesy of Admiral ). For models in scale 1:100 I use computer printing of cloths lines and reef bands on thermal transferring paper for ironing on to sails fabric . Sails leech, head and foot ropes are fixed in its place with use of textile adhesive .
Material for sails I prefer is old bed linen many, many times washed .
Work step by step
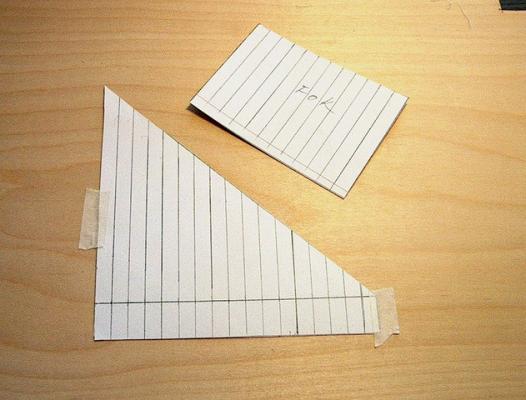
1.Make paper stencil for each sail and check it’s dimensions on your model.
2.With soft pencil transfer all lines in to fabric – add stripe 5-7 mm around
sail edges.
3.Make all necessary lines on fabric using sewing machine and thin thread with light brown or beige color.
For sails with thermal transferring of line any sewing is not necessary.
Cut of sail shape.
4. Fold the edges stripe to reverse side of sail and apply textile adhesive
5. Put sail on flat surface protected against glue adhesion ( wax paper )
and fix it with pins and nails for forming clews.
Using textile adhesive attach thread around sail and form clews and cringles as necessary.
After adhesive excess removal from sail surface and final ironing your sail is ready.
Foto 1-10 Sail making Step by Step
Foto 11 HMS Speedy - printed sails
Foto 12 HMS Warrior - printed sails
Foto 13 Patern for printing sails for S/S Savannah
- thibaultron , tasmanian , CaptainSteve and 9 others

I wouldn't use paper. If you don't want to use cloth, use silkspan from a hobby shop that deals with the RC guys/gals. It comes in various weights and you'd probably need to acquire small amounts of several sizes to find which one works best for you.
- Canute and Elia
Mark "The shipwright is slow, but the wood is patient." - me Current Build: Past Builds: La Belle Poule 1765 - French Frigate from ANCRE plans - ON HOLD Tri ton Cross-Section
NRG Hallf Hull Planking Kit HMS Sphinx 1775 - Vanguard Models - 1:64
Non-Ship Model: On hold, maybe forever:
CH-53 Sikorsky - 1:48 - Revell - Completed Licorne - 1755 from Hahn Plans (Scratch) Version 2.0 (Abandoned)
Good stuff.
I have seen some members using silkspan and modelspan. Any thought on this material. I'm not familiar with thermal transferring paper. can you elaborate. How do you use textile adhesive with out making a mess? Is it diluted in any way?
The adhesive is not diluted , unwanted stains of adhesive on sails can be easily removed by scraping .

Thanks for outlining the step by step process you use. In my opinion, the thermal transfer is brilliant. I have been hesitating to start my sails for quite a while because I don't want to sew the seam lines (I think they would look too bulky) and I don't trust myself to be able to draw them evenly using pencil. You have certainly given me something to think about! I imagine transfer will be more durable than pencil - another plus for the technique.
Current build -- MS Bluenose
Future build - MS Flying Fish
"A ship is safe in harbor, but that's not what ships are for." - William G. T. Shedd

Guest Tim I.
Good stuff. I have seen some members using silkspan and modelspan. Any thought on this material. I'm not familiar with thermal transferring paper. can you elaborate. How do you use textile adhesive with out making a mess? Is it diluted in any way?
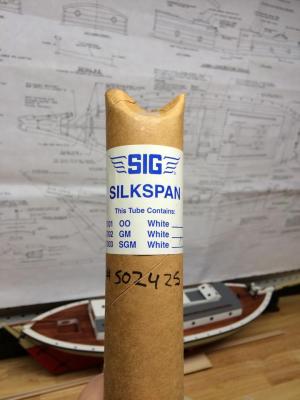
Silk span is easy to work with. PVA glue works well and any glue that moves outside what you are trying to glue will dry clear. Also Rubber Cement works well, if applied sparingly. Here are some sails I have done using silk span. Nothing to write home about, but my first attempts at sail making.
I use strips of silk span to simulate seams and sail detail and work them up in layers. You can also add bolt ropes and reef points to add more detail. I did not go into a lot of detail with these, rather kept them simple to work on my technique. Also if you use PVA a good idea is to press the sails between some parchment paper and heavy books while drying to prevent buckling or bubbling of the thin strips of silk span.
I hope this helps.
I like the look of the silkspan and the layering of the cloth details. What weight silkspan do you use?
Not quite sure on the weight. I just bought what my local hobby store has. This Silk Span in my pictures is the "SGM White".
Hope this helps,

A question about silkspan. Can it achieve the draped and folded look of clewed up sails? Or will it be too stiff? I want to show my ship in the process of reducing to battle sail.
Laissez le bon temps rouler !
Current Build: Le Soleil Royal
Completed Build : Amerigo Vespucci
Just saw this while looking for a source for Sig Silkspan, source of quote is the Stuntbarn an RC Forum:
"Title: Silk Span Covering
Post by: ericrule on October 22, 2012, 12:10:29 PM I just got off the telephone with Sig Mfg where they informed me that they will no longer have silk span available. At the present time they have only OO (Light) in stock and when that is gone they will no longer be able to obtain it.
According to the person I spoke to the company that supplied the silk span is out of business and they can not find any other supplier. Mike is searching for a new source but it does not look like he is having any luck."
So not sure if real or not....? But if true silkspan may not be around loong??
Just saw this while looking for a source for Sig Silkspan, source of quote is the Stuntbarn an RC Forum: "Title: Silk Span Covering Post by: ericrule on October 22, 2012, 12:10:29 PM I just got off the telephone with Sig Mfg where they informed me that they will no longer have silk span available. At the present time they have only OO (Light) in stock and when that is gone they will no longer be able to obtain it. According to the person I spoke to the company that supplied the silk span is out of business and they can not find any other supplier. Mike is searching for a new source but it does not look like he is having any luck." So not sure if real or not....? But if true silkspan may not be around loong?? Tom
That is what my local hobby store told me as well. That is why I bought out everything they had, for stock.
Oh noooooooooooooooooooooooooo !!!!! Say it ain't so.
Thank you all this is good stuff. I hope I can still get silk span I would like to try it out.

Landlubber Mike
Is there a difference between silk span and model span? I have a roll of model span, but haven't tried using it yet.
Current Wooden builds: Amati/Victory Pegasus MS Charles W. Morgan Euromodel La Renommèe
Plastic builds: SB2U-1 Vindicator 1/48 Five Star Yaeyama 1/700 Pit Road Asashio and Akashi 1/700 diorama Walrus 1/48 and Albatross 1/700 Special Hobby Buffalo 1/32 Eduard Sikorsky JRS-1 1/72 IJN Notoro 1/700 Akitsu Maru 1/700
Completed builds : Caldercraft Brig Badger Amati Hannah - Ship in Bottle Pit Road Hatsuzakura 1/700 Hasegawa Shimakaze 1:350
F4B-4 and P-6E 1/72 Accurate Miniatures F3F-1/F3F-2 1/48 Tamiya F4F-4 Wildcat built as FM-1 1/48 Special Hobby Buffalo 1/48
Citroen 2CV 1/24 - Airfix and Tamiya Entex Morgan 3-wheeler 1/16
Terminated build: HMS Lyme (based on Corel Unicorn)
On the shelf: Euromodel Friedrich Wilhelm zu Pferde; Caldercraft Victory; too many plastic ship, plane and car kits
Future potential scratch builds: HMS Lyme (from NMM plans); Le Gros Ventre (from Ancre monographs), Dutch ship from Ab Hoving book, HMS Sussex from McCardle book, Philadelphia gunboat (Smithsonian plans)
I believe its just a different brand butt lets let the experts handle that question.
For what it's worth I got a big roll of model span last year from CornwallModelBoats.
Steven, if you're interested in furled sails, I shared my techniques that I used on my Badger in a separate thread:
http://modelshipworld.com/index.php/topic/3944-landlubber-mikes-technique-for-furled-sails/
- 2 months later...

jablackwell
Those looking for SilkSpan can still find it at the Guillow model airplane homepage. It can be found under the spare parts section. Each model plane has a spare parts assortment, and the wing covering is an option for most.
U.S. Brig Syren - 1803 - Model Shipways - First PoB Build
Sopwith Camel F.1 - 1916 - Model Airways - Not a Ship! , Completed
Kate Cory - 1856 - Model Shipways - Second Build, completed
Sultana - 1767 - Model Shipways - First shipbuild, completed

There's more on using SilkSpan for sails in a new booklet by SeaWatchBooks, or as a new chapter in a new edition of Swan IV.
- EricWilliamMarshall
Be sure to sign up for an epic Nelson/Trafalgar project if you would like to see it made into a TV series http://trafalgar.tv
- 1 month later...

Jolley Roger
For what it's worth I got a big roll of model span last year from CornwallModelBoats. Steven, if you're interested in furled sails, I shared my techniques that I used on my Badger in a separate thread: http://modelshipworld.com/index.php/topic/3944-landlubber-mikes-technique-for-furled-sails/
Can you recall under what product name CMB was selling the model span?
I've been unable to find it on their site.
Samuel Pepys notes in his diary on 19 July 1667: "the Dutch fleets being in so many places, that Sir W. Batten at table cried, By God , says he, I think the Devil shits Dutchmen."
I can't find it on the website either. I'm fairly certain it was under building materials or something and listed as Modelspan. I looked at the packaging, and it had the Mantua name/emblem on it, but I don't see it under the Mantua fittings. Maybe email them and ask?
Thanks Mike, i'll send them a mail.
I am a passionate advocate of including sails on models so I am pleased you are making the decision to include them on your model.
I had a look at your Victory build log, those sails looks fantastic!
I think I will follow your method when I get to that part on my build.

Richard Griffith
Bluejacket Shipcrafters ran out of silkspan recently but they substituted model span which to me is the same material. I used it to added furled sails to Le Superbe. I am a very happy customer of BJ, not an employee.
- Landlubber Mike , Canute and MrBlueJacket
I'm just using old worn bed sheets for my 1/100 scale HMS Victory. Check out my build log which is really not much at all about building the kit and mostly focussing on how I am making the sails. I bet if you searched through all my comments on MSW you would find 1/2 of all my posts are having to do with sails or rigging. I am a passionate advocate of including sails on models so I am pleased you are making the decision to include them on your model. I don't think the thickness of the material is that big a deal as long as the texture of the weave is fine enough not to draw attention to itself. Many very convincing ship model sails have actually been carved out of wood. My build log goes into a lot of detail on these points but I will just set them out here again: Don't use pure white sails, this will look too stark and in fact actual sails were cream colored or very light grey.(staining with coffee is super easy and very effective) Don't sew the boltropes on, no matter how fine a thread you use, it will look out of scale. Just glue them on. Do include sail construction details like reef bands and reinforcing patches, these give a good texture and are realistic. Look at all the photos you can find of reproduction ships that resemble your ship and try to duplicate that look.
JCFrankie, thanks so much for your detailed log on your sail techniques. I went with furled sails on my Badger, but was planning on doing a mixture of furled and unfurled on my Pegasus and future builds. Your results are fantastic, and I will certainly bookmark your log for when I get to that point! I experimented with tissue and a few other materials as well, but ended up with cloth as well.
Once again, a big thank you!
- 3 years later...
Hi I am making sails for a large pond yacht which will of course become very wet , if I chose a material that becomes too wet and heavy that will cause problems,
what is the best material to use
for a large expanse of sail.
My pond yacht is 5ft long not inc
bow sprit.
Join the conversation
You can post now and register later. If you have an account, sign in now to post with your account.

× Pasted as rich text. Paste as plain text instead
Only 75 emoji are allowed.
× Your link has been automatically embedded. Display as a link instead
× Your previous content has been restored. Clear editor
× You cannot paste images directly. Upload or insert images from URL.
- Insert image from URL
- Submit Reply
Recently Browsing 0 members
- No registered users viewing this page.
Modelshipworld - Advancing Ship Modeling through Research
SSL Secured
Your security is important for us so this Website is SSL-Secured
NRG Mailing Address
Nautical Research Guild 237 South Lincoln Street Westmont IL, 60559-1917
Model Ship World ® and the MSW logo are Registered Trademarks, and belong to the Nautical Research Guild (United States Patent and Trademark Office: No. 6,929,264 & No. 6,929,274, registered Dec. 20, 2022)
Helpful links.
- Articles Database
- NRG Home Page
- NRG Online Store
- Important: Our Guidelines
- Terms of Use
- Buildlog Index
About the NRG
If you enjoy building ship models that are historically accurate as well as beautiful, then The Nautical Research Guild (NRG) is just right for you.
The Guild is a non-profit educational organization whose mission is to “Advance Ship Modeling Through Research”. We provide support to our members in their efforts to raise the quality of their model ships.
The Nautical Research Guild has published our world-renowned quarterly magazine, The Nautical Research Journal, since 1955. The pages of the Journal are full of articles by accomplished ship modelers who show you how they create those exquisite details on their models, and by maritime historians who show you the correct details to build. The Journal is available in both print and digital editions. Go to the NRG web site (www.thenrg.org) to download a complimentary digital copy of the Journal. The NRG also publishes plan sets, books and compilations of back issues of the Journal and the former Ships in Scale and Model Ship Builder magazines.
Our Emblem ®
Nautical Research Guild ® and the NRG logo are Registered Trademarks, and belong to the Nautical Research Guild (United States Patent and Trademark Office: No. 6,999,236 & No. 6,999,237, registered March 14, 2023)
- Existing user? Sign In
- Latest Posts
- All unread content since my last vist
- Unread topics I have posted in
- Create New...

Spring Is Here!
Save up to 30% on new sails and prepare for your next big voyage.
Trusted by YouTube’s Largest Sailing Channels
Sailing for a living requires sails that work. These inspirational sailors put hours on their sails in remote locations and put their trust in Precision Sails.
Custom Designed Sails
Designed for your boat, your sailing area, and the type of sailing you do. Over 15,000 Sailboat Rig Specs on file.

Any Sail That You Need
Mainsails, Headsails, Asymmetrical Spinnakers, Symmetrical Spinnakers, Gennakers, Code Zeros – we have it all!
The Largest Sailcloth Selection in the Industry
With the widest selection of sailcloth available in the industry there is always a cloth suited for you. Let us help narrow down your options.
Perfect Fit Guaranteed, Every Time
Every step in our process is focused on ensuring the highest quality and satisfaction for our sailors. Smooth sailing is guaranteed with our innovative approach to production and our exceptional warranty coverage.
Mon-Fri: 8:00am to 4:00pm PST [email protected] – This opens in your default email application 1-888-958-5638 – This opens in your default telephone application
Educating & Consulting to Ensure You Get What You Need
Sails are the main propulsion force for sailboats. Unfortunately, most sailors don’t replace their sails often enough. This can lead to the assumption that purchasing new sails can be overwhelming and confusing. Precision Sails takes a new approach to the sailing industry by helping you choose what sails and sailcloth is best for you, your sailboat, the type of sailing you want to do, and the area in which you are sailing. We offer industry-leading transparency into what sailcloth is available worldwide and the importance of sail design to your sail’s performance and lifespan.
Our website is filled with educational resources related to cloth, design, and technical sailing knowledge. Our team of sail consultants is always available to walk you through the options and help you choose the sail that is right for you.
Perfect Sails Start With a Perfect Design
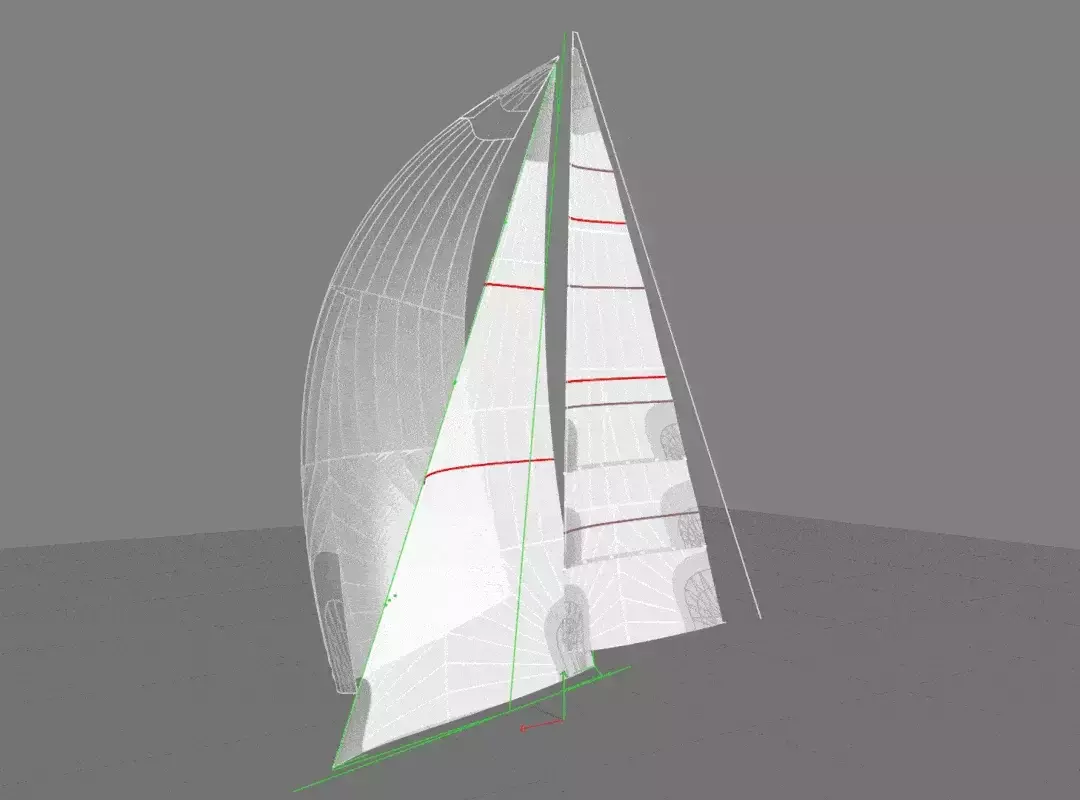
In order for a sail to fit and perform it needs to be designed properly. While other lofts are contracting sail designs to third-party design services, Precision Sails is building its in-house design team in Victoria BC, Canada, to work directly with sailors to ensure your new sail fits perfectly and performs the way that you want it to. Using the most modern 3D sail design software our design team will customize a sail that not only fits your rig as she sits in the water today but ensure that your sail fits and performs for years to come.
100% Fit and Performance Guarantee
Buying a new sail is a big investment. Precision Sails offers its 100% Guarantee so all our sailors have the confidence that Precision Sails has your back. Accidents are rare, but they can happen. If your sail does not fit or perform to your satisfaction your sail will be redesigned and rebuilt. As experts in our craft and with the confidence we have from supporting thousands of sailors worldwide, our team is proud to boast the widest covering sail warranty in the industry.
Leading the Industry in Sailcloth Options
Sailcloth manufacturers offer many different types of sailcloth in multiple different quality levels. There is always sailcloth available that will meet your sailing needs as well as your budget. Precision Sails offers all sailors full transparency into what sailcloth is offered and from which manufacture. Our team is here to help select which cloth is best suited for your sailing needs.
Our Partners
Precision Sails is proud to partner with these amazing sailors documenting their adventures. These sailors inspire new sailors and weekend warriors alike to learn how to sail, sail more often, and sail further than ever before. If you are looking for some inspiration to cut the lines and sail away make sure to help us support these creators by watching their episodes.
Learn More About Our Partners

Find your Sail
Your perfect sail is out there and Precision Sails is ready to make it for you. Request a quote for a sail and we’ll be in touch shortly.
Types of Sails
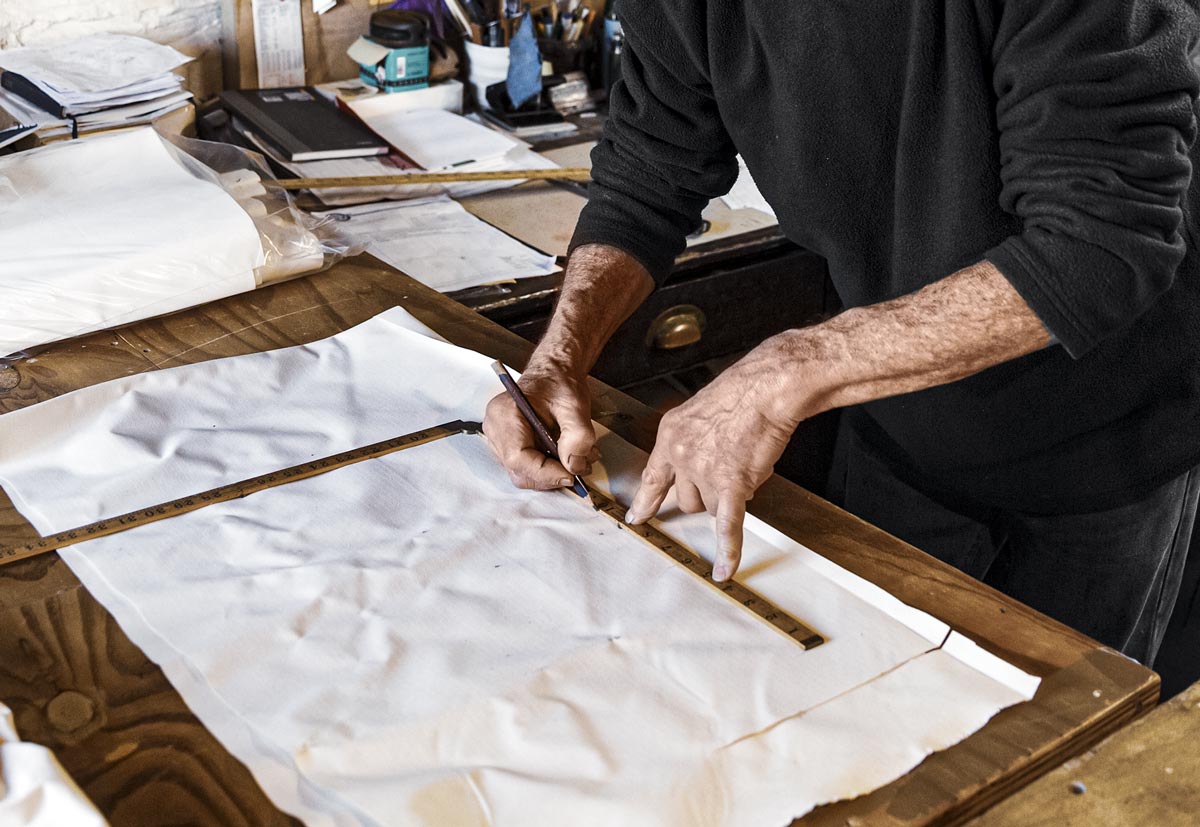
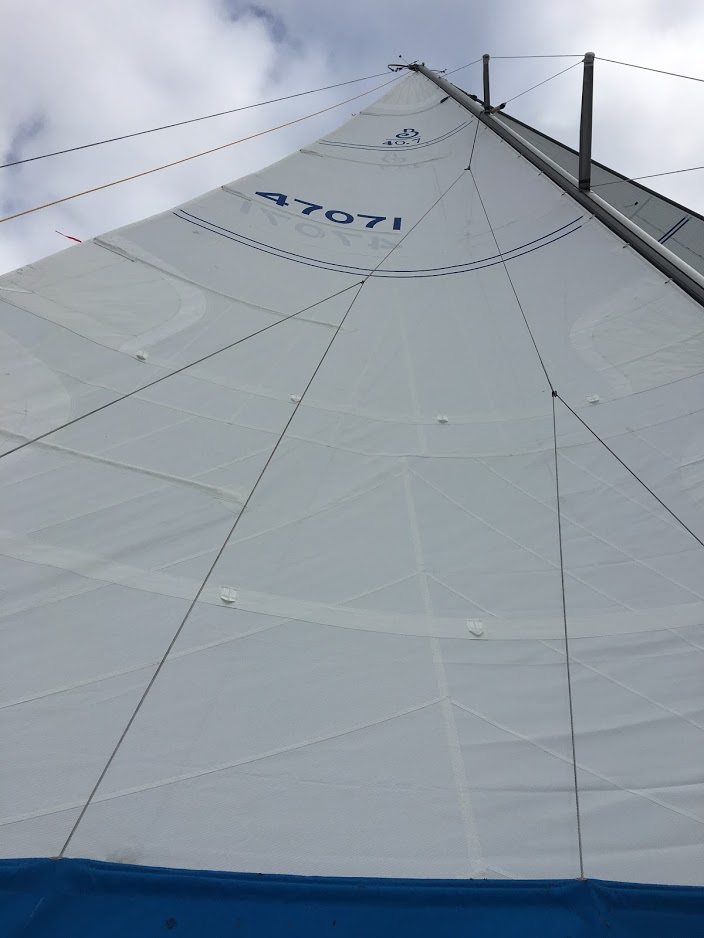
Precision Sail Loft specializes in producing headsails, mainsails, spinnakers, gennakers, and code zeros. So no matter the type of sail you’re looking for, we can help. Our sails are trusted by cruisers and racers alike from around the globe. Review the sail options and craftsmanship available to customize your dream sail.
Build & Process
Every sail we craft is produced to the highest standards with the best hardware, craftsmanship, and skill-set in the industry. Pair that with Precision Sails’ approach to communication and your sailboat will be ready to set sail before you know it.
What are Sailors Saying About Precision Sails
Precision Sails thrives on communication. At each step from design to delivery, we encourage you to collaborate one-on-one with our expert sail consultants in finding the perfect sail to suit your needs. Don’t just hear it from us. Check out some reviews posted on third-party review sites by our sailors!
“ I have had two sails made by Precision Sails in the last 12 months. Both have exceeded my expectations. The fit to the boat and the performance of the sails are exceptional. The sail designer worked with me to make sure the resulting sail fit my objectives. Precision Sails has excellent documentation and videos to assure that your measurements are accurate. The sails are first rate and the price was very competitive. I am a very happy repeat customer. -Terry Noreault (Facebook)
“ I just received my asymmetrical spinnaker, with sock and turtle bag, along with a new 135 Genoa. The entire process was simple and both sales and the design team were in regular contact if there were any questions. The customer portal was easy to use and lets you keep track of where in the process your sails are. Great sails, great service -Graham Edwards (Facebook)
“ Very responsive, excellent quality, very fair prices. When they were not happy with the graphic on the first sail Ron called to let me know and they sent me a second sail at no charge. Highly recommended! -Gerry Beltgens (facebook)
“ We love the design, quality, construction, and performance of our new 95% furling jib from Precision Sails. The sail works well with our staysail and performs better than expected on all points of sail including poled out dead down wind. The new 95% jib does not get as overpowered as our old 135% Genoa and it is easier to tack with the staysail deployed. The design team made the process of getting accurate dimensions easy, took the time to understand our requirements, and was a pleasure to deal with. I will definitely do business with Precision again! -Charles Clark (Google)
“ Quality throughout the whole process… starting with quotation, options and cloth alternatives. Quick delivery time and the product is very good quality. I am very pleased to carry my Precision sails on my boat. I recommend them 100%! -Marcos D.
“ I just received the 2nd custom-made sail I’ve ordered through Precision Sails. The process for providing measurement information and custom images is very clearly laid out in the forms on their website, in addition to several instructional YouTube videos. The results turned out beautifully, just as I had pictured it for both sails! -Michael Shafer (Google)
“ Just received my new mainsail from Precision Sail Loft and am over the moon about it. Darryl walked me through all my options and gave great advice. The measurement form is foolproof. They keep you updated with the status of your order every step of the way. I can recommend them highly enough. -Henry Gomez (Google)
“ I was introduced to Precision Sails through Sailing Yacht Ruby Rose on You Tube. I decided to try the online experience myself. I provided the measurements and had good conversations with the sales team and with the sail designer. The new Genoa arrived in great condition and was a perfect fit! Couldn’t be happier!! -Brad Hamrlik (Google)
“ The whole team at Precision Sails was fantastic from start to finish. We’ve had a laminate main and genoa made so far and have a spinnaker on the way. They listened carefully to our needs and recommended a great sail cloth. We couldn’t have gotten more bang for our buck! -Noah Regelous (Google)
“ Our new sails performed flawlessly. Several of our crew were seasoned Annapolis sailors, who commented on the quality of the sails and of how they seemed to improve Godspeed’s performance. We were also impressed with your consult-measure-design process. Your sales persons were knowledgeable and helpful. As was the designer, who I spoke with several time. We had obtained quotes at the Annapolis Boat Show from North Sails and Quantum Sails — both were more expensive than your quote for equivalent quality and options.” -Randy Gillies
“ We received our spinnaker and launched it yesterday and I just wanted to let you know how pleased we are with it. The service we received from your company was exceptional and the quality of your product is second to none. We will certainly be return customers in the next few months to replace our main and jib sails and will recommend your company to all our sailing buddies. Once again-thank you.” -Daniel Jackson (Google)
Sailor Resources
The Precision Sails’ team has a wealth of knowledge on all things sailing. Tap into our range of useful resources and browse all topics ranging from the best cloth types to sail maintenance tips. Check out our Ask Precision Sails series where we answer questions provided by sailors like you!
How to Measure for a New Mainsail
If you can read a tape measure you can measure your boat for a new Mainsail.
Purchasing a new Mainsail for your sailboat is one of those investments that every sailor will be faced with eventually. Sails don’t last for ever, even if you treat them like gold. Once you have decided to invest in new sails you may get that feeling of being over whelmed by the choices and the details involved. When deciding on a loft to work with make sure you choose a loft that will offer a good consultation on the cloth and sail feature choices as well as a design consultation if you want one.
Jibs vs. Genoas
Get to know the difference!
Jibs and Genoas are triangular sails which are affixed to a stay in front of the mast. Typically they run from the head of the foremast to the bowsprit. Jibs and genoa’s are used in tandem with a mainsail to stabilize the vessel and are usually measured by their Luff Perpendicular percentage, that is, how much area within the fore-triangle they use.
Taking Headsail Measurements with the Mast Down
Measuring your Headsail with your mast down is still possible.
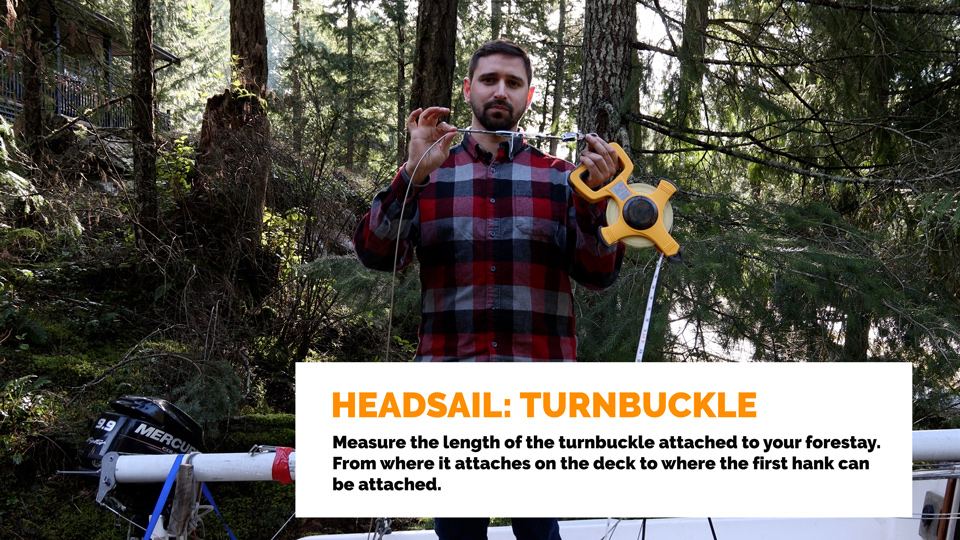
Step by Step How To Instructions and Videos on how to collect your boats measurements for a your new headsail. Watch Jeremy Roszmann, sail designer, walk us through how to collecte great measurements to build a headsail with.
How To Measure for a New Spinnaker
Learn how to measure your boat and rig for a new spinnaker with our simple form.
Measuring your rig for a new spinnaker is easy. We need to know the location of your halyard, what your maximum hoist is, where the location you sheet to is located and what style. We also need to know if you have a bowsprit, plan to use a spinnaker sock, or other kind of furling system. Last but not least, you get to pick your colors!
Mainsails: Loose Foot VS Fixed Foot
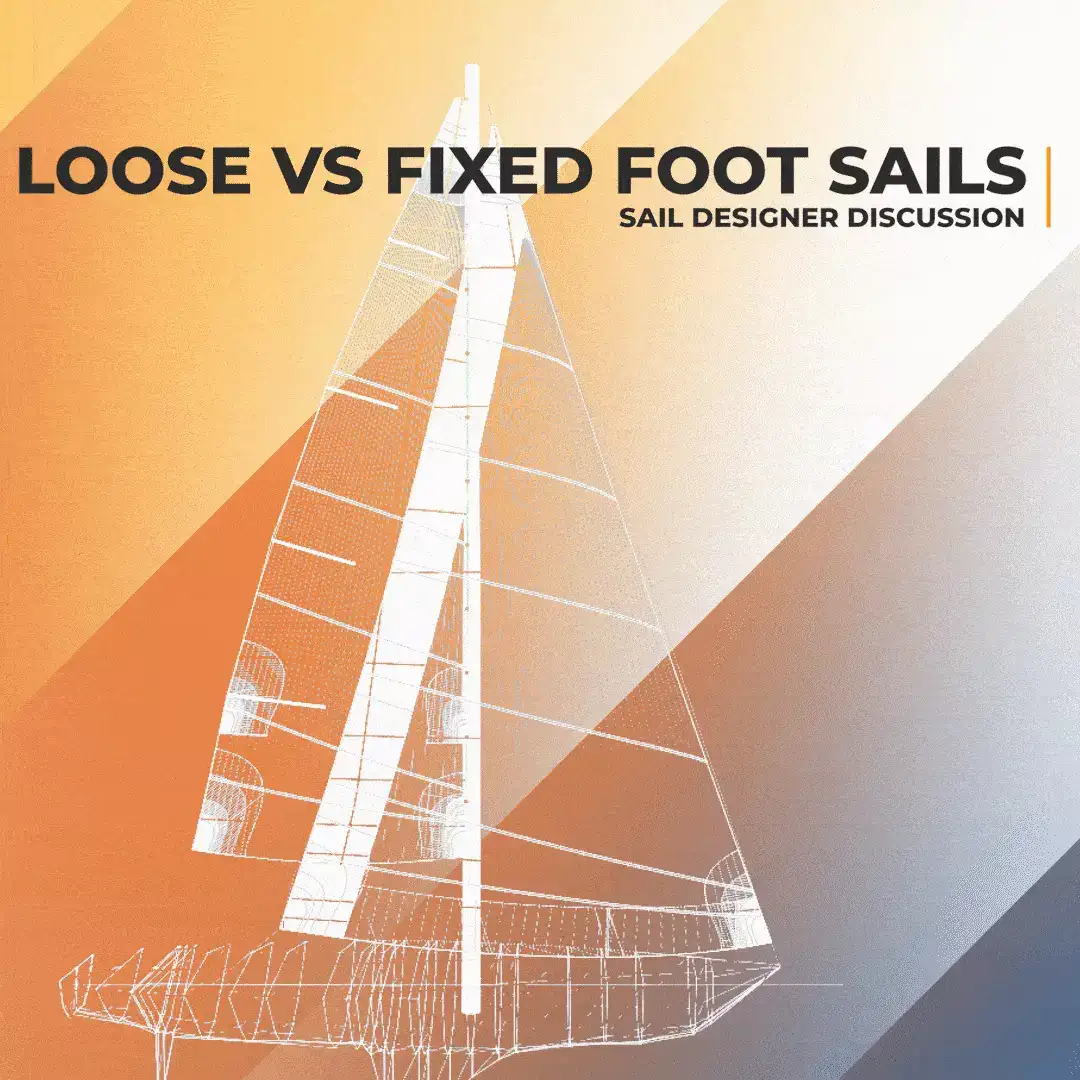
If you currently have a fixed footed mainsail read about the new modern design of a loose footed mainsail.
Sail design has come a long way in the past several decades. A loose footed mainsail is becoming the norm for most sailors. It allows for creating a better shaped sail. This increasings sail performance, efficency, and power. Having a loose-footed sail means having a much more versatile sail as far as trimming is concerned.
" * " indicates required fields
- --> Login or Sign Up

Shop by category
Shop by category.
- All Holiday Nautical Decor and Gifts
- All Nautical Christmas Decor
- Seashell Ornament Collection
- Charm Bracelet and Necklace Gifts
- Personalized Nautical Gifts
- Seashell Wreath Collection
- Stocking Stuffers
- Top Picks for Nautical Gifts
- Treasure Island
- All Personalized Nautical Decor and Gifts
- Nautical Charm Bracelets and Necklaces
- Nautical Engraved Pocket Knives
- Bells, Clocks and Nautical Instruments
- Model Ships
- Name and Address Plaques
- Oak Barrel Gifts
- Serving Trays and Cutting Boards
- All Signal Flags and Ornaments
- Flags - A to Z and 0 to 9
- Framed Flags - A to Z
- Flag Ornaments - A to Z
- Wall Signs and Ship Wheel Decor
- Watches - Personalized
- Nautical Gifts- Personalized
- All Classic Nautical Decor
- Maps, Charts, and Navigation
- Antique Decor
- Diving Helmets
- Brass Ship Plaques
- Ship Telegraphs
- Ship Wheels
- All Full Size Boats
- Display Only - Boats and More
- Full Size Boats
- Full Size Canoes
- Full Size Kayaks
- Other Full Size Vessels
- All Model Ships
- Ocean Liners
- Fishing Boats
- Other Vessels
- Decorative Boats
- Display Cases
- Space Exploration
- All Nautical Instruments
- Rain, Temperature, & Wind Speed Gauges
- Rain, Temperature, Humidity, & Wind Speed Gauges
- Telescopes and Spyglasses
- Tide Clocks
- Weather Stations
- Instrument Bases
- Nautical Instruments - Other
- All Nautical Home Furniture
- Cabinets, Bookcases and Bookshelves
- Desks and Chairs
- Display Canoes
- Anne Home Collection
- All Nautical Wall Decor and Art
- Maps and Charts
- Knot Boards
- Nautical Paintings
- Stainless Steel Wall Art
- All Nautical Clocks
- Desk Clocks
- All Tide Clocks
- Animated Tide Clocks
- Porthole Clocks
- Ship Wheel Clocks
- Wall Clocks
- All Nautical Lamps and Lighting
- Nautical Lighting
- All Nautical Night Lights
- Seashell Night Light Collection
- Nautical Table Lamps
- Nautical Floor Lamps
- Nautical Lanterns
- All Nautical Home Accents
- All Destinations USA
- All Destinations USA (All Products)
- Stainless Steel Tumblers - 20 Oz.
- 16" Platters
- Tidbit Trays
- 2 - Handle Trays
- Ceramic Mugs
- Pint Glasses
- Kitchen Towels
- Kitchen, Bar, and Tableware
- Beach Towels
- Nautical Dinnerware
- Nautical Guest Towels
- Nautical Kitchen Towels
- Nautical Placemats
- Candle Holders
- Nautical Coasters
- Desk Accessories
- All Glass Floats
- LED Glass Floats
- Figurines, Sculptures, and Statues
- Hooks, Racks and Cabinet Knobs
- Oars and Paddles
- Rugs and Door Mats
- Shower Curtains
- Tabletop Accents
- Throw Blankets
- Throw Pillows
- Other Home Accent Items
- All Seashell and Capiz Decor and Gifts
- Electroplated Shells and Starfish
- Metal and Capiz Decor
- Night Lights
- Seashell Keepsake Boxes
- Seashell Ornaments
- Seashell Wreaths
- Windchimes and Chandeliers
- All Nautical Keychains
- Solid Brass Key Chains
- Mother of Pearl Key Chains
- Nautical Pocket Knives
- All Nautical Watches
- Exclusive Tide Watch Collection
- Admiral Collection
- Long Life Catalina Sports Strap Collection
- Professional Dive Collection
- Exclusive Super Glo Collection
- Premier Automatic Collection
- Long Life Nautical Collection
- Long Life Coronado Collection
- Military Collection
- Men's Dive and Sailing Watches
- Women's Dive and Sailing Watches
- All Nautical Jewelry
- Nautical Jewelry
- All Nautical Charm Bracelets and Necklaces
- Bracelets for Charms
- Chains for Charms
- Engravable Charms
- Jewelry and Keepsake Boxes
- All Nautical Yard and Patio Decor
- Nautical Outdoor Artwork
- Outdoor Rugs, Pillows, and Patio Accessories
- Weather Vanes
- Cranes and Herons
- Hanging Figures
- Whales, Dolphins, Sharks, and Trophy Fish
- Other Yard and Patio Decor
- All Nautical Decor by Theme
- Anchors, Ship's Wheels, Oars, and Portholes
- Classic Nautical Instruments
- Lanterns and Classic Lighting
- LED Wooden Wall Art
- Lighthouses
- Oyster Shells
- Pirates, Captains, Divers, and Sailors
- Sailboats, Ships, Yachts, and Other Boats
- Sea Turtles
- Shore Birds
- Trophy Fish
- Other Themes and Animals
- Armed Forces Decor
- Nautical Kids Korner
- Wholesale, Parties, Weddings
- Corporate and Promotional Gifts
- SHIPPING ONLY
Shop by Brand
- Everything Nautical
- View all Brands
- Destinations USA (All Products)
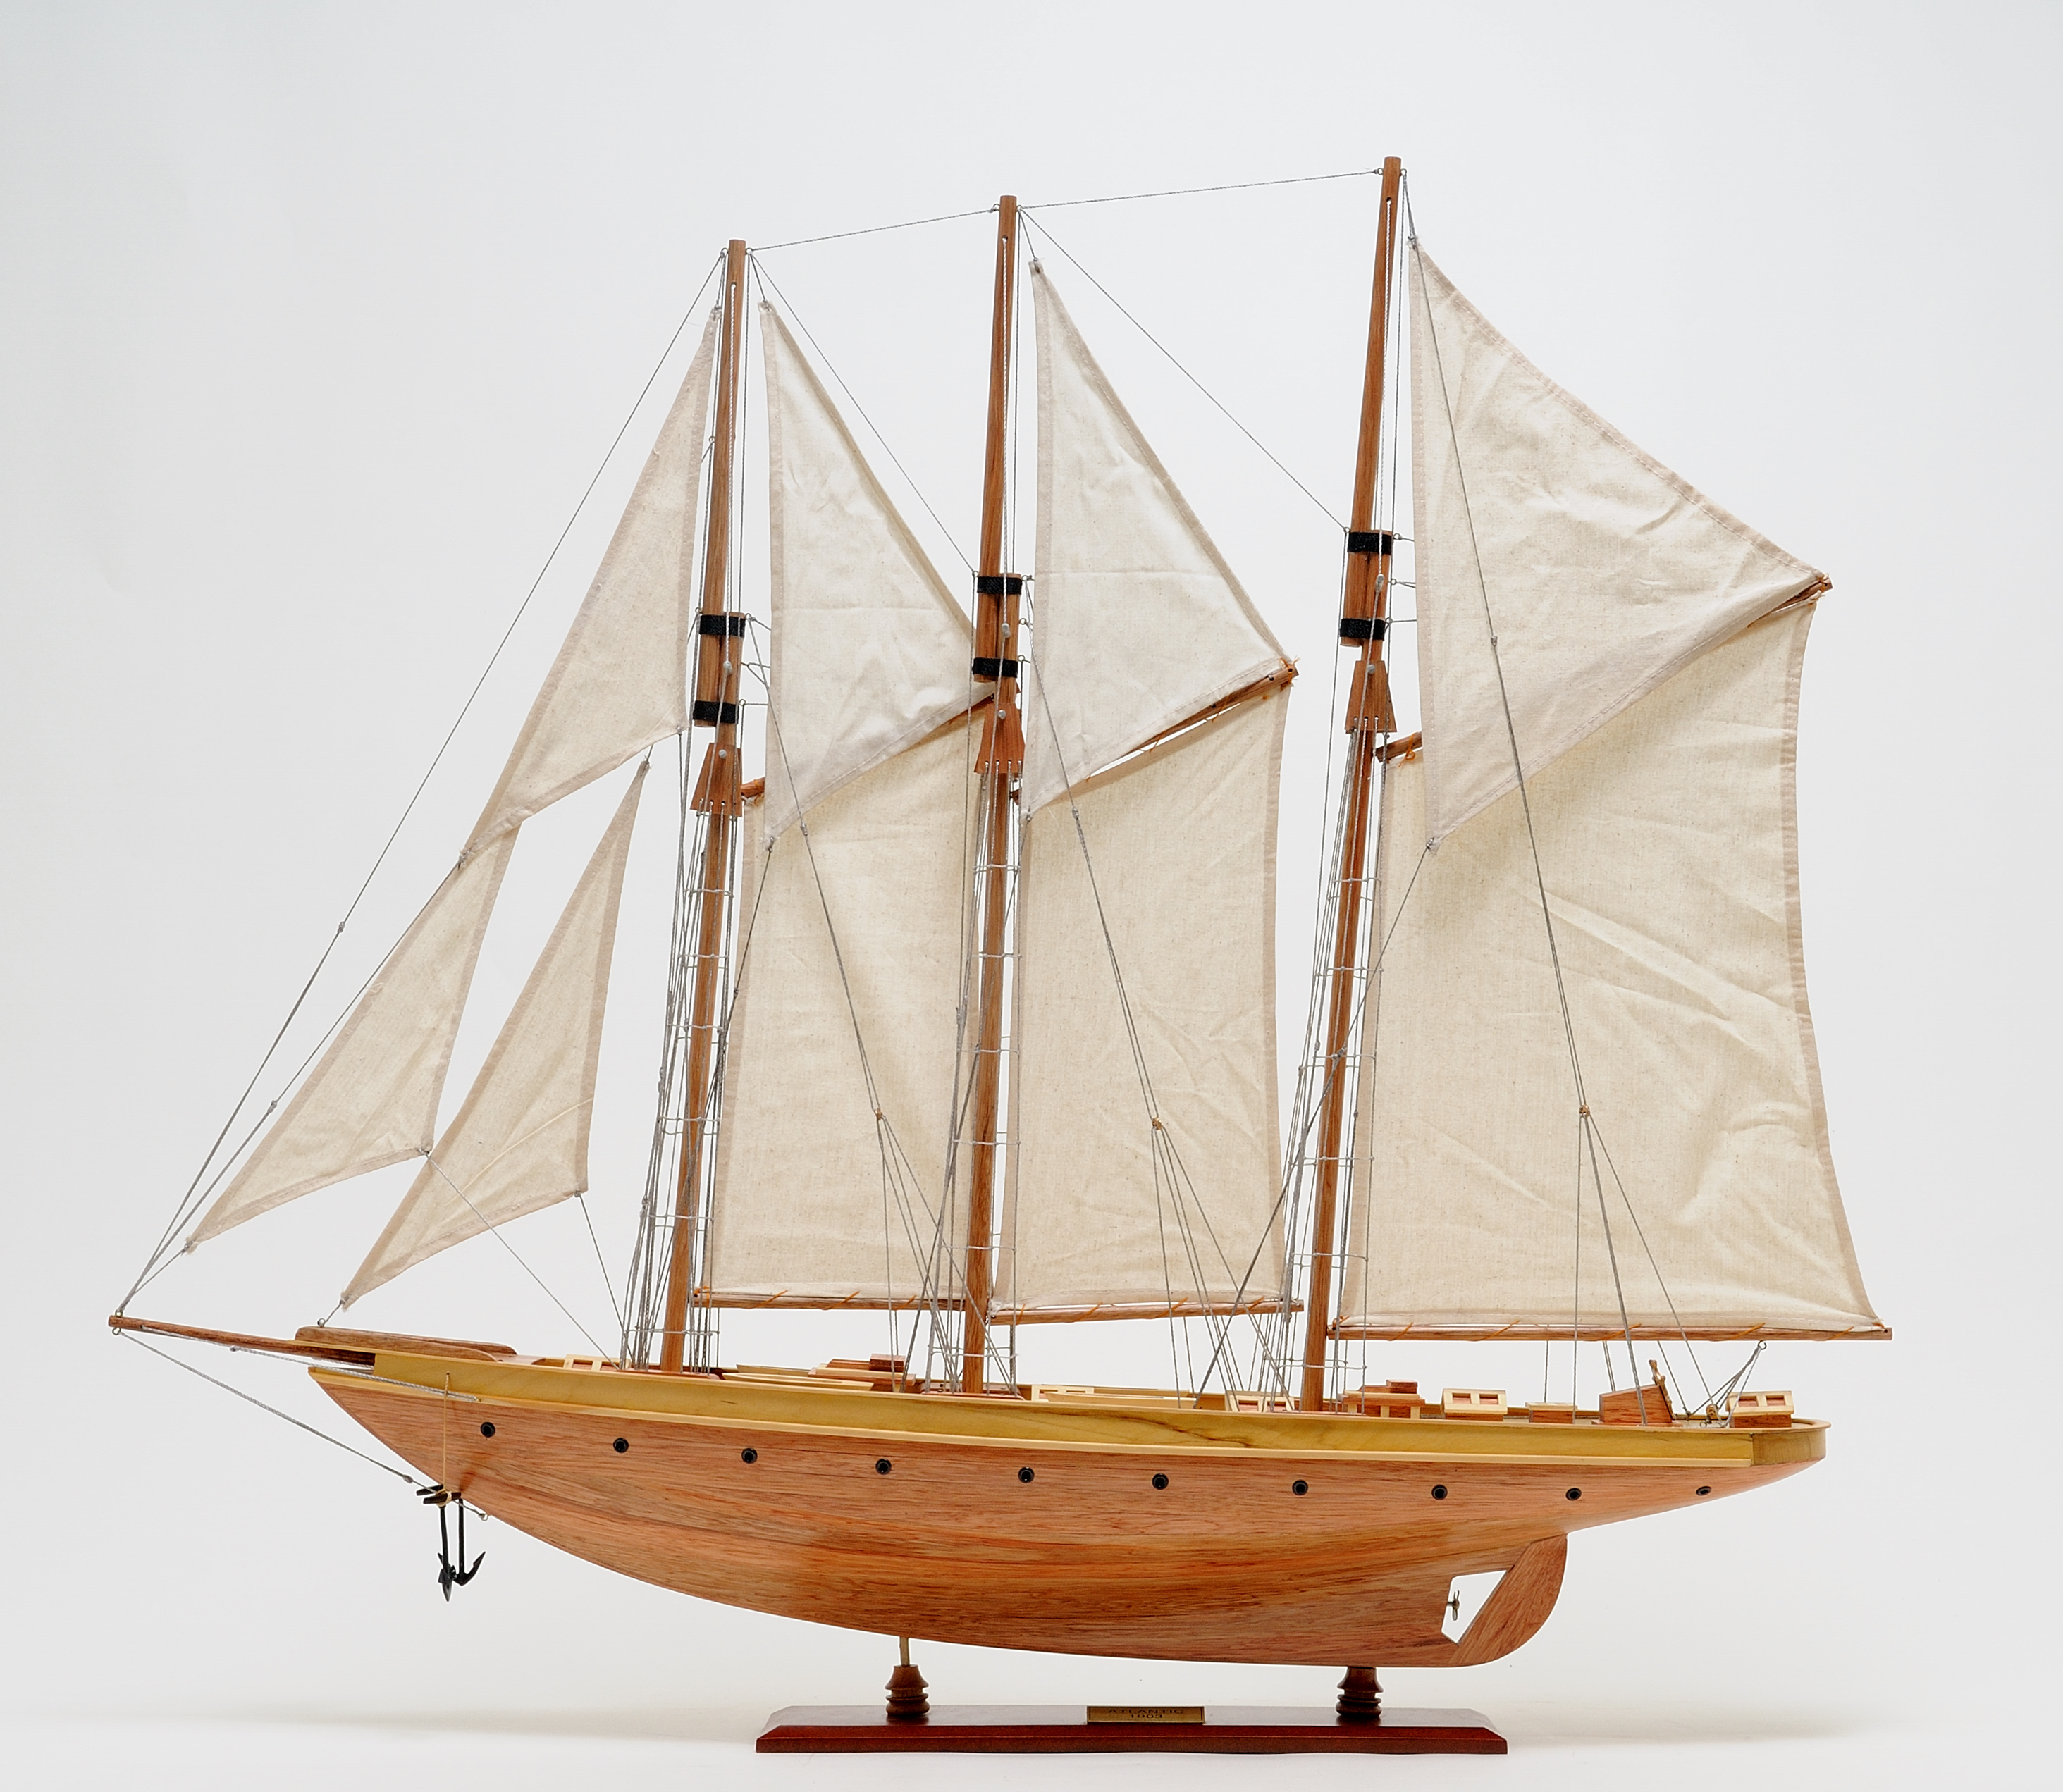
Let your love for the sea be known with our huge collection of handcrafted Nautical Sailboat Models ! Ideal for any collector and perfect for use as decor, our model ships are designed to add a nautical atmosphere anywhere they are placed. They also make thoughtful gifts for friends who love the sea. Arriving fully assembled and ready for display, we also offer tabletop and stand-alone display cases for the avid collector.
This collection features many Sailboats such as models of the Bluenose II, Classic 1930s Yacht, Drakkar Viking, and many more. All items are available for purchase at our guaranteed low price. We also offer free shipping for orders above $99.
When you shop with Everything Nautical, you are receiving the same quality treatment that all of our customers have been receiving online since 1998. Let us help you shop with confidence and complete your home nautical decor with our quality Model Ships and maritime collectibles. Call us now at 888-211-4490 !

Endeavour Lux Model Sailboat - 36"
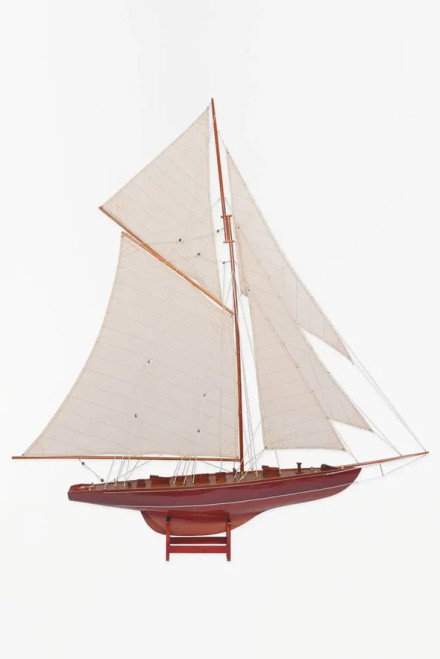
Columbia Sailboat - America's Cup - 56"

Columbia Sailboat - America's Cup - 46.5"

sku: AS075F
Columbia - america's cup sailboat - 65"".

sku: AS108F
Columbia - america's cup sailboat - 35.5".

sku: AS076F
Columbia - america's cup sailboat - 46.7".

Ship Model Wall Display

sku: Intrepid 27
Intrepid limited model sailboat - 27".
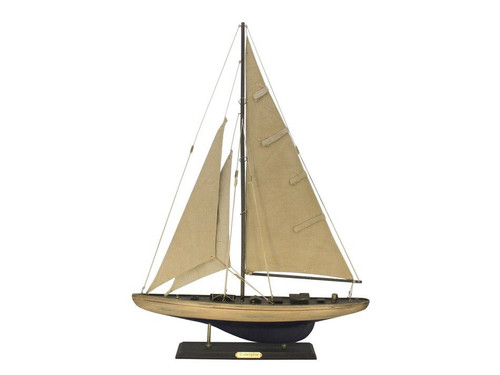
sku: R-ENT -30
Rustic enterprise limited model sailboat - 27".

sku: H END D0303
Endeavour limited edition model sailboat - 35".
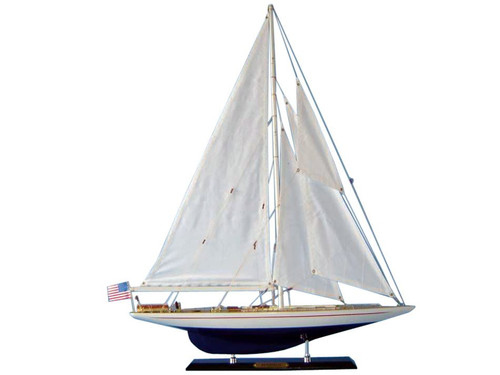
Wooden Enterprise Limited Model Sailboat 27"

sku: H Bluenose 32
Bluenose ii model sailboat - 35".
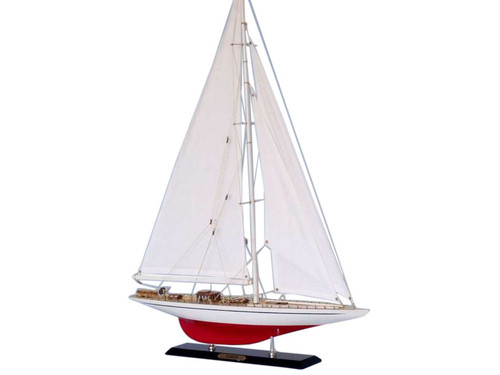
Ranger Model Sailboat America's Cup- 26"
sku: MD-393
America's cup columbia model ship - mid.

sku: Sailboats - Float - Set 2 - #3
Sailboats - they float 12" - set of 2 - #3.

sku: Sailboats - Float - Set 2 - #2
Sailboats - they float 12" - set of 2 - #2.

sku: Sailboats - Float - Set 2 - #1
Sailboats - they float 12" - set of 2- #1.

sku: MD-396 M
J5 classic yacht.

sku: ENT-R-35 Rustic
Vintage enterprise limited model sailboat america's cup 35".


sku: Ran-R-35
Ranger model sailboat america's cup- 35".
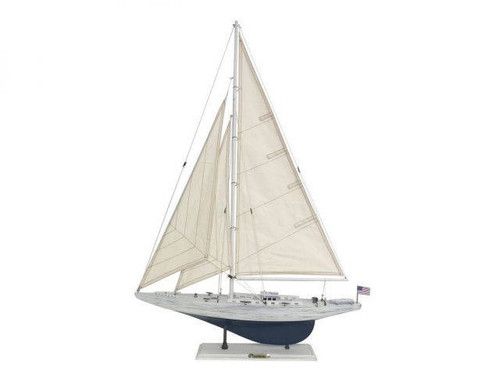
sku: WW-E-35
Rustic whitewashed enterprise limited model sailboat 35".

sku: Drakkar 24
Wooden viking drakkar model boat 24".
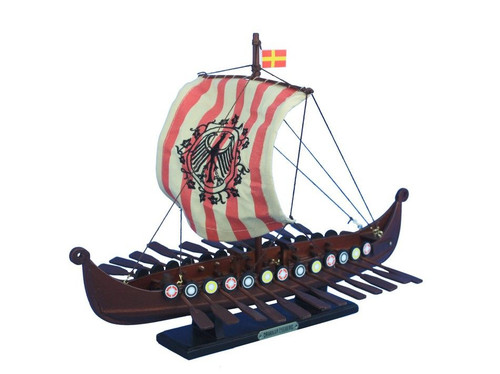
sku: Drakkar Raven 14
Wooden viking drakkar with embroidered raven limited model- 14".
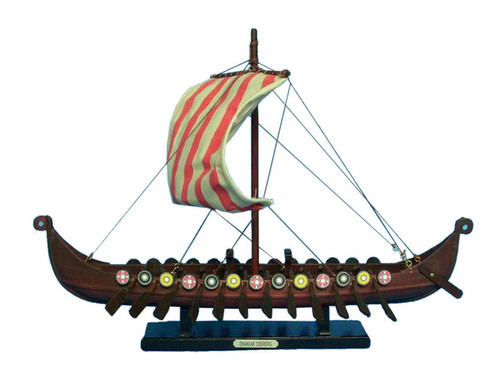
sku: Drakkar 14
Wooden viking drakkar model boat -14".

sku: H-R-Newport 30
Newport sloop - rustic -30".

sku: H-BLUE 24
Bluenose model sailboat - 24".

sku: H-D0604
Shamrock limited model sailboat - 27".
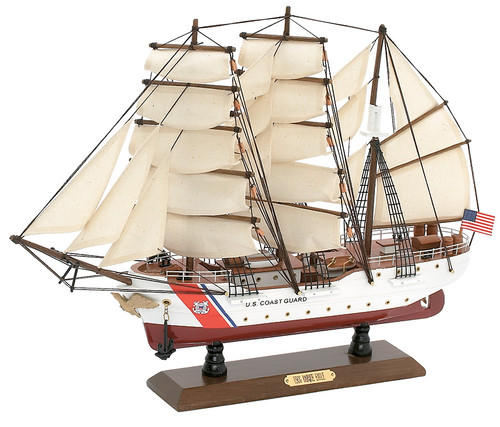
sku: MD-389
Uscg barque eagle - 1936 i.

sku: MD-391
Endeavour racing yacht.

sku: MD-383
Outer banks sailboat.

sku: MD-354
Sailboats - 9" - set of 4.
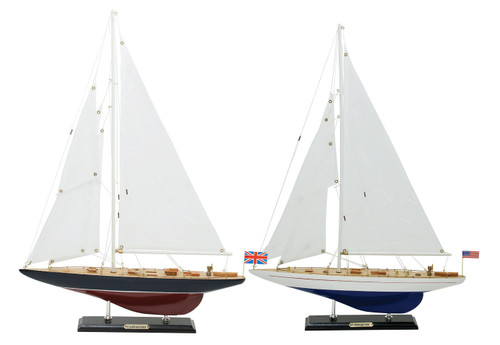
sku: MD-397
Endeavour & enterprise sailboats -21" - set of 2.
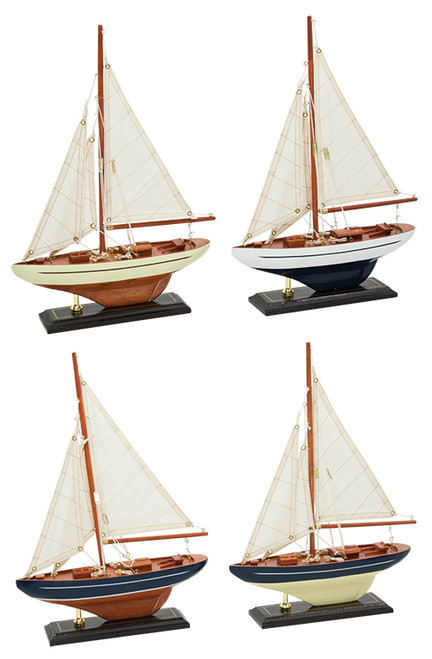
sku: MD-394
Sailboats - 13.5" - set of 4.

sku: American Sailboat Set - 12"
American sailboats - red - white - blue- 12" - set of 4.

sku: H-End R 60
Endeavour model sailboat - rustic - 60".
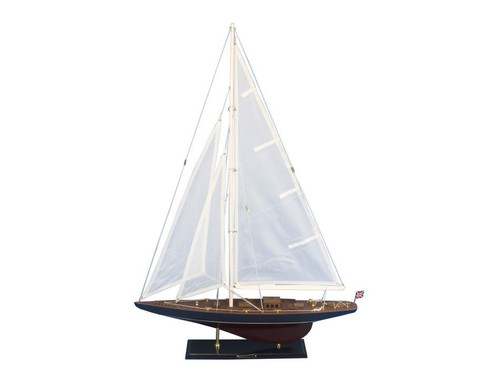
sku: H-END- R-35
Endeavour model sailboat - 35".

sku: H-END 27 D0304
Endeavour limited model sailboat - 27".
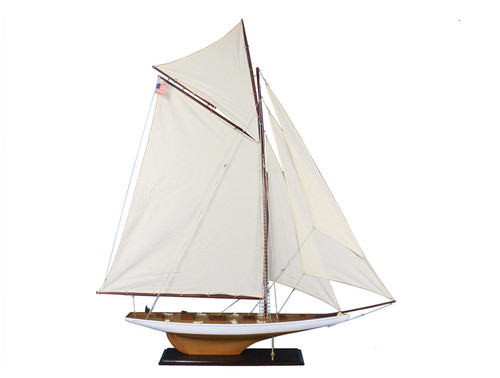
sku: H- COL 60
Columbia limited model sailboat - 60".

sku: H- COL-D0404
Columbia limited model sailboat - 25".

sku: H-R-COL 30
Columbia sailboat - rustic - limited 30".
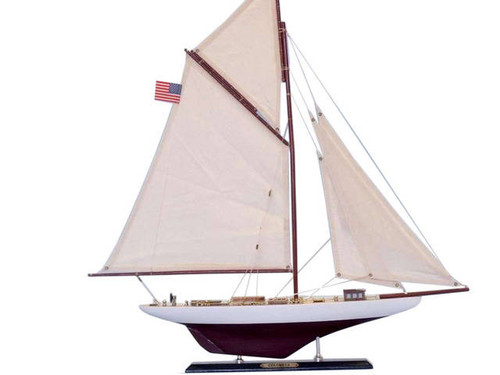
Wooden Columbia America's Cup Limited Edition - 25"

sku: American Sailboat Set 17
American sailboats - red - white - blue- 17" - set of 4.
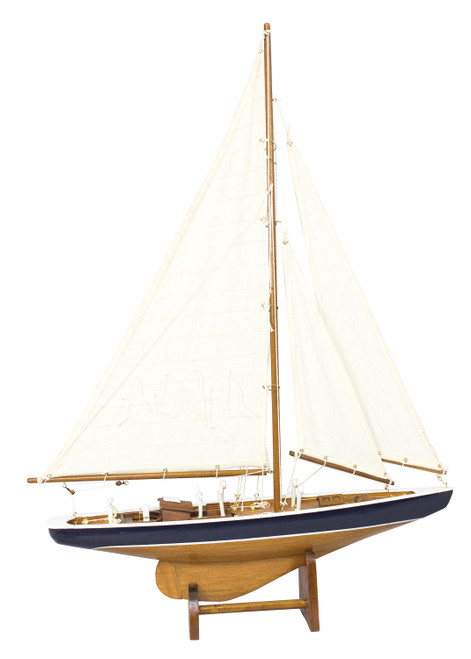
sku: MD-357
Sailing boat i.

Shamrock Yacht - Large - Optional Personalized Plaque
Shamrock Yacht - Mid Size - Optional Personalized Plaque
Painted Shamrock Half-Hull Model Boat - 35.5" - Optional Personalized Plaque

Pen Duick Half-Hull Scaled Model Boat - 35.5" - Optional Personalized Plaque

Custom Made Model Ship - Optional Personalized Plaque and Display Case
Endeavour Lux Model Sailboat - 36" Everything Nautical proudly presents the Endeavour Lux Model Sailboat - 36" With the winning spirit of her famous namesake, the presence of this sailing ship model...
Columbia Sailboat - America's Cup - 56" Everything Nautical proudly presents the Columbia Sailboat - America's Cup - 56" Perfect for the nautical décor theme of a room with existing rustic décor, bedroom shelf or office desk,...
Columbia Sailboat - America's Cup - 46.5" Everything Nautical proudly presents the Columbia Sailboat - America's Cup - 46.5" Perfect for the nautical décor theme of a room with existing rustic décor, bedroom shelf or office...
Columbia - America's Cup Sailboat - 65" Everything Nautical proudly presents the Columbia - America's Cup Sailboat - 65" Perfect for the nautical décor theme of a room with existing rustic décor, bedroom shelf or...
Columbia - America's Cup Sailboat - 35.5" Everything Nautical proudly presents the Columbia - America's Cup Sailboat - 35.5" Perfect for the nautical décor theme of a room with existing rustic décor, bedroom shelf or...
Columbia - America's Cup Sailboat - 46.7" Everything Nautical proudly presents the Columbia - America's Cup Sailboat - 46.7" Perfect for the nautical décor theme of a room with existing rustic décor, bedroom shelf or...
Everything Nautical proudly presents the Ship Model Wall Display. This is an elegant wood wall mount display for ship models. Screws & brackets are included Note images with ships displayed on it with varying size bases. The base for your...
Intrepid Limited Model Sailboat - 27" Everything Nautical proudly presents the Intrepid Limited Model Sailboat - 27". Increased craftsmanship and significantly upgraded deck features highlight our newly...
Rustic Enterprise Limited Model Sailboat - 27" Everything Nautical proudly presents the Rustic Enterprise Limited Model Sailboat - 27". Wind and waves will take you away on Enterprise racing model sailboats with these Limited...
Endeavour Limited Edition Model Sailboat - 35" Everything Nautical proudly presents the Endeavour Limited Edition Model Sailboat Decoration - 35". With the winning spirit of her famous namesake, the presence of this sailing ship model...
Wooden Enterprise Limited Model Sailboat 27" Everything Nautical proudly presents the Wooden Enterprise Limited Model Sailboat 27". Wind and waves will take you away on Enterprise racing model sailboats with these Limited Edition yacht...
Bluenose II Model Sailboat - 35" Everything Nautical proudly presents the Bluenose II Model Sailboat - 35" . With a sleek elegance that won her numerous titles in both racing and fishing competitions, this brilliant model livens up...
Ranger Model Sailboat America's Cup - 26" Everything Nautical proudly presents the Ranger Model Sailboat America's Cup - 26" With the winning spirit of her famous namesake, the presence of this sailing ship model of America’s Cup winner...
America's Cup Columbia Model Ship - Mid Presenting the all new America's Cup Columbia Model Ship - Mid from Everything Nautical. Here's your chance to own the historic Columbia, 2 time winner of America's Cup. A truly magnificent and...
Sailboats - They Float 12" - Set of 2 Everything Nautical proudly presents our new It Floats - Sailboat. These really are "whatever floats your boat! These sailboats are freshly designed with increased craftsmanship and is our debut...
Sailboats - They Float 12" - Set of 2 Everything Nautical proudly presents our new It Floats - Sailboat. These really are "whatever floats your boat! These sailboats are freshly designed with increased craftsmanship and is our...
J5 Classic Yacht Everything Nautical proudly presents the carefully handcrafted, and famous J Classic Yacht. A J-Class yacht is a single-masted racing yacht built to the specifications of Nathanael Herreshoff's Universal Rule. The J-Class are...
Vintage Enterprise Limited Model Sailboat America's Cup 35" Everything Nautical proudly presents the Vintage Enterprise Limited Model Sailboat America's Cup 35" . With the winning spirit of her famous namesake, the presence of this...
Ranger Model Sailboat America's Cup - 35" Everything Nautical proudly presents the Ranger Model Sailboat America's Cup - 35" With the winning spirit of her famous namesake, the presence of this sailing ship model of America’s Cup winner...
Rustic Whitewashed Enterprise Limited Model Sailboat 35" Everything Nautical proudly presents the Rustic Whitewashed Enterprise Limited Model Sailboat 35" . With the winning spirit of her famous namesake, the presence of this sailing ship model of...
Wooden Viking Drakkar Model Boat 24" Everything Nautical proudly presents the Wooden Viking Drakkar Model Boat -24". Share the courageous spirit of adventure that made the Vikings the greatest explorers, traders and feared raiders of...
Wooden Viking Drakkar with Embroidered Raven Limited Model- 14" Everything Nautical proudly presents the Wooden Viking Drakkar with Embroidered Raven Limited Model- 14". Share the courageous spirit of adventure that made the Vikings the...
Wooden Viking Drakkar Model Boat -14" Everything Nautical proudly presents the Wooden Viking Drakkar Model Boat -14". Share the courageous spirit of adventure that made the Vikings the greatest explorers, traders and feared raiders of...
Newport Sloop- Rustic - 30" Everything Nautical proudly presents the Newport Sloop - Rustic - Limited 30". Perfect for the nautical decor theme of a room with existing rustic decor, bedroom shelf or office desk, the graceful lines of...
Bluenose Model Sailboat - 24" Everything Nautical proudly presents the Bluenose Model Sailboat - 24". With a sleek elegance that won her numerous titles in both racing and fishing competitions, this brilliant model livens up any room or office...
Shamrock Limited Model Sailboat - 27" Everything Nautical proudly presents the Shamrock Shamrock Limited Model Sailboat - 27". Increased craftsmanship and significantly upgraded deck features highlight our newly redesigned Limited Edition...
United States Coast Guard USCG Eagle Tall Model Ship -15" Everything Nautical proudly presents the United States Coast Guard USCG Eagle Tall Model Ship -15". The legendary cutter USCG Eagle is proudly recreated here in stunning detail,...
Endeavour Racing Yacht Everything Nautical proudly presents the carefully handcrafted, and famous Endeavor Racing Yacht, the Endeavour Racing Yacht . This version of the Endeavour is slightly different from the MD-349 in size and color...
Outer Banks Sailboat Everything Nautical proudly presents the carefully handcrafted, Outer Banks Sailboat. Sail the Outer Banks with this sailboat whether it be off Nag's Head, or Cape Cod. Or, perhaps your sailboat is sailing off the Outer...
Sailboats - 9" - Set of 4 Add a nautical flair to your home or office with these cutter style Sailboats - 9" - Set of 4! What could be more fun than having this set of colorful Sailboats! How These boats are replicas of many of the...
Endeavour & Enterprise Sailboats -21" - Set of 2 Everything Nautical proudly presents the Endeavor and Enterprise - 21" Set of 2. A winner and challenger in the America's Cup. Now you can display both at a very moderate price...
Sailboats - 13.5" - Set of 4 Add a nautical flair to your home or office with the Sailboats - 13.5" - Set of 4! What could be more fun than having this set of colorful Sailboats! How These boats are replicas of many of the sailboats on...
American Sailboats - Red - White - Blue- 12" Set of 4 Add a nautical flair to your home or office with the Set of American Sailboats - Red - White - Blue from Everything Nautical! What could be more fun than having this set of...
Endeavour Model Sailboat - Rustic - 60" Everything Nautical proudly presents the Endeavour Model Sailboat - Rustic - 60". With the winning spirit of her famous namesake, the presence of this sailing ship model...
Endeavour Model Sailboat - 35" Everything Nautical proudly presents the Endeavour Model Sailboat - 35". With the winning spirit of her famous namesake, the presence of this sailing ship model...
Endeavour Limited Model Sailboat 27" Everything Nautical proudly presents the Endeavour Limited Model Sailboat 27". Newly redesigned, our Limited Edition sailing ship models of the famous America’s Cup challenger Endeavour feature...
Columbia Limited Model Sailboat - 60" Everything Nautical proudly presents the Columbia Limited Model Sailboat - 60" Perfect for the nautical decor theme of a room with existing decor, bedroom shelf or office desk, the graceful lines of this...
Columbia Limited Model Sailboat - 25" Everything Nautical proudly presents the Columbia Limited Model Sailboat - 25" Perfect for the nautical décor theme of a room with existing rustic décor, bedroom shelf or office desk, the...
Columbia Sailboat - Rustic - Limited 30" Everything Nautical proudly presents the Columbia Sailboat - Rustic - Limited 30". Perfect for the nautical decor theme of a room with existing rustic decor, bedroom shelf or office desk, the...
Wooden Columbia America's Cup Limited Edition - 25" Everything Nautical proudly presents the Wooden Columbia America's Cup Limited Edition - 25" Let the wind and waves take you away with this Limited Edition wooden model sailboat of the...
American Sailboats - Red - White - Blue- 17" Set of 4 Add a nautical flair to your home or office with the Set of American Sailboats - Red - White - Blue from Everything Nautical! What could be more fun than having this set of...
Sailing Boat I Everything Nautical proudly presents the carefully handcrafted, Sailing Boat I A perfect gift for the boating enthusiast, the passionate collector or simply those who appreciate the nautical life. Dimensions 29"" H x 3.5" D x 20"...
Shamrock Model Yacht - Large with Optional Personalized Plaque Everything Nautical is proud to present this stunning Shamrock Model Yacht, now available with the option to add a customized plaque. Display this beautiful ship anywhere in your...
Shamrock Model Yacht - Mid Size - with Optional Personalized Plaque Everything Nautical is proud to present this stunning Shamrock Model Yacht, now available with the option to add a customized plaque. Display this beautiful ship...
Painted Shamrock Half-Hull Model Boat with Optional Personalized Plaque Everything Nautical is proud to present this stunning Painted Shamrock Half-Hull Model Boat, now available with the option to add a customized plaque. Display this...
Pen Duick Half-Hull Scaled Model Boat with Optional Personalized Plaque Everything Nautical is proud to present this stunning Pen Duick Half-Hull Scaled Model Boat, now available with the option to add a customized plaque. Display this...
Custom Made Model Ship with Optional Personalized Plaque Everything Nautical is proud to present the opportunity to create your very own stunning Custom Made Model Ship, now available with the option to add a customized plaque. Display the...
Tippecanoe Boats
Tippecanoe boats.

We produce the highest quality model sailboats, toy sailboats, and radio controlled model sailing boats in the world.
After 36 years of business, there are now over 70,000 Tippecanoe model sailboats sailing in more than 65 countries around the world!

Our Mission:
Our mission is to continue the wonderful tradition of model sailboats, especially wooden model sailboats, that really sail. Our boats have provided thousands of hours of happy outdoors experiences for countless adults and youngsters. We hear back from owners almost every day about how much they enjoy their boats and how pleased they are that we are doing what we do. In their small way, model sailing boats make the world a better place for all of us.
Our Origin:
Will Lesh is the founder, designer, and owner of Tippecanoe Boats. Will grew up with a classic Jacrim Seaworthy model sailing yacht which he sailed for many summers on Lake Tippecanoe along with his sister who also had a beautiful Keystone pond yacht.
“It has been in memory of those many happy hours that I have brought these beautiful toy sailboats back to life, and of course we have added a terrific collection of sensational RC model sailboats as well which make splendid projects for craftsmen as well as for first time builders and sailors.” – Will Lesh, Founder and Designer

“I have a 100 ton license. I built my own 24 foot sailboat and sailed it across the Atlantic. I own a 34 foot cruising sloop, a laser, two MC Scows, a Hobie 14, a windsurfer, a 420, my 24 foot trans-Atlantic sloop, a 12 foot laminated mahogany sailing dinghy, 5 kayaks and 2 canoes (also two 37 foot steel sailboats in process). I am passionate about sailing boats and human powered boats of all sizes. But I still love sailing the model boats, they are so fun and beautiful and bring the joy of sailing alive in a very special way. In fact, I think I sail and race our model boats more frequently than I use my full sized boats! You can count on every one of our Tippecanoe boats, free-sailing toy boats and sophisticated radio control boats, to sail exceptionally well. I guarantee it!” – Will Lesh, Founder and Designer
Will Lesh lives and breathes sailing. He always has, and he always will.
Will started, and continues to run, Tippecanoe Boats in order to spread his love for sailing to all:
“I sail, therefore I am!”
Copyright All Rights Reserved
- Join Newsletter & Get 10% Off Your First Order

Join / Login
Rigging tips for building a model ship.
- Updated on: 25th January 2021
- Written by Gary Renshaw
Introduction
Rigging is a significant part of the process of building a model ship. It can be tedious and time-consuming however putting the effort in adds to the beauty of your finished model.
In general, the instructions on rigging provided by the manufacturers of model ship kits are fairly sparse. Whilst there are several specialised and very detailed books on masting and rigging, they are more concerned with matters of historical and technical accuracy than with the sort of advice that might help the beginner to understand the best way of going about what might appear to be quite a daunting task.
Highly recommended is a 3 DVD set available from Modellers Shipyard on Masting and Rigging . This is a comprehensive set which shows all aspects of preparing the masts, spars and yards and the rigging for a period model. For further information call our office or visit our website.
We do strongly recommend “Ship Modelling Simplified” by Mastini – it contains excellent advice on ship modelling in general and has a good section on rigging. Modeller’s Shipyard has produced the following information as an introduction to the Rigging of a model ship. The following points should be noted:
- This is a general guide only and is to be used in conjunction with any instructions and plans provided by the kit manufacturer. In particular, it must be emphasised that any illustrations used in this leaflet are purely for the purpose of example and may not relate to your specific model.
- The approaches described are not the only way of doing things and the order in which the various processes are carried out may be varied, within reason, to suit the individual modeller.
Building a model ship is as much an exercise in using the mind as it is in using your fingers and hands. In this small leaflet, we can’t hope to cover all the problems and queries that may be encountered in the construction of your model. It is necessary to spend as much time thinking about the task at hand as actually doing it. If having thought about it, you still have a problem then contact us. We’ll either be able to advise you ourselves or refer you another modeller in your area who’ll be happy to help you with “hands-on” assistance.
TYPES OF RIGGING
The rigging of a ship can be divided into two main parts:
- “Standing” or “Fixed” rigging, which is used to support the Masts and Bowsprit.
- “Running” rigging, which is used to manipulate spars and sails.
On an “actual” ship any Rigging which didn’t pass through a pulley block was coated with tar to help prevent it rotting. For this reason, standing rigging is often, although not always, black on ship models.
If you do want your standing rigging black, and black cord is not supplied in the kit then you can consider these options:
- You can purchase Black cord.
- The use of black rigging “wax” gives a very authentic tarred look but it is difficult to do well.
- The cord supplied with the kit can be coloured using black dye or “Raven Oil” as used by leatherworkers/saddlers.
- Black felt-tipped “Texta” is an easy way to colour the cord.
- Black “Padawax” shoe colour is also very satisfactory.
When any liquid dye has been used it will be necessary to stretch the cord by hanging it on a clothesline, with weights, to prevent it going slack after installation on the model. It will also probably be necessary to use clear wax to eliminate any furry look in the cord.
STANDING RIGGING
This includes the rigging of the Stays, Backstay, Bowsprit and Gammoning. This is fairly straightforward and should present few difficulties. Work from the centre of the ship out and try to avoid difficult and confined spaces. A Rigging Tool presented in the Tools section of our Catalogue will be helpful when rigging. The various names for the standing rigging are presented below.
- Fore topmast stay
- Fore topgallant stay
- Flying-jib stay
- Fore royal stay
- Fore skysail stay
- Main topmast stay
- Main topgallant stay
- Main royal stay
- Main skysail stay
- Mizzen stay
- Mizzen topmast stay
- Mizzen topgallant stay
- Mizzen royal stay
- Mizzen skysail stay
- Mizzen topmast backstay
- Mizzen royal backstay
- Mizzen skysail backstay
- Main topmast backstay
- Main topgallant backstay
- Main royal backstay
- Main skysail backstay
- Fore topmast backstay
- Fore topgallant backstay
- Fore royal backstay
- Fore skysail backstay
- Bowsprit shrouds (bobstays)
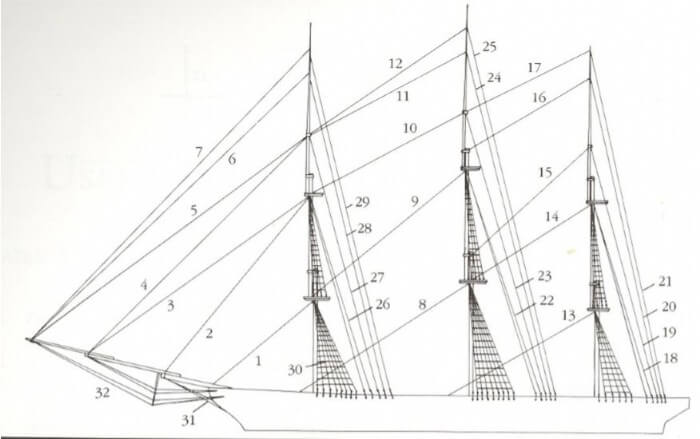
Source: “Ship Modeling Simplified” by Mastini Pages 143 –144
FITTING OF BLOCKS, EYE PINS & CLEATS
Before proceeding further fit all the eye pins and rigging blocks to the bowsprit, masts, yards, and deck – also to the insides of the bulwarks if required. Cleats may be required on the lower masts, deck or bulwarks. Pay particular attention to any area which will be relatively inaccessible once the shrouds and other standing rigging ropes are in place.
It is as well to drill out the holes in the blocks and deadeyes to facilitate the threading of the rigging cord when the time comes.
For the most inaccessible blocks, insert a short piece of thin rigging cord through the hole and glue it to itself forming a loop. Later, when you wish to insert the permanent running rigging you cut the loop, glue the new cord to one end and pull it through the hole using the other end of the pilot cord. No awkward threading
DEADEYES (LOWER) AND CHAIN STRAPS/ DEADEYE STRAPS
In most models, the lower deadeyes are fitted into “deadeye loops” which are inserted into gaps in the outer edge of the “Channel”. Once the complete row of deadeyes are installed a capping strip is fixed along the front.
From the bottom of the deadeye loop either a straight ”Deadeye Strap” or a “Chain Strap” goes to the side of the hull at a lower level. The style of this fitting will depend on the period to which the particular ship belongs and also the price/ quality of the ship being built.
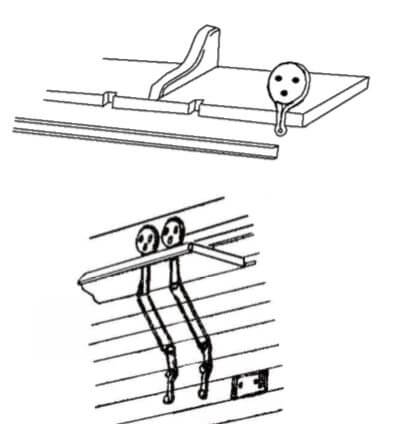
There are several points to keep in mind when setting up these “deadeye assemblies”
The deadeye strap (or chain strap) is rarely, if ever, perpendicular. Rather, it should be at an angle which is an extension of the angle of the shroud which will eventually be attached to the deadeye above it. The diagram on the left of this page should make that mouthful clearer!!
The lower deadeyes, the ones being attached at present, should be placed so that the three holes are positioned with the lowest one being the centre of the three. When at a later stage the upper deadeye is fitted, it is equally important that the centre hole is the highest of the three. Refer to the diagram on the right-hand side of this page.
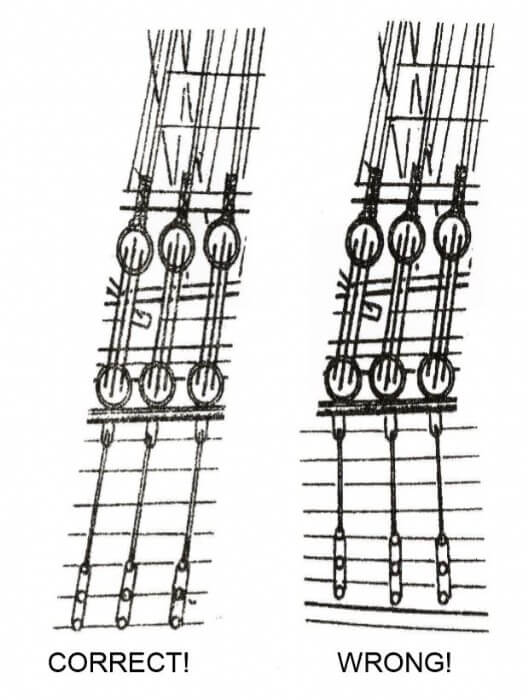
These together with the “forestays” and “backstays” are the ropes that support the masts. Shrouds, which are the group of ropes to which the ratlines are attached, are made up in pairs with a deadeye at each end of a single rope.
First cut a piece of cord to an appropriate length and with the help of an alligator clip or a small clamp glue one end around a deadeye. This deadeye should then be temporarily connected to the front portside (left hand) lower deadeye using a wire jig. This jig will provide the correct spacing between the upper and the lower deadeye.
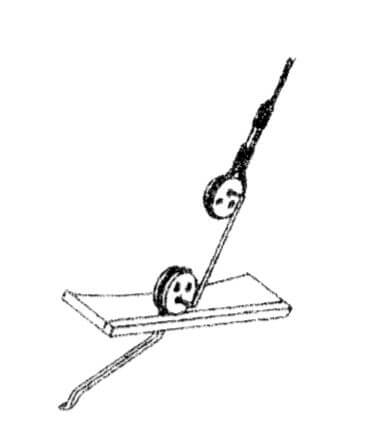
The loose end of the rope then goes up, around the mast and down to the position of the lower deadeye immediately behind the first. Using glue, alligator clip and another wire spacer, the upper deadeye is attached to the shroud. At a latter stage, the double thickness of cord immediately above the upper deadeye will be bound with fine thread as shown as shown in some of our diagrams. The “Lanyards”, made of the thinnest rigging cord, are then installed as shown in the adjoining drawing. Because on the “real thing” the lanyards were constantly used to take up tension on the shrouds they were never tarred and should not be black.
Once the first pair of shrouds has been completed, the exercise is repeated on the other (starboard) side, then, back to the port side and so on.
If, when the others have been done there remains a single lower deadeye on each side then the final pair of shrouds goes from one side of the ship to the other with a large seized eye around the masthead. In all of this, it is important to ensure that the deadeyes are in straight rows parallel with the channels and with each other.
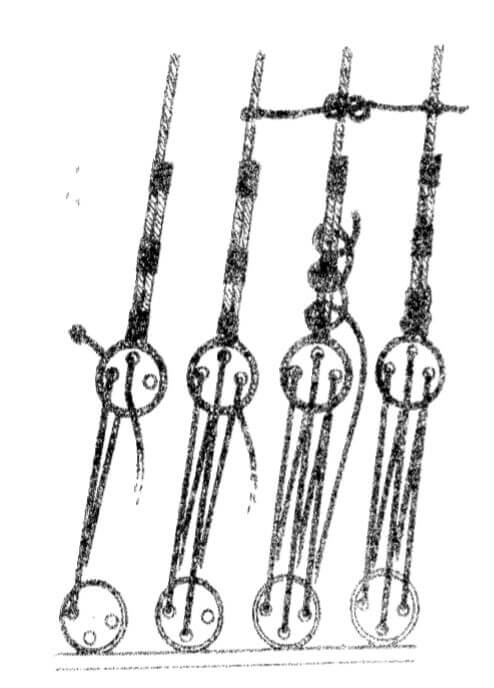
SEQUENCE OF SHROUDS
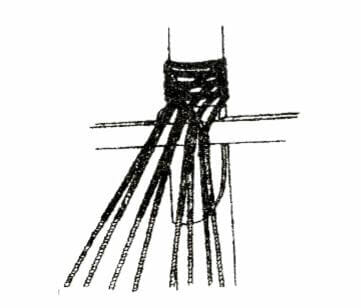
The forestays should now be fitted paying attention to the particular fittings used. Quite commonly “heart deadeyes” and lanyards will be used for tensioning purposes.
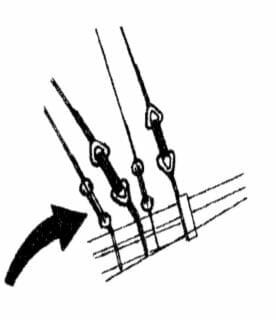
These are always rigged with a large seized eye around the masthead as with the “odd” shrouds (if any). As with the shrouds they are rigged with deadeyes and lanyards but the upper deadeye will normally be at a higher level than that of the shroud deadeyes.
The colour of the ratline cord is grey or fawn. The tying of ratlines can be fairly tedious but it is worth going to some trouble to ensure that it is done well. Among the points to keep in mind are:
- They should not be too tight otherwise they will pull the shrouds together.
- They should be parallel to the waterline.
- On the “real thing” the spacing between each row was about 400mm so, on a model at a scale of say 1:50, the gap would be approximately 10mm.
- Avoid tying knots tightly until all the ratlines are in place. This will allow some “fine tuning” before placing a tiny dab of glue on each knot. Placing a sheet of white plain paper behind the shrouds will assist with gaining contrast to make the tying of the ratlines a tad easier on the eyes.
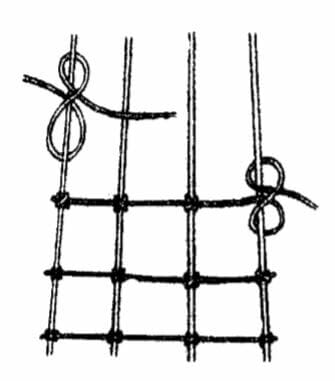
ATTACHING RIGGING LINE TO BELAYING PINS
The adjacent diagram demonstrates clearly the method best used to attach the cord to the belaying pins.
If you have any difficulties determining which belaying pin a rope is intended to go to, a good rule of thumb is that the higher up the mast it starts then the further back it finishes.
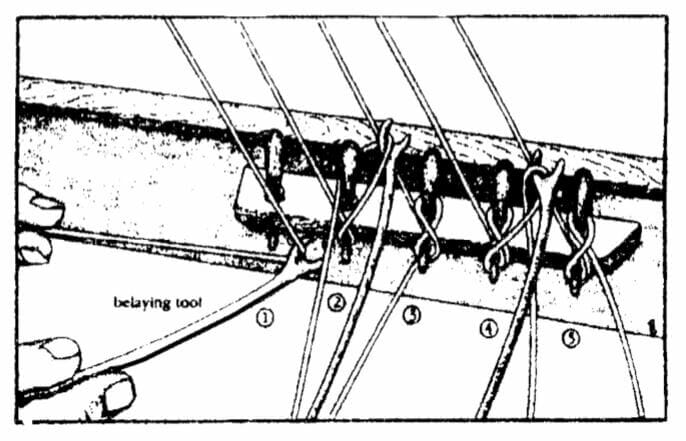
ROPE COILS
Plenty of rope coils draped over the belaying pins provide a finishing touch. These can be made from odd lengths of offcuts. If placed into the shapes you require they can be (fixed) permanently by using hair lacquer or nail polish.
WHAT SIZE ROPE TO USE
In the plans or in the instructions there should be a key or description of the size of cord to be used for various purposes. In the unlikely event that no indication is given, then the following can serve as a guide:
Forestays & Anchor ropes – Heavy cord
Shrouds & Backstays – Medium cord
Ratlines & Running Rigging – Lightest cord
RUNNING RIGGING
Once the standing rigging has been completed you can now start the Running Rigging. You will have enlarged the holes in the blocks which are already in place. Do the same with all other blocks as you come to use them.
When threading cord through blocks, you will find that a needle threader (available from sewing shops) will be very handy. Also, a smear of super glue on the end of the cord can stiffen it and make it easier to thread. Work from the centre of the ship out and try to avoid locking yourself into difficult positions. A Rigging Tool presented in the Tools section of our Catalogue will be helpful when rigging.
The various names for the Running Rigging are presented below.
- Fore brace
- Fore lower topsail brace
- Fore upper topsail brace
- Fore lower topgallant brace
- Fore upper topgallant brace
- Fore royal brace
- Fore skysail brace
- Fore yard lift
- Fore topsail yard lift
- Fore topgallant yard lift
- Fore royal yard lift
- Fore skysail yard lift
- Main lower topsail brace
- Main upper topsail brace
- Main lower topgallant brace
- Main upper topgallant brace
- Main royal brace
- Main skysail brace
- Main yard lift
- Main topmast yard lift
- Main topgallant yard lift
- Main royal yard lift
- Main skysail yard lift
- Mizzen yard brace
- Mizzen lower topsail brace
- Mizzen upper topsail brace
- Mizzen lower topgallant brace
- Mizzen upper topgallant brace
- Mizzen royal yard brace
- Mizzen skysail yard brace
- Mizzen topmast yard brace
- Mizzen topgallant yard lift
- Mizzen royal yard lift
- Mizzen skysail yard lift
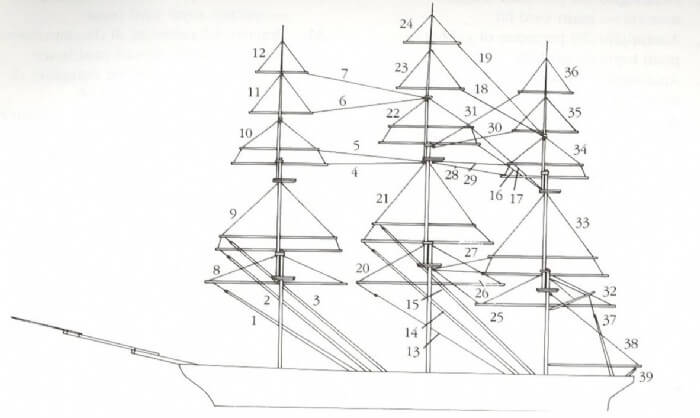
Source: “Ship Modeling Simplified” by Mastini Pages 145 –146
TYPICAL RUNNING RIGGING APPLICATIONS
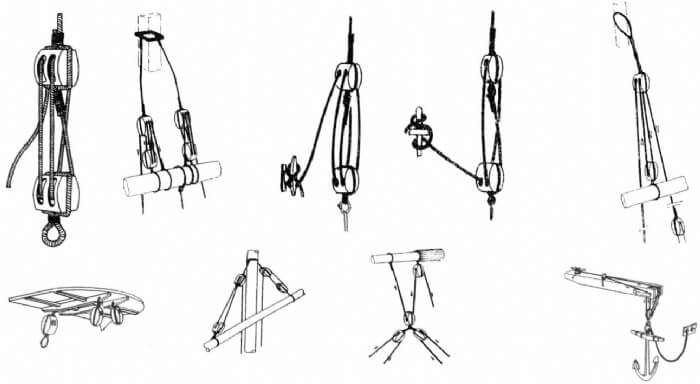
NAMES OF MASTS & SPARS
- Fore lower mast
- Fore topmast
- Fore topgallant mast
- Fore royal and fore skysail mast
- Main lower mast
- Main topmast
- Main topgallant mast
- Main royal & main topgallant mast
- Mizzen lower mast
- Mizzen topmast
- Mizzen topgallant mast
- Mizzen royal & mizzen skysail mast
- Fore topsail yard
- Fore upper topsail yard
- Fore lower topgallant yard
- Fore upper topgallant yard
- Fore royal yard
- Fore skysail yard
- Main lower topsail yard
- Main upper topsail yard
- Main lower topgallant yard
- Main topgallant yard
- Main royal yard
- Main skysail yard
- Crossjack yard
- Mizzen lower topsail yard
- Mizzen upper topsail yard
- Mizzen lower topgallant yard
- Mizzen upper topgallant yard
- Mizzen royal yard
- Mizzen skysail yard
- Gaffsail boom
- Flying-jibboom
- Martingale boom, dolphin striker
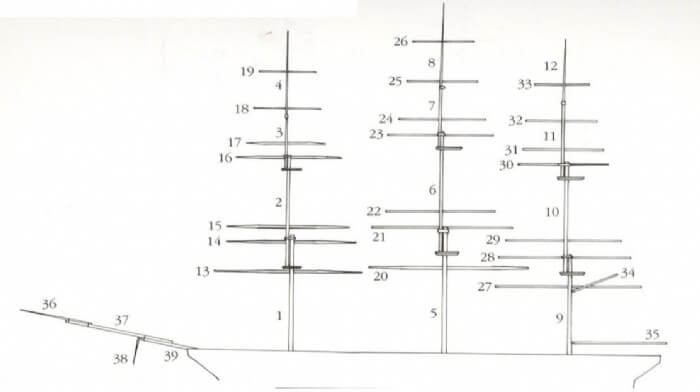
Source: “Ship Modeling Simplified” by Mastini Pages 142 –143
Learn The Art Of Building A Model Ship
Get started in wooden model ship building today
Join 18,543 other modelers to hear about specials, new products and modeling tips
- Become a Member
- Modeling Hub
- Model Ship Building
- Maritime History
- Affiliate Program
Information
- Terms & Conditions
- Privacy Policy
Copyright © 2023 Modelers Central. ABN: 31 114 830 732
- Claim 10% Off First Order
- Get 5% off ALL orders with a Membership
- Gift Vouchers
- Help & Advice
Modelers Central. 2023, All rights reserved.

- Claim 10% Off Your First Order
- Get 5% Off All Orders With A Membership

Get 10% off
Your first order.
10% off applies only to full-price items. By providing your email address, you agree to our Terms & Privacy Policy

10% off applies only to full-price items. By providing your email address & mobile number, you agree to our Terms & Privacy Policy and consent to receive marketing messages from Modelers Central at the addresses provided. You can unsubscribe at any time by replying STOP.
CR-914 Class Page
Cr-914 rc model sailboat, header content region, insert text, image or banner ads here, or just delete this text and leave this area blank.

1/25 (36") Scale America's Cup high performance model sailboat
5ft Replica of the 1962 Americas Cup 12 Meter
45" Scale Model of the Olympic Star Boat
J Class Boat-Shamrock V
1/16 (8'-10')Scale Replica of the 1930's America's Cup Class Yacht
RMG Sail Winches
High Performance sail control winches
[Library/logo/wrappers/logo-wrapper.htm]
- Create as many news links as you need. News links are simple bullet lists.
This is where you would add your text, images, or advertising banner
CR-914 RADIO CONTROL MODEL SAILBOAT Easy to Build, Fun to Sail. No Better way to get Started
One of the hottest classes in the American Model Yachting Association (AMYA)
The CR-914 is a strict one design AMYA sanctioned 1:25 scale model based on the Americas Cup class yacht.
The kit comes with everything you need to build your boat. All you need are some simple tools, sandpaper, paint and batteries. Excellent sailing performance in a wide wind range. With quick acceleration and turning this boat will thrill and excite the expert as well as the novice.
CR-914 CLASS WEB SITE
View Kit Options Kit Accessories
BUILDERS TIPS AND TRICKS PAGE

Copyright © 2021. Chesapeake Performance Models LLC. All Rights Reserved..
- U.S. Dollar (USD)
- New Products
- Vintage And Used Models,Toys And Nautical items
- Custom Built Model Ships, Boats, Aircraft, Helicopters
- Tall Ship Models
- Aircraft Carrier and Naval Ship Models
- Boat Models
- Pirate Ship Model
- Speedboat Models
- Ship Models
Sailboat Models
- Canoe Models
- Cruise Ship Models
- Boat and Ship Models Less than $250.00
- Boat and Ship Models $251.00 to $500.00
- Wood Premier Boat And Ship Models $501 and up
- Ship and Boat Models with Free Shipping
- Display Cases for Ship Models
- Nautical Accessories
- Ship Model kits
- Remote Control
- Custom Builds
- Hand Crafted
- Shipping/Pay
- New Products (145)
- Vintage And Used Models,Toys And Nautical items (1)
- Custom Built Model Ships, Boats, Aircraft, Helicopters (2)
- Tall Ship Models (59)
- Aircraft Carrier and Naval Ship Models (48)
- Fishing Boat Model
- Yacht Models
- Pirate Ship Model (5)
- Speedboat Models (21)
- Ship Models (114)
- Sailboat Models (29)
- Canoe Models (6)
- Cruise Ship Models (14)
- Boat and Ship Models Less than $250.00 (20)
- Boat and Ship Models $251.00 to $500.00 (88)
- Wood Premier Boat And Ship Models $501 and up (82)
- Ship and Boat Models with Free Shipping (137)
- Display Cases for Ship Models (4)
- Nautical Accessories (12)
- Ship Model kits (25)
- Remote Control (0)

Information
- Privacy Policy
Customer Service
- Advanced Search
- Order History
- Marshville, NC
- 855-280-9590 Toll Free
- [email protected]

1-360-966-7245
FOR THE MOST CURRENT ORDERING OPTIONS, PLEASE GO TO WWW.SAILINGIS.COM
Crafted in the USA using the finest materials from around the world.
Fast and Fun!
Controls from Shore on a Line. How Fun Are Free-Sailing Boats? Lots and Lots of Fun!
Owners' Pictures - the best part of our web site!
Our latest blog post - see what's happening at Tippecanoe!
Rc sailboat radio controlled, excellent sailing performance, order form please visit www.sailingis.com to order..
Regattas and News
T37 Canadian National Championships 2015
T37 canadian national championships 2014, click here to see our site map with all our toy boats and rc model sailboat pages.
- Basket (USD $0) Checkout
Shop By Difficulty Level
Beginner's kit, advanced beg. kit, intermediate kit, shop by model boat kit category.

Any Other Type

Barge, Trawlers and Tug Boat Model Kits

Best Selling Model Kits
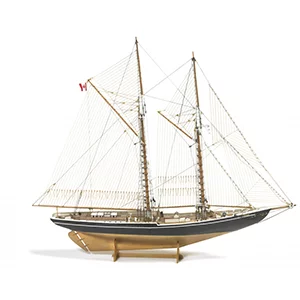
Classic Boat & Yacht Model Kits
Fishing Vessel Model Kits
Historical & Tall Ship Model Kits
In Stock Kits
Modern Military Model Kits
Passenger Boats and Liners Model Kits
Model Making Tools & Modeling Kits
Tram Model Kits
Click here for all model boat kits.

Model Boat Kits
For some of our clients, they gain greater satisfaction in actually building their own ships, yachts and sailboats rather than purchasing a ready-made ship model. Premier Ship Models caters for both collectors of ready–made models and the avid hobbyist who prefer to make their own by providing the services and relevant products to satisfy all of their needs.
Model Boat Kits: Explore Premier Ship Models’ Exquisite Collection
Delve into the world of model boat kits at Premier Ship Models, where our curated collection awaits your exploration. With meticulous craftsmanship and a passion for maritime history, we present an exquisite array of model ship kits to captivate enthusiasts of all levels. From timeless classics to exclusive offerings, each kit in our collection is a testament to our commitment to quality and authenticity. Embark on a journey of creativity and discovery as you peruse our selection of wooden model boats, sailboat kits, and historical replicas. Experience the artistry of model ship building with Premier Ship Models.
There is an extensive range of kits on offer of tall ship building kits and wooden yacht model kits; furthermore, there are different levels of difficulty to choose from to ensure that you pick the right one for you. There are many reasons why someone would want to build their own model. From the feedback that we have received, it seems to be purely for the satisfaction of making something with your own hands that you can be proud of.
Our collection includes sail boats, tall ship building kits, scale model boat kits, historical ships, and wooden yacht model kits. In addition, we will try and source kits for you if you are unable to find a specific one that you are looking for. We have about 200 model kits on offer and all of them are wooden ship model kits. The ship model kits that we offer have been carefully selected to ensure that they are of the finest quality, using the best quality woods and materials.
Featured Model Boat Kits
Step into the world of model boat kits with our curated selection of featured models that capture the essence of maritime history and craftsmanship. From classic sailboats to majestic tall ships, each kit boasts meticulous attention to detail and exceptional quality craftsmanship. Explore our popular model boat kits, including wooden model boats and wooden sailboat kits, meticulously crafted to satisfy your desire for authenticity and beauty.
As a result we have model makers coming back to us with positive feedback where they have been pleased with the quality of our sailboats, yachts and tall ship building kits. As mentioned above we sell kits from the best manufacturers of quality model kits. They are, Artesania, Amerang, Billings, Aeronaut, Amati and Mantua to name but a few. The types of models are; classic, historic, modern ships and wooden yacht model kits and these tend to be vessels from history, stories, and classic yachts, including HMS Unicorn, HMS Victory,La Sirene, Le Mirage, Reale De France and many others.
Over the years, we have found that one of our best-selling and most popular model ship kits is the Scotland Baltic yacht model kit. This particular wooden kit is provided by an Italian manufacturer, Corel S.R.L., famous for making wooden kits over 40 years. Another popular wooden ship model kit by Corel S.R.L. is the HMS Bellona, a famous 74 gun classic British Navy ship.
One of the most elegant ship model kits in our product range is the Blue Nose 11 model ship a great focal point in any room or office. For those of you who are more experienced kit builders, Smit Rotterdam model boat kit is a great choice. This model ship kit is built with bulb stern nozzle and the onboard equipment includes a very modern for component for navigation, steering and radio communication.
Another possibility for a more advanced kit builder is the HMS Bounty model ship kit with laser cut parts. Purchasing a boat model kit online could not be simpler! Our easy and friendly online store makes purchasing sailing boat models, tall ship building kits and wooden yacht model kits easy and convenient.
To make your shopping easier, we have classified our kits according to the manufacturer and level of difficulty (Beginner, Intermediate and Advanced). Kits can be shipped out to you worldwide. Please see our customer testimonials for all those satisfied customers who have purchased from us from 81 countries around the world so far and counting.
New Arrivals
Stay ahead of the curve with our latest arrivals, featuring the newest additions to our ever-expanding inventory of model boat kits. Discover exciting opportunities to embark on fresh building projects and expand your collection with the latest offerings from renowned manufacturers. With our commitment to sourcing the finest ship model kits, you can trust that each new arrival embodies the same level of excellence and precision that defines Premier Ship Models.
At Premier Ship Models, we cater to the unique preferences of every collector. We offer a large selection of ready-made ship models and model ship kits for those who prefer to build their own models. If you find building models relaxing or relish the satisfaction of building something with your own hands, we offer intricate boat and ship models that you would be proud to display in your home.
At Premier Ship Models, we have an expansive selection that includes more than 200 wooden model boat kits. We feature model kits from the best known brands in the industry. We showcase only the best products with the best quality woods and materials to ensure a pleasant experience for novice and experienced model builders alike. Choose ship kits from Artesania, Aeronaut, Billings, Amati, Mantua, and other well-known and respected brands.
Customer Favorites
Join the ranks of satisfied customers who have experienced the joy of building and displaying our customer-favorite model boat kits. With rave reviews and high ratings, these kits have captured the hearts of enthusiasts worldwide, earning accolades for their exceptional quality, authenticity, and attention to detail. Choose from our selection of customer favorites and embark on a rewarding journey of model ship building that will leave you feeling proud and fulfilled.
Models for Every Skill Level & Interest
Do you love a certain type of ship or time period in military or nautical history? Our inventory includes ship model kits of classic, historic, and modern ships. You will find model kits for all types of vessels, including tall ships, wooden yachts, historical ships, sail boats, scale model boat kits, and more. Whether you are looking for a model from a specific time period, type of ship, or modern boats, you will find it here.
Always select a model that is appropriate for the level of skill and experience of the person building it. A kit that is too easy or too difficult will detract from the enjoyment of the activity. We have model sailboat kits for every level of difficulty to satisfy beginners as well as more advanced hobbyists. Read the product description of each kit to learn more about each ship, including the materials included in the kit, photographs, and level of difficulty to make sure that the ship is right for you.
Exclusive Model Ship Kits
Indulge in the luxury of exclusivity with our collection of exclusive model boat kits, available only at Premier Ship Models. Discover limited-edition treasures that exemplify the pinnacle of craftsmanship and design, meticulously curated to offer you a unique and unforgettable building experience. Elevate your collection with these rare gems and make a statement that reflects your discerning taste and appreciation for the finer things in life.
Historical Replicas
Experience history brought to life with our collection of historical replica model boat kits, meticulously recreated to honor the grandeur of maritime heritage. Immerse yourself in the rich tapestry of naval history as you embark on a journey to build iconic vessels from the past. With unparalleled accuracy and attention to detail, our historical replicas are a testament to our commitment to preserving the legacy of maritime craftsmanship for generations to come.
Some model boat enthusiasts take the hobby to the next level with radio controlled boats. We offer prebuilt models and RC boat kits for large RC boats, scale boats, gas powered boats, PC hull boats, race and speed boats. RC boat models are used for recreation or competitive racing, depending on the interests of the individual. Browse through our website to find wooden model ships, sailboats, historic ships, and modern ship model kits that are suited for beginner, intermediate, and advanced model building. We offer fast order processing and worldwide shipping.
Information
- Delivery & Packaging

- Cookie Consent
- Secure Payment
- Legal Notice
- Terms & Conditions

Follow us to keep up-to-date using our social networks

Enter your email address to sign up to our newsletter to keep up-to-date.


DON'T DISEMBARK JUST YET!
Order now and you can return the item up until Jan 2nd
We ship daily! Order by 2PM est on the following dates for guaranteed delivery by Christmas!

Handcrafted Model Ships - Wooden model sailboats and sailing ships
Wooen model sail boats, since 1954, handcrafted model ships guarantees the lowest price, the highest quality and a 100% money back guarantee on sail boats., decorate your home, or give as a gift to someone special our large selection of sail boats., shop with confidence and showcase your passion for model sailboats with fast and free shipping on orders over $99.
Sail Boat Models
Sleek beauties designed to cruise through the sea with speed, agility, and grace, sailboats are the true essence of nautical life. From historic sailboats, to centerpieces and proud Americas Cup winners, Handcrafted Model Ships offers charming sailboat models for collectors, home and office décor, and wonderful gift ideas.
Basic sailing ship models are available in a wide range of colors, enabling them to match the décor of any room. They are a perfect addition to any seashore or beach décor theme, and make great gifts. Display them in a bedroom, family room, sunroom or liven up an office with their fun and playful presence. These models also make excellent themed centerpieces of events and receptions.
Fine-crafted décor yachts models add a touch of class and a nautical flair to any room with their quality workmanship. They combine elegance with a subtle presence that makes them an ideal addition to family rooms, dens or offices, as well as meeting rooms and other common areas.
Premium-quality replica yachts are produced with exquisite details to appeal to collectors and yachtsmen alike. These museum-quality model yachts are crafted to the highest standards, delivering an enviable display that will be a highlight of any rooms collection of nautical décor and artifacts.
Recreational sailing is a sport and pastime enjoyed by people around the world. Docks and marinas may be found along any stretch of coastline, lakeshore or riverfront, offering both coastal and inland enthusiasts the opportunity to take to catch the breeze and take to the water.
Historically, sailboats have been working boats for millennia. While royalty, nobles and aristocrats may have occasionally maintained vessels for personal use, these were primarily barges, such as the famous pleasure barges of Queen Elizabeth at Leichester or Queen Cleopatra on the Nile, intended for lakes or rivers. Sailing remained a difficult and dangerous business, and boating an occupation for the working class.
The coming of the steamboat and the Industrial Era changed the status of the sailboat from working vessel to pleasure craft. Increasingly powerful steam (and later diesel) engines rendered sails obsolete within a matter of decades, while advancing production technology enabled the construction of inexpensive sailboats on an industrial scale. Sailing was rapidly transformed in the common view from a profession to a pastime, and simultaneously the cost of purchasing a small boat became increasingly affordable for the middle-class.
As the middle-class enjoyed recreational day-sailing in small boats, certain types of large sailing ships, such as the windjammer class of ocean cargo ships or many fishing and whaling trawlers, continued to operate as working vessels. Meanwhile, the wealthy upper-classes turn their attention to the intermediate and rapidly expanding class of boats known as yachts.
Jacht was a Dutch term originally referring to a class of light, fast sailing ships used by the Dutch Navy to pursue pirates and outlaws in the shallow waters of Holland and the Low Countries. Similar vessels also served as customs inspectors or pilot boats, and when merchants recognized the speed and ability of these small boats to intercept larger tall ships at sea, they became to build private yachts in order to greet their inbound trade ships. Other wealthy individuals began building jachts for pleasure trips, which attracted the attention of King Charles II of England in the mid-17th century. When the king chose a jacht for his official conveyance back to England for the Restoration in 1660 following the English Civil War, the term yacht entered the English vocabulary.
Charles II had become an avid sport sailor during his time in the Netherlands, and commissioned the construction of an additional 24 royal yachts throughout his reign, sparking an interest in yachting among English aristocracy. Yacht reviews and regattas were already common in Holland, and these events passed to Britain and then spread throughout the aristocracy of mainland Europe. Yachts varied greatly in size, from small private pleasure boats to larger royal yachts to Dutch military vessels approaching the scale of 6th and 5th Rate ships-of-the-line.
In common use, however, the term yacht as understood in Britain and spread to continental Europe and the Americas signified exclusively pleasure craft with no commercial or military function. Yacht clubs formed where members could sail, display and race their yachts. One such race was held in 1851, sponsored by the Royal Yacht Squadron as their annual circumnavigation of the Isle of Wight. Fifteen English yachts participated in the regatta, joined by a single American entrant.
Appropriately named the America, this racing yacht was commissioned by members of the fledgling New York Yacht Club and designed as an over-sized pilot-boat. When the America bested her competition in the 53-mile race by finishing 8-minutes ahead of her nearest competitor, Queen Victoria is said to have asked the name of the second-place boat and received the famous reply, Ah, Your Majesty, there is no second.
The winning yachtsman returned their trophy to the New York Yacht Club, renaming it the Americas Cup and bestowing it to the club via the Deed of Gift. Other clubs were now able to challenge for possession of the Cup, and Americas Cup challenge races quickly became the most prestigious in yachting. Today it remains the oldest active trophy in international sport, successfully defended by the New York Yacht Club for an astonishing 126 years until the Royal Perth Yacht Club achieve victory with the Australia II, thus ending the longest winning streak in sports history. American yacht clubs have since twice reclaimed the trophy, and it has been held once each by clubs from New Zealand and Switzerland.
Not all races consisted of pleasure boats or purpose-built racing yachts. Throughout the late 19th and early 20th centuries, sailing ships still labored in certain professions, with the professionalism of the crews as well as a the speed and handling of their boats a matter of pride. Working vessels participated in races as well, such as competitive trade-runs by clipper ships or off-season races between working fishing boats. Among the latter, in the early 20th century Canadian schooner Bluenose from Nova Scotia held the International Fishermans Trophy against all challengers for 17 straight years, while also winning awards for the largest catch of the season and similar honors as an actively working fishing vessel.
With the advent of diesel powerboats, the last of the working sailboats faded into history. Modest yachts continued to become increasingly affordable for average owners, and the pastime of pleasure-boating increased in popularity. With the addition of inboard engines, yachts could now be enjoyed regardless of weather conditions as either sailed or powered vessels.
Still, to many sailing enthusiasts there is no greater joy that taking personal control of a one-person dinghy and harnessing the wind. Sailboats, whether large or small, are a heart-felt passion for millions and an icon of any day at the seashore.

HANDCRAFTED MODEL SHIPS was founded in 1954 and since then we have expanded our products, websites and brands. Shop and save on all 5 brands/websites and enjoy one shopping cart.

SHOP WITH CONFIDENCE!

HANDCRAFTED MODEL SHIPS HELPFUL INFORMATION


IMAGES
VIDEO
COMMENTS
Install and rig the booms and gaffs. Make the sails based on the actual layout of my ship. De-rig the booms and gaffs, and remove them from the ship. Attach sails to the booms and gaffs as appropriate. Re-install the booms and gaffs, and their rigging. Add the additional rigging for each sail.
2023 CATALOG AND PRICE LIST. 1) Select color for corner reinforcements: (red, yellow, blue, green, day-glo orange, day-glo pink, black or white.) 2) Select mainsail to mast attachment: Mast loops, jackwire, bolt-rope. 4) If Class Insignia and racing numbers required, select color: (red, blue, green or black), (add $15.)
Sail numbers (main only) Country Designation on Main $10; Jib numbers $10 (2 digits), add $5 per number if want 3 or 4 digit; Colored corner patches in either Star or Oval shapes (black, white, kevlar, red, green or blue) Other colors available upon request. Note: Sail numbers, draft stripes and class insignia - Either Insignia fabric or inked ...
Sirius Sails unique design allows maximized performance in the upper and lower wind range of the sail. Restricted wind range performance has been eliminated. Also, since Sirius Sails' proprietary sail design software and seaming tools allow precise control of camber and its location, custom-tailored designs are used for each model yacht type.
Sail Sets. Modelers Central offers the largest range of decorative sail sets for wooden model ships & wood model boats - plus 100's of decorations, accessories & fittings available. Modelers Central is the no.1 destination for model ship builders & model boat builders worldwide. Showing all 25 results.
Easy Tutorial for Ship Modelling: Creating Realistic Sails in 1/72 Scale 🚢🔍Learn how to create lifelike sails for your wooden ship model with this simple t...
When e-mailing Carr Sails, put "Model Yacht Sails" in your subject line to avoid getting caught in our spam filters. CARR SAILS, 3011 - 177th Ave. NE, Redmond, WA 98052 (425) 881-2846 rodcarr @ carrsails.com
Almost any material used for scale model sail making is, by definition, too thick. With furled sails, though, it's possible to compensate for that problem by reducing the sail's depth - and thus the size of the bundle. A favourite material for furled sails is "silkspan" tissue, subjected to a special (but quite simple) treatment.
The advantages of sailing a recognized class boat are the community of like-minded skippers and the depth of technical information and assistance they can provide. If you are a beginning skipper, please click on "Getting started" and also check out our magazine, the only publication in the country devoted 100% to model yachting.
The sails are 1 ounce Dacron/Polyester material. The sails come with colored corners of your choice and are rolled on a tube for shipment so there are no crease lines. Our SeaWind sail set includes: White Dacron/Polyester main and jib sails with colored corners - your choice of color; Pre-cut batten materials, plus instructions for applying the ...
RC Sails. Windjammin Sails has been an industry leader in the manufacture and sale of rc sails for racing since 1995. For over 26 years, WJ Sails has earned and maintained a reputation and proven winning track record for being one of the top remote control sail mfg. in the the USA!
Work step by step. 1.Make paper stencil for each sail and check it's dimensions on your model. 2.With soft pencil transfer all lines in to fabric - add stripe 5-7 mm around. sail edges. 3.Make all necessary lines on fabric using sewing machine and thin thread with light brown or beige color.
Read More. We make it easy to get new sails custom designed for your sailboat or sailing yacht, at the best prices online. Replacement sails for Catalina, Hunter, Beneteau, Pearson, C&C, and 15,000 more! Get a free quote within 24 hours or less. Headsails, Mainsails, Spinnakers, and Turtle Bags too!
Sailboats. Let your love for the sea be known with our huge collection of handcrafted Nautical Sailboat Models! Ideal for any collector and perfect for use as decor, our model ships are designed to add a nautical atmosphere anywhere they are placed. They also make thoughtful gifts for friends who love the sea. Arriving fully assembled and ready ...
After 36 years of business, there are now over 70,000 Tippecanoe model sailboats sailing in more than 65 countries around the world! Our Mission: Our mission is to continue the wonderful tradition of model sailboats, especially wooden model sailboats, that really sail. Our boats have provided thousands of hours of happy outdoors experiences for ...
Work from the centre of the ship out and try to avoid locking yourself into difficult positions. A Rigging Tool presented in the Tools section of our Catalogue will be helpful when rigging. The various names for the Running Rigging are presented below. Fore brace. Fore lower topsail brace.
The CR-914 is a strict one design AMYA sanctioned 1:25 scale model based on the Americas Cup class yacht. The kit comes with everything you need to build your boat. All you need are some simple tools, sandpaper, paint and batteries. Excellent sailing performance in a wide wind range. With quick acceleration and turning this boat will thrill and ...
Penduick Painted Sailboat Model. The Regatta Cutter Pen Duick 26"L x 5"W x 31"H model is a beautiful sailing boat model. This sail boat model is shipped fully assembled, you just need to stand the masts and she is ready to be displayed. SKU: 2SMSSY033. $132.50.
T12 Cruiser: 12 inch sailboat, for ages 5 and over, Western Red Cedar hull with two sails. Kit $82.50, Finished $149.50. T15 Racing Sloop: Winner of the Parents' Choice Award. 15 inch sailboat, for ages over 8 years old, Western Red Cedar hull with two sails. Kit $115.95, Finished $196.50. T-Class Racing Sloop: 18 inch sailboat, Western Red Cedar hull with two sails and an adjustable rudder.
Riley Blake - Set Sail America by Lindsay Wilkes - Sailboats Offwhite - C10515 OFFWHITE - 100% cotton fabric - Sold by the yard (s) (5.4k) $11.75. Personalized Model Sailboat, Blue and White. Custom boat, family name, custom nautical, custom wedding gift, last name decor, sailboat 057. (986)
Our collection includes sail boats, tall ship building kits, scale model boat kits, historical ships, and wooden yacht model kits. In addition, we will try and source kits for you if you are unable to find a specific one that you are looking for. We have about 200 model kits on offer and all of them are wooden ship model kits.
Wooden It Floats 12" - American Floating Sailboat Model $14.99. Wooden It Floats 12" - Red Floating Sailboat Model $14.99. Wooden It Floats Nautical Rose Model Sailboat 12" $14.99. America Sailboat in a Glass Bottle 7" $17.99. Wooden Rustic Enterprise Model Sailboat Decoration 16" $19.99.
We have it all, handcrafted wooden famous sailing boats and historic tall ship models. All model boats that we sell are fully assembled meticulously and professionally. Gonautical shop is a family owned business who employs only the best artisans in the model ships and sailboats building industry . Our uniquely designed products are sold at the ...